Imply quickstart
This quickstart only covers unmanaged Imply Enterprise. Learn to install, load, query sample data, and create visualizations using Imply Enterprise. However, there are multiple ways to try Imply:
- Imply Polaris: Easy to access through a browser.
- Unmanaged Imply Enterprise: Download and run Imply software locally. You can try with your own data. Your data stays on your machine.
- Imply Hybrid: Connect your data in your cloud account with Imply Hybrid. Contact Imply for a trial account. Once you have a trial account, you can start loading data.
- K8s: Deploy using Helm chart. If you already have a Kubernetes cluster, get started with
helm installafter you add the Imply repository.
Don't use a quickstart instance for production. For information about installing Imply for production, see Production ready installation instructions.
Prerequisites
This section describes how to install and start Imply on a single machine using the quickstart configuration.
To run a single-machine Imply instance with the quickstart configuration, make sure you can meet the following requirements:
- Java 17. Imply builds and certifies its releases using OpenJDK. Select a distribution that provides long-term support and open source licensing, such as Amazon Corretto or Azul Zulu.
- Python.
- Linux, Mac OS X, or other Unix-like OS. Windows and ARM-based CPUs are not supported. For more information, see Running on a VM.
- At least 4 GB of RAM.
Run the quickstart on a VM
The quickstart isn't supported for Windows machines or ARM-based CPUs like Apple M1. If you want to run the quickstart in one of these environments, use a Virtual Machine (VM) that runs a supported OS and CPU architecture, such as an Ubuntu VM on EC2.
When using a VM, consider the following additional requirements:
- You need a way to transfer the Imply package to the VM, such as with
scp. - The Imply UI, known as Pivot, uses port 9095 by default. Make sure that port is accessible.
Download Imply Enterprise
A new, unlicensed Imply Enterprise installation comes with a free 30-day trial period.
-
Sign up and download Imply 2025.07.1 from imply.io/get-started.
-
Unpack the release archive:
tar -xzf imply-2025.07.1.tar.gz
Note the version number in the command. You may have to adjust it for your version of the download.
The package contains the following files:
bin/*- run scripts for included softwareconf/*- template configurations for a clustered setupconf-quickstart/*- configurations for this quickstartdist/*- all included softwarequickstart/*- files useful for this quickstart
If you have a license from Imply, apply it by adding the path to the license file to conf-quickstart/pivot/config.yaml as the licenseFile property, as follows:
licenseFile: /Users/implyuser/Downloads/pivot-license
Start Imply Enterprise
Start the Imply services, which include Druid
, Pivot, and ZooKeeper. The included supervise script starts Imply and other required services with a single command.
-
Navigate to the directory where you unpacked the Imply files.
cd imply-2025.07.1
-
Run the start up script:
bin/supervise -c conf/supervise/quickstart.confIf you encounter the error
/usr/bin/env: 'python' not found, create a symbolic link to point/usr/bin/pythonto your Python installation. For example:sudo ln -s /usr/bin/python3 /usr/bin/pythonThen, run the script again.
Imply logs a message for each service that starts up. You can view detailed logs for any service in the
var/sv/directory using another terminal. -
Optionally, verify that
var/sv/pivot/currentshows your license if you applied one.
To stop the Imply instance and its related services, interrupt the supervise program in your terminal with SIGINT (control + c).
For a clean start after stopping the services, remove the var/ directory before running the supervise script again.
Now that Imply is running, load data.
Load data
This section walks you through loading data from an HTTP source using the Druid data loader. The sample data represents Wikipedia edits from June 27, 2016.
-
Access the Imply UI at http://localhost:9095 and click Data in the menu bar:
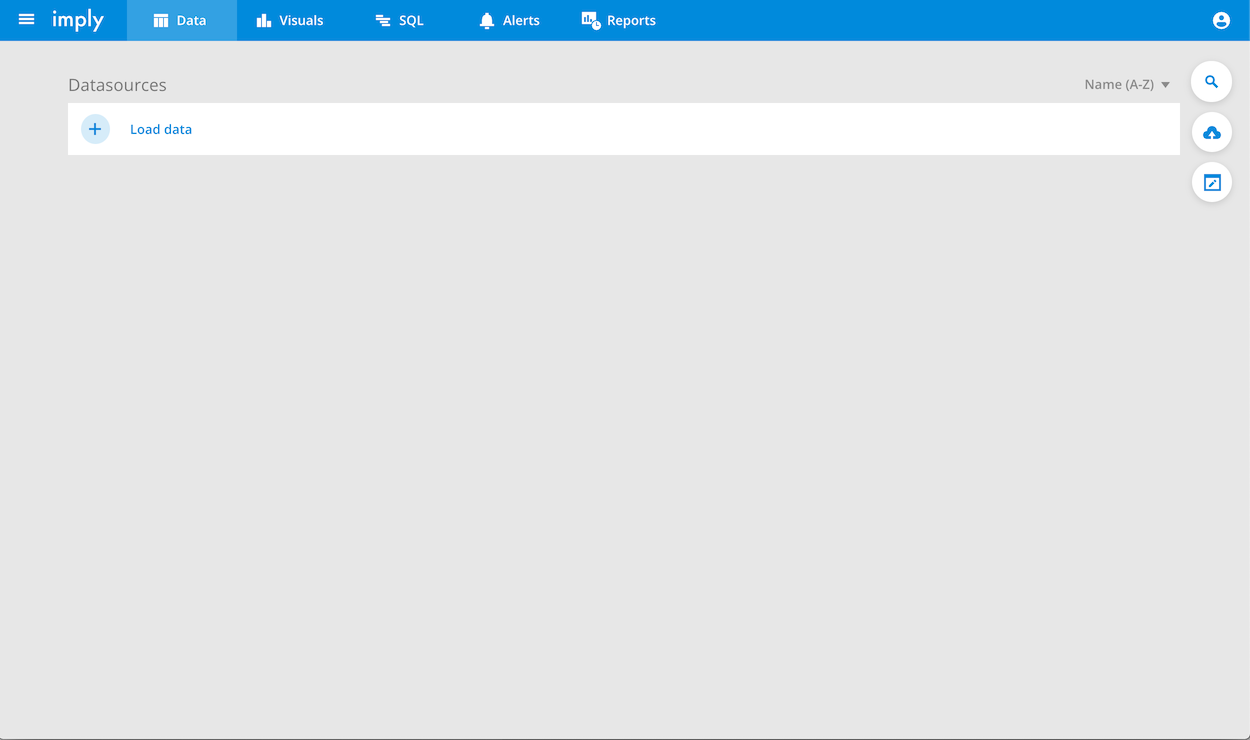
If you get a connection refused error, your Imply instance may not be ready yet. Wait a few seconds and refresh the page.
-
Click Load data to open the Druid console data loader.
The Druid console, which is part of the Imply stack, lets you ingest data from static and streaming sources:
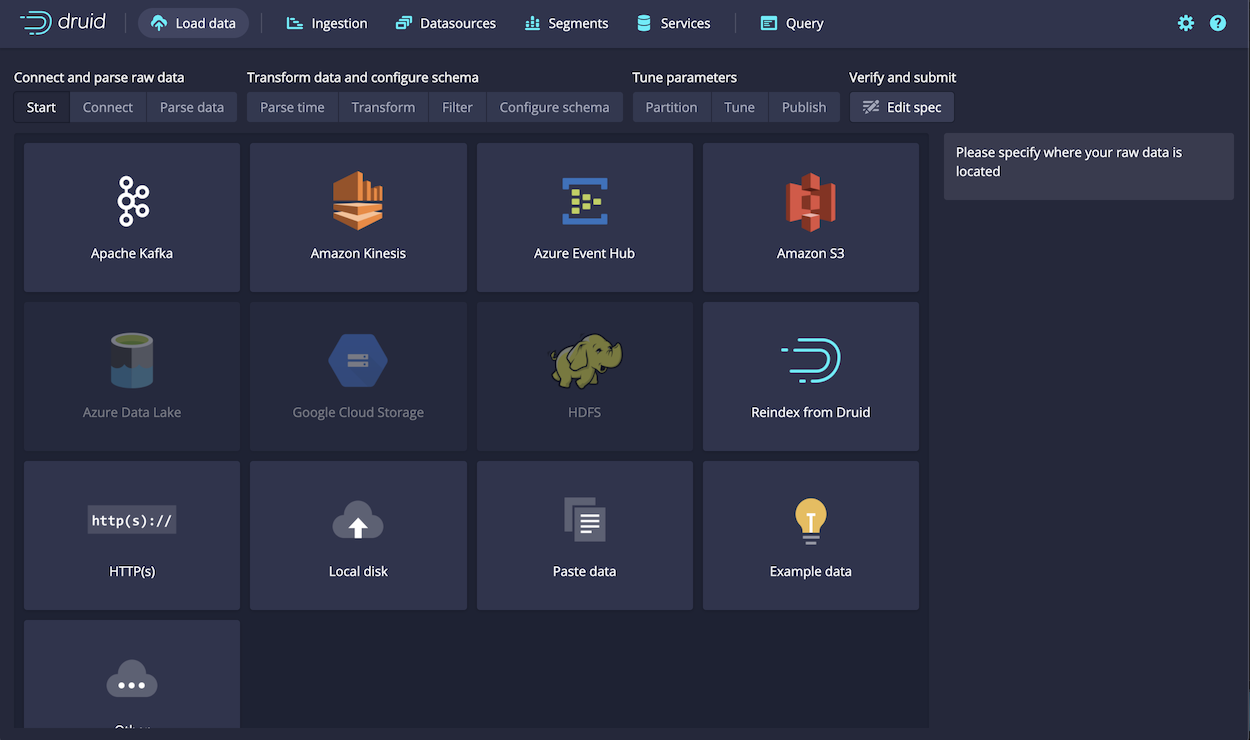
-
In the top navigation bar, click Load data > Batch - SQL.
- Select HTTP(s) to load data from an online source, like the sample data in this quickstart.
-
In the URI field, enter
https://static.imply.io/data/wikipedia.json.gzand Click Connect data.Leave HTTP auth username and HTTP auth password blank for this quickstart.
-
The data loader automatically detects the parser type for the data and previews the parsed output in
jsonformat. When ready, click Next. -
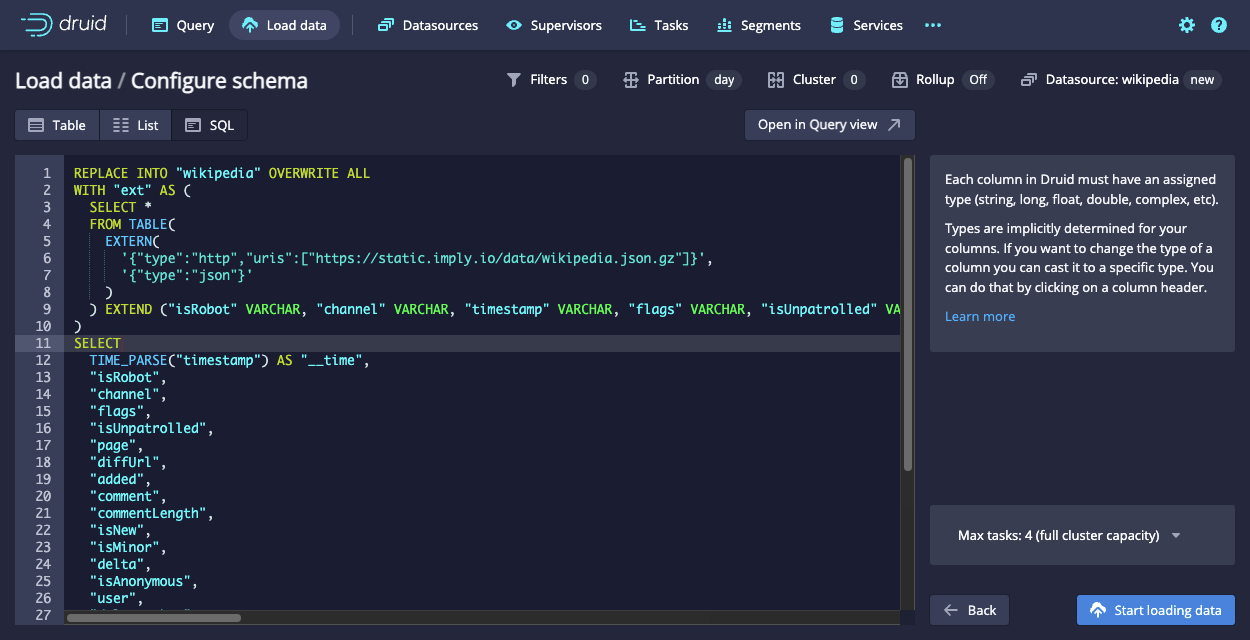
The Configure schema page provides a user interface for you to modify your ingestion setup. You can:
- Add, remove, and rename columns and metrics.
- Apply filters to your incoming data.
- Configure partitionining and clustering.
- Enable rollup.
- Specify the destination datasource.
For this quickstart, accept the defaults. Click the SQL tab.
-
The SQL tab shows ingestion statement for Druid SQL:
View the query
REPLACE INTO "wikipedia" OVERWRITE ALL
WITH "ext" AS (
  SELECT *
  FROM TABLE(
    EXTERN(
      '{"type":"http","uris":["https://static.imply.io/data/wikipedia.json.gz"]}',
      '{"type":"json"}'
    )
  ) EXTEND ("isRobot" VARCHAR, "channel" VARCHAR, "timestamp" VARCHAR, "flags" VARCHAR, "isUnpatrolled" VARCHAR, "page" VARCHAR, "diffUrl" VARCHAR, "added" BIGINT, "comment" VARCHAR, "commentLength" BIGINT, "isNew" VARCHAR, "isMinor" VARCHAR, "delta" BIGINT, "isAnonymous" VARCHAR, "user" VARCHAR, "deltaBucket" BIGINT, "deleted" BIGINT, "namespace" VARCHAR, "cityName" VARCHAR, "countryName" VARCHAR, "regionIsoCode" VARCHAR, "metroCode" BIGINT, "countryIsoCode" VARCHAR, "regionName" VARCHAR)
)
SELECT
  TIME_PARSE("timestamp") AS "__time",
  "isRobot",
  "channel",
  "flags",
  "isUnpatrolled",
  "page",
  "diffUrl",
  "added",
  "comment",
  "commentLength",
  "isNew",
  "isMinor",
  "delta",
  "isAnonymous",
  "user",
  "deltaBucket",
  "deleted",
  "namespace",
  "cityName",
  "countryName",
  "regionIsoCode",
  "metroCode",
 "countryIsoCode",
  "regionName"
FROM "ext"
PARTITIONED BY DAY
Note the following:
- The
REPLACE INTOstatement tells Druid to execute an ingestion task into the Druid datasourcewikipedia. OVERWRITE ALLconfigures the ingestion task to replace all data in any existingwikipediadatasource with the result of the query.- The
EXTERNstatement assignshttps://static.imply.io/data/wikipedia.json.gzas the HTTP input source andjsonas the input format. - The
EXTENDstatement describes the input schema. - The
SELECTstatement defines the transformations and schema of the resulting Druid table. PARTITIONED BYsets the datasource partitioning toDAY.
To learn more, see SQL-based ingestion reference.
- The
-
When ready, click Start loading data to ingest the data to Druid.
-
Once the data has been loaded, click Query: wikipedia.
After this step succeeds, you can start to define a data cube and visualize your data.
Create a data cube
Pivot's data cubes are highly configurable and give you the flexibility to represent your dataset, as well as derived and custom columns, in many different ways.
The documentation on dimensions and measures is a good starting point for learning how to configure a data cube.
Create a data cube from the Wikipedia data you ingested:
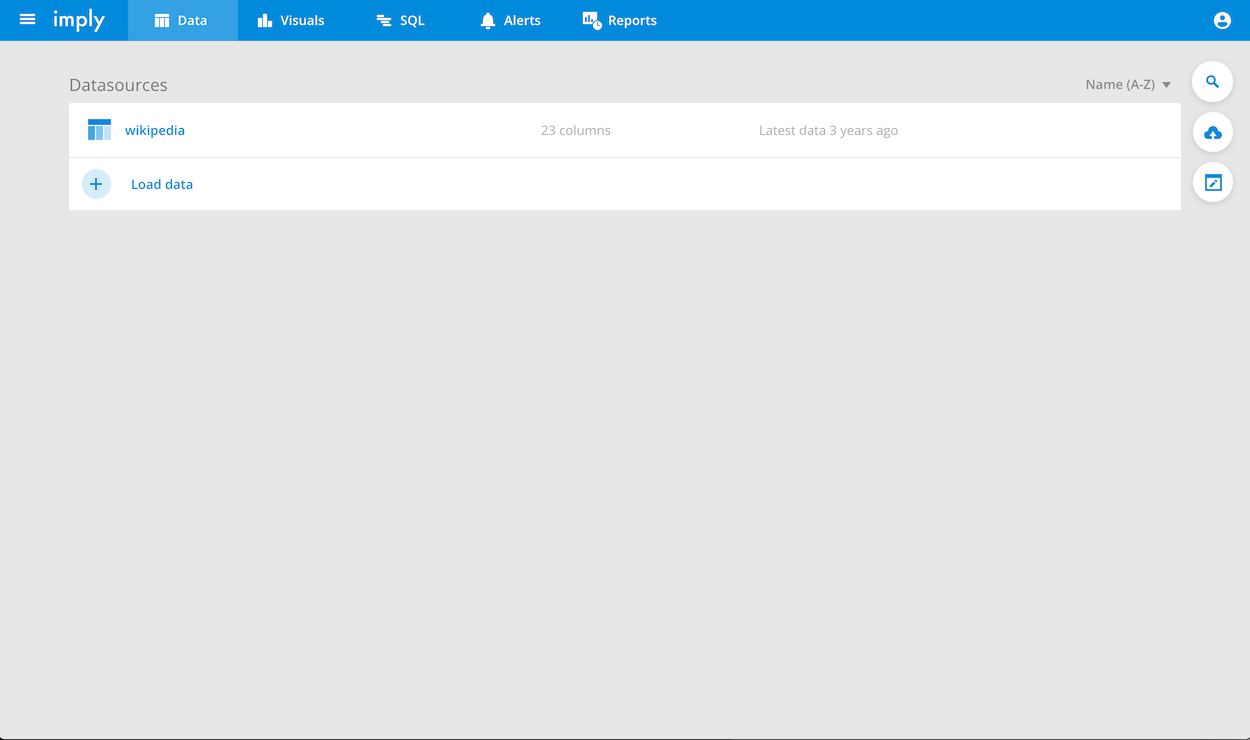
-
Go back to Pivot and make sure that your newly ingested datasource appears in the list. It might take a few seconds for it to show up.
-
Go to Visuals tab. From here, you can create data cubes to model your data, explore these cubes, and organize views into dashboards.
-
Create a new data cube:
- Pivot SQL: leave it selected
- Source: select wikipedia, which is the datasource name from the publish step in the Druid data loader.
- Auto-fill dimensions and measures: leave it selected to allow Imply to intelligently inspect the columns in your datasource and determine possible dimensions and measures automatically.
-
Explore the Edit data cube pages.
From here, you can configure the aspects of your data cube, including defining and customizing the cube's dimensions and measures.
-
Click Save when you're ready.
Visualize a data cube
There is a 2.0 view and a Classic view for data cubes. This section uses the 2.0 view.
The data cube view for a new data cube automatically loads when you save cube. You can also view existing data cubes on the Visuals page.
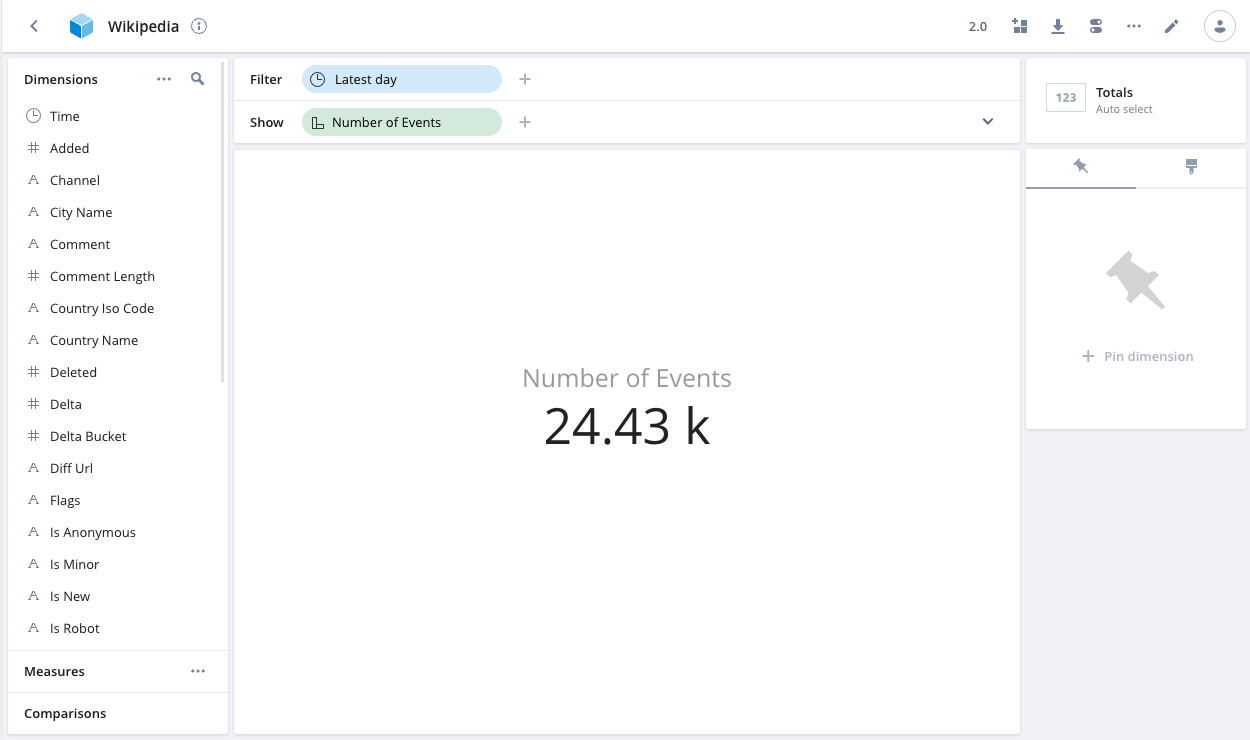
With a data cube, you can explore a dataset by filtering and splitting it across any dimension. For each filtered split of your data, you can see the aggregate value of your selected measures.
On the Wikipedia dataset for the quickstart, you can see the most frequently edited pages by splitting on Page. Drag Page to the Show bar and keep the default sort (by Number of Events):
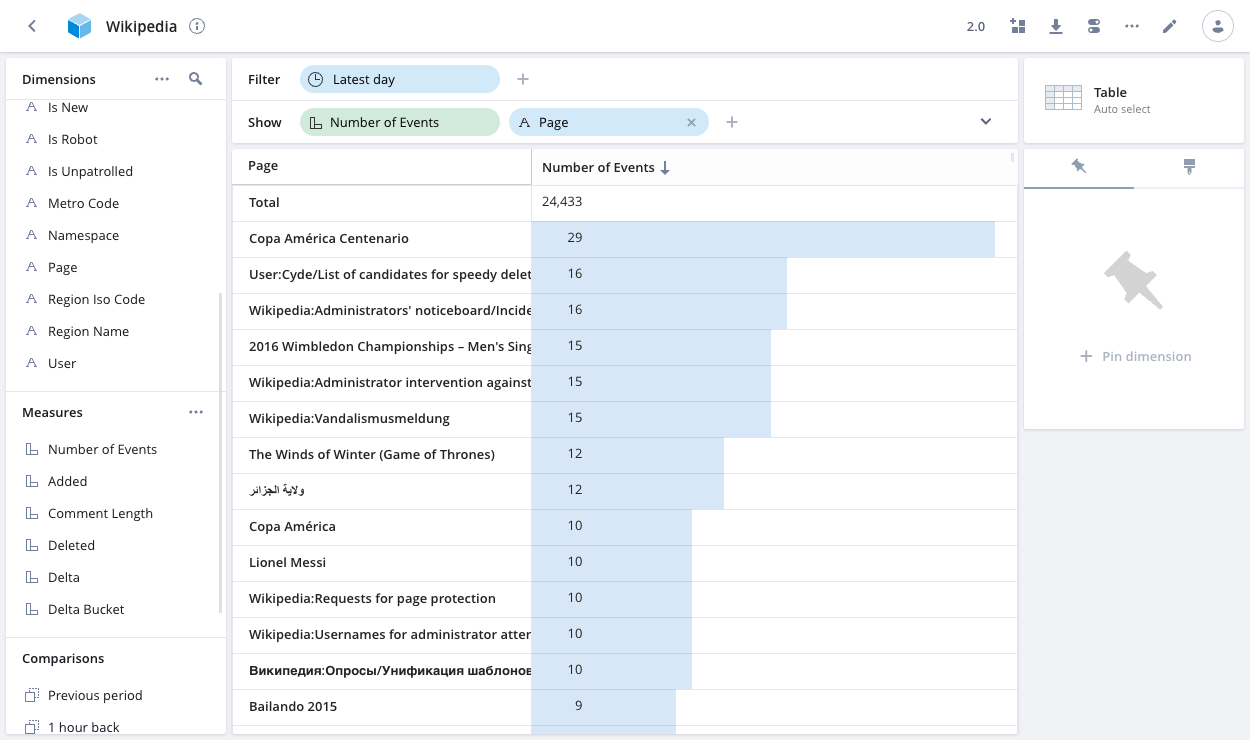
The data cube view suggests different visualizations based on how you split data. You can change the visualization manually by choosing your preferred visualization from the dropdown. If the shown dimensions are not appropriate for a particular visualization, the data cube view recommends alternative dimensions.
For more information on visualizing data, refer to Data cubes.
Run SQL
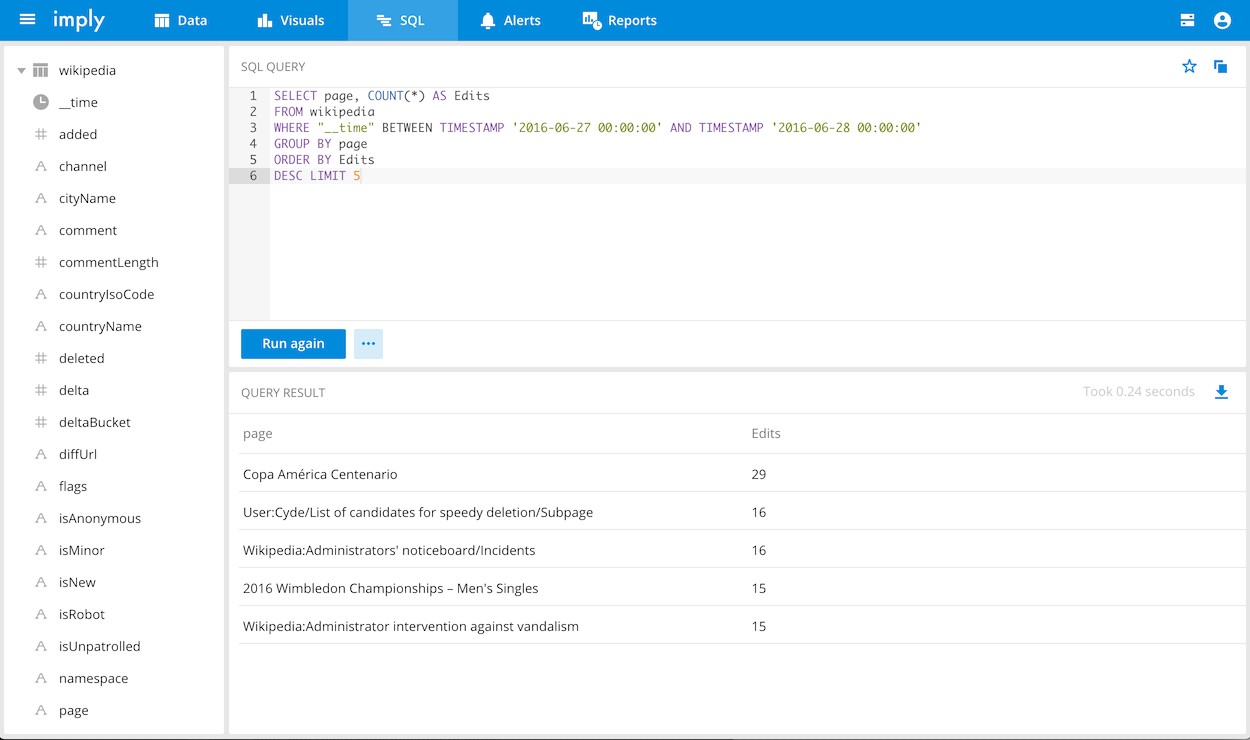
Imply includes an interface for issuing Druid SQL queries. To access the SQL editor, go to the SQL page from the Pivot home page. Once there, try running the following query that returns the most edited Wikipedia pages:
SELECT page, COUNT(*) AS Edits
FROM wikipedia
WHERE "__time" BETWEEN TIMESTAMP '2016-06-27 00:00:00' AND TIMESTAMP '2016-06-28 00:00:00'
GROUP BY page
ORDER BY Edits
DESC LIMIT 5
You should see results like the following:
For more details on making SQL queries with Druid, see the Druid SQL documentation.
Next steps
Congratulations! You deployed an Imply cluster, loaded a sample dataset, defined a data cube, explored some simple visualizations, and executed a query using Druid SQL.
Learn more
Next, you can:
- Configure a data cube to customize dimensions and measures for your data cube.
- Create a dashboard with your favorite views and share it.
- Read more about supported query methods, including visualization or SQL.
Production-ready installation instructions
The configuration described in this quickstart is intended for exploring and learning about Imply. It's not meant for production workloads.
For information about using Imply in production, start by reviewing the Deployment overview to familiarize yourself with the options.
For information about installing Imply in a specific environment, refer to the following guides:
- For a distributed cluster that uses Kubernetes as the orchestration layer, see:
- For a distributed cluster environment without Kubernetes, see Install Imply without Kubernetes.
- For information on cloud hosting with Imply Hybrid, see Imply Hybrid Overview.
- For information on self hosting using Imply Enterprise, see Imply Enterprise Overview.