Set up SSO with Okta using OIDC
Single sign-on (SSO) is an identity verification method that allows you to authenticate to multiple applications using the same set of credentials. Imply Lumi supports SSO with Okta as the identity provider using the OpenID Connect (OIDC) protocol. You can configure SSO so that users can sign in to Lumi with their existing Okta credentials.
This topic explains how to set up SSO with Okta through OIDC in Lumi.
The instructions in this topic reflect Okta configurations as of October 2025.
Prerequisites
To configure SSO with Okta, you need the following:
- Access to Okta with the Org admin role or higher. For details, refer to the Organization administrators documentation in Okta.
- Access to Lumi with the Admin role. For information on roles and permissions, see Manage roles.
- Lumi tenant ID. To obtain the tenant ID, contact your Imply support representative.
Create a new application in Okta
To create an OIDC application in Okta:
-
In your Okta instance, navigate to the Admin console.
-
In the left sidebar, click Applications > Applications.
-
Click Create app integration.
-
In the Create a new app integration dialog, select the following:
- Sign-in method:
OIDC - OpenID Connect - Application type:
Web application
- Sign-in method:
-
Click Next.
-
On the New web app integration page, configure the following:
-
App integration name: Enter a meaningful name for your application, such as
Imply Lumi. -
Grant type: Select
Authorization codeandRefresh token. -
Sign-in redirect URIs: Enter the Lumi sign-in redirect URI in the following format:
https://auth.lumi.imply.io/auth/realms/lumi/broker/TENANT_ID-oidc/endpointReplace
TENANT_IDwith your Lumi tenant ID.View example
https://auth.lumi.imply.io/auth/realms/lumi/broker/1234f2ff-oidc/endpoint -
Sign-out redirect URIs, enter the Lumi sign-out redirect URI in the following format:
https://auth.lumi.imply.io/auth/realms/lumi/broker/TENANT_ID-oidc/endpoint/logout_responseReplace
TENANT_IDwith your Lumi tenant ID.View example
https://auth.lumi.imply.io/auth/realms/lumi/broker/1234f2ff-oidc/endpoint/logout_response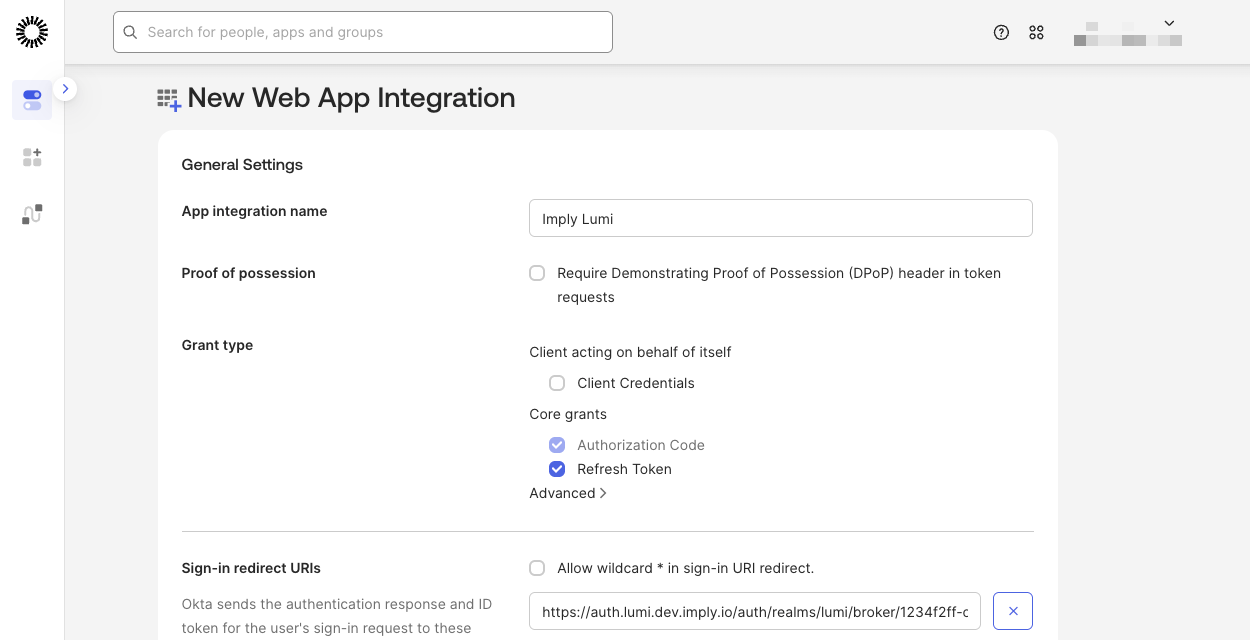
-
-
Click Save.
Configure assignments
To assign users and groups to the application:
- On your Okta application's settings page, open the Assignments tab.
- Click Assign and select Assign to people or Assign to groups to configure group authorization.
- Complete your selection and click Done.
Provide application details to Lumi
Provide the following information about your Okta application to your Imply support representative:
- Client ID and Client secret:
- You can find this information in the General tab of your Okta application's settings page.
- Issuer URI for the authorization server:
- In the left sidebar, go to Security > API > Authorization servers. Copy the Issuer URI value.
Your Imply support representative will complete the integration and enable SSO for your organization.
Learn more
See the following topics for more information:
- Security for an overview of available Lumi security measures.
- Manage roles for reference on predefined roles in Lumi.