How to backfill VPC flow logs from S3
AI summary
About AI summaries.
This tutorial shows you how to use the event source integration for AWS VPC flow logs. Flow logs for AWS Virtual Private Cloud (VPC) capture metadata about IP traffic going to and from network interfaces in your VPC. The tutorial provides example data you can use to follow along. The following example shows a VPC flow log:
2 123456789010 eni-1235b8ca123456789 192.0.2.139 198.0.2.16 20641 22 6 20 4249 1785349000 1785349493 REJECT OK
This event describes rejected SSH traffic from the source IP address, 192.0.2.139, to the destination IP address, 192.0.2.16, associated with the account ID, 123456789010.
The event started at 1785349000 and ended at 1785349493 in Unix time.
In the event source integration, you configure a receiver to send events to Imply Lumi. You learn how to set up S3 pull to perform backfill ingestion. This creates an ingestion job that reads selected objects from your Amazon S3 bucket.
The integration also configures your IAM key with the right source type to activate the predefined pipeline for AWS VPC flow logs. The pipeline parses and transforms incoming events into structured data you can easily search. For example, you can filter the ingested logs by source and destination IP addresses.
If you want to backfill other log formats from your bucket, you can use the S3 pull integration and follow most of the same steps in this tutorial.
The steps show you how to:
- Set up the necessary AWS permissions and identity.
- Configure a Lumi IAM key.
- Upload a sample VPC flow log file to your S3 bucket.
- Create an S3 backfill job.
- Preview transformed events in Lumi.
- View the AWS VPC flow log predefined pipeline.
The following diagram summarizes the end-to-end process of using S3 pull to backfill events to Imply Lumi. Yellow shaded boxes represent steps taken within Lumi, and blue shaded boxes represent steps taken outside Lumi. Click any box in the diagram to jump to that step.
Prerequisites
To complete the tutorial, you need the following:
- Access to Lumi with the Data manager role or higher. For information on roles and permissions, see Use roles to control access.
- Amazon IAM permissions to create roles, create policies, and attach policies to roles. For more information, see Allow users and groups to create and modify roles in the AWS documentation.
- Amazon S3 bucket, including the ARN of the bucket. For information on how to find the ARN of an S3 bucket, see Find ARNs in the AWS documentation.
1. Create an AWS permissions policy
In this section, you create a permissions policy that grants access to a specific S3 bucket.
-
In the AWS console, go to the IAM dashboard.
-
Click Policies in the left sidebar, then click Create policy.
-
In the Policy editor section, click JSON.
-
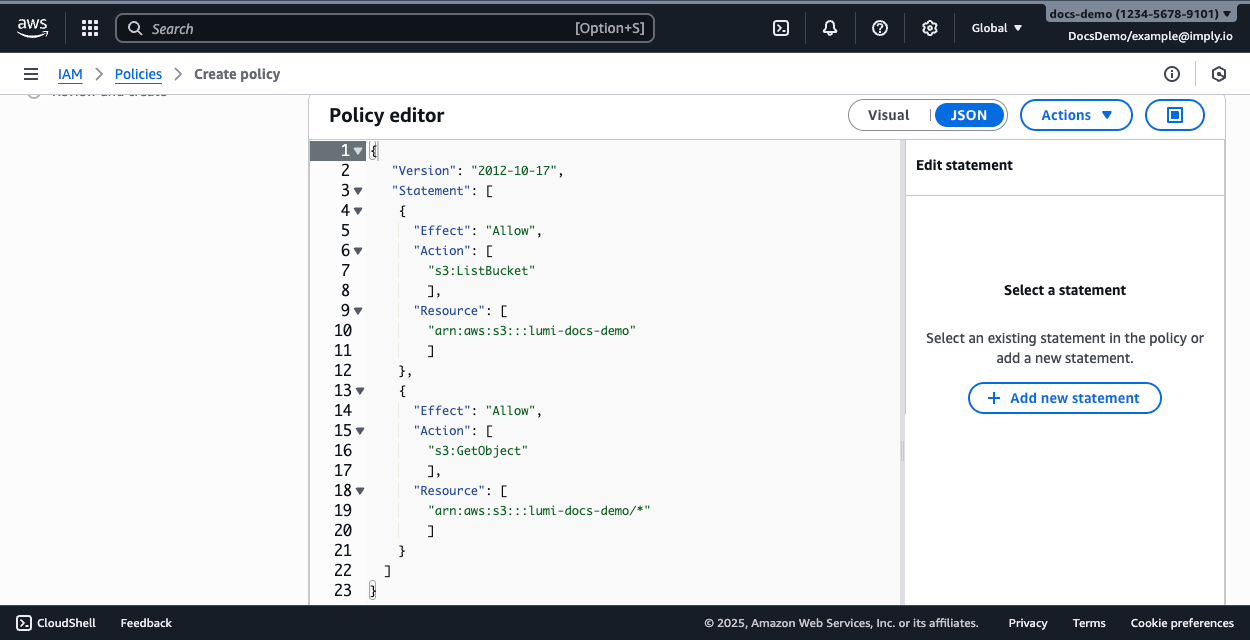
Replace the contents in the policy editor with the following policy. Replace both instances of
S3 ARNwith the ARN of your S3 bucket.{"Version": "2012-10-17","Statement": [{"Effect": "Allow","Action": ["s3:ListBucket"],"Resource": ["S3 ARN"]},{"Effect": "Allow","Action": ["s3:GetObject"],"Resource": ["S3 ARN/*"]}]}The policy editor should resemble the following:
-
Click Next.
-
Enter a name for the policy, then click Create policy.
2. Create an AWS IAM role
In this section, you create an AWS IAM role and add a trust policy that allows Lumi to assume that role.
Start by obtaining a trust policy template from Lumi:
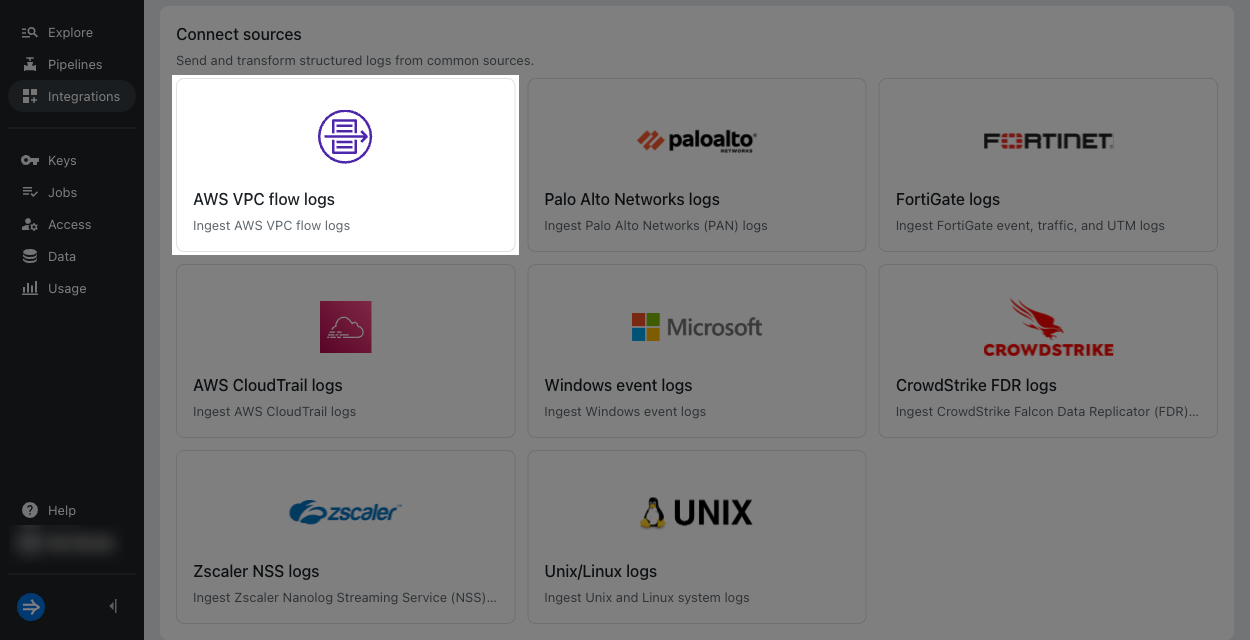
- From the Lumi navigation menu, click Integrations > AWS VPC flow logs.
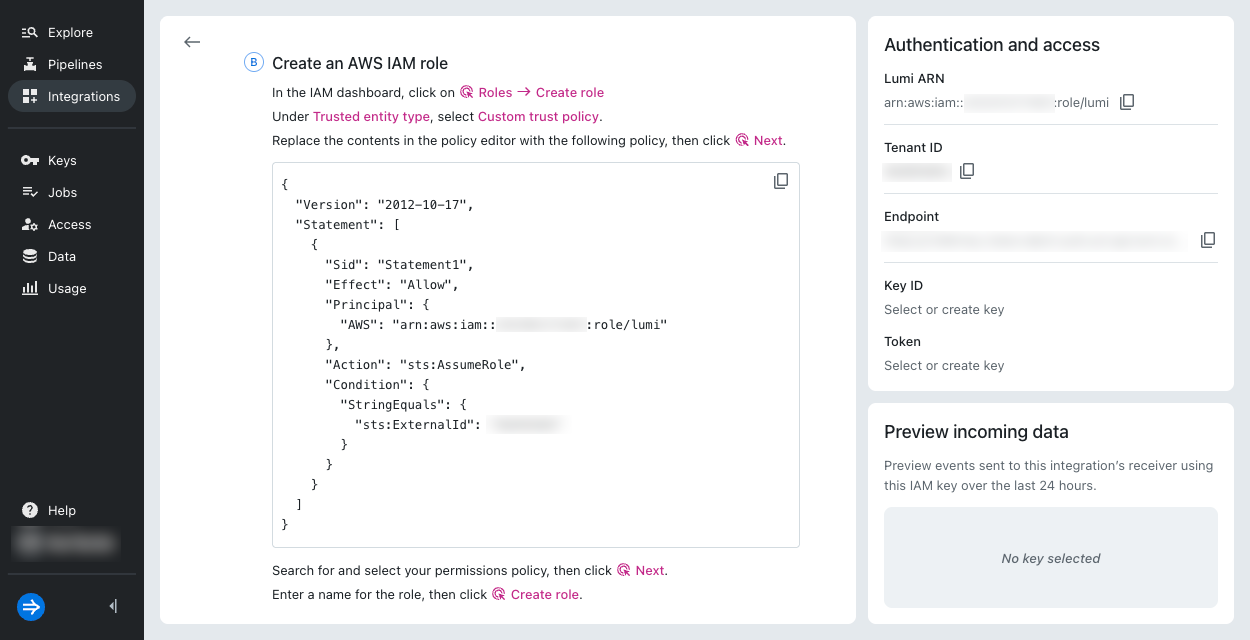
- Under Configure AWS access: Create an AWS IAM role, copy the trust policy. You'll use it to create an IAM role in AWS.
Create an IAM role with the trust policy:
-
In the AWS console, go to the IAM dashboard.
-
Click Roles in the left sidebar, then click Create role.
-
In the Trusted entity type section, select Custom trust policy.
-
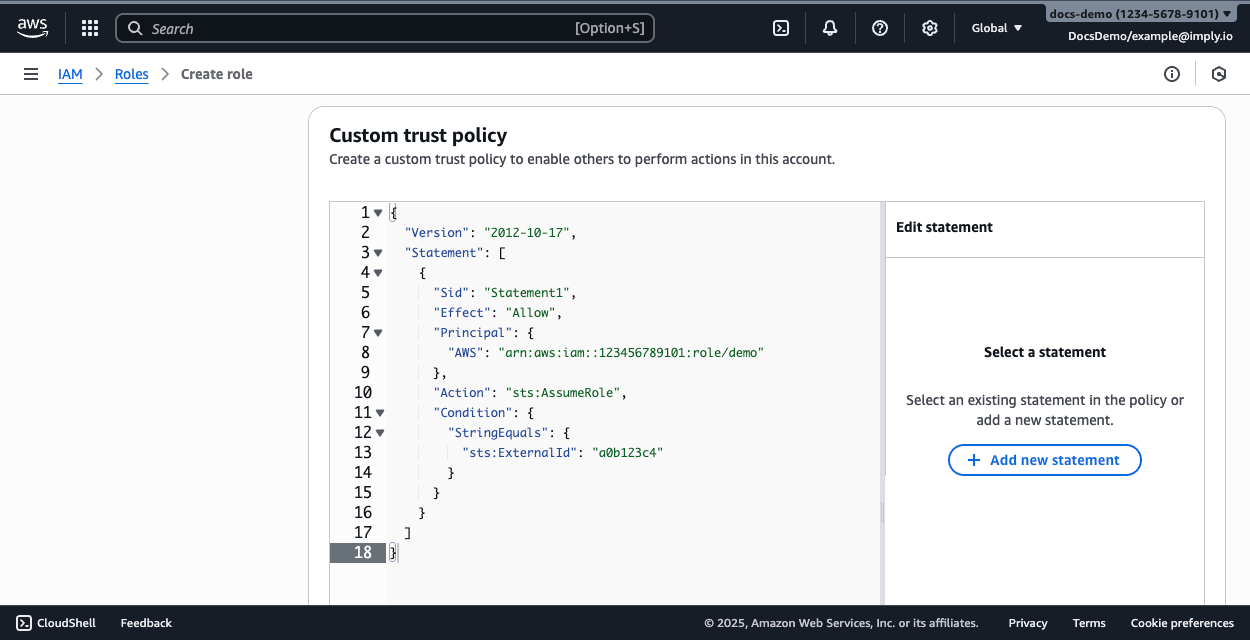
Replace the contents in the policy editor with the trust policy you copied from Lumi.
The policy editor should resemble the following:
-
Click Next.
-
Search for and select the permissions policy you created in the previous step.
-
Click Next.
-
Enter a name for the role, then click Create role.
-
Click the role to view its details. Save the ARN of the role. You'll need it in a later step.
3. Create an IAM key
In this section, you configure an IAM key in Lumi using your AWS IAM role ARN.
-
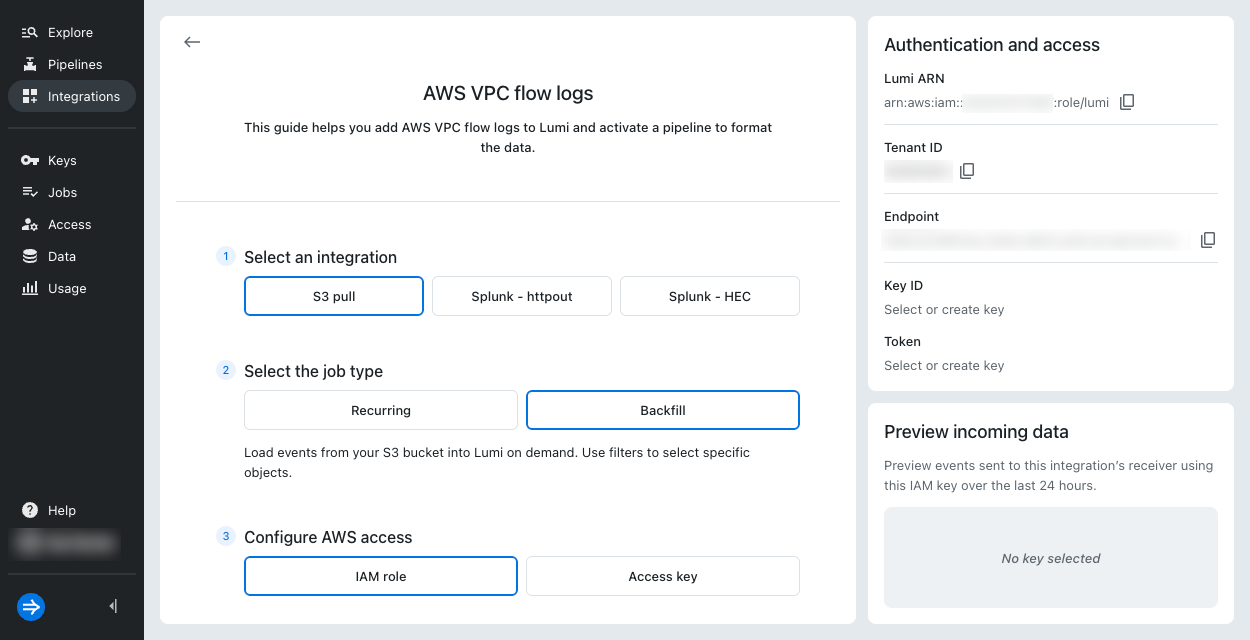
From the Lumi navigation menu, click Integrations > AWS VPC flow logs.
-
In the Select an integration pane, select S3 pull.
-
In the Select the job type pane, select Backfill.
-
In the Configure AWS access pane, verify that IAM role is selected.
-
In the Select or create an IAM key pane, click Select or create key > Create key.
- Enter a name for the key.
- Optionally, provide values for the environment and team system attributes.
- Provide the ARN of the AWS IAM role you created in the previous section.
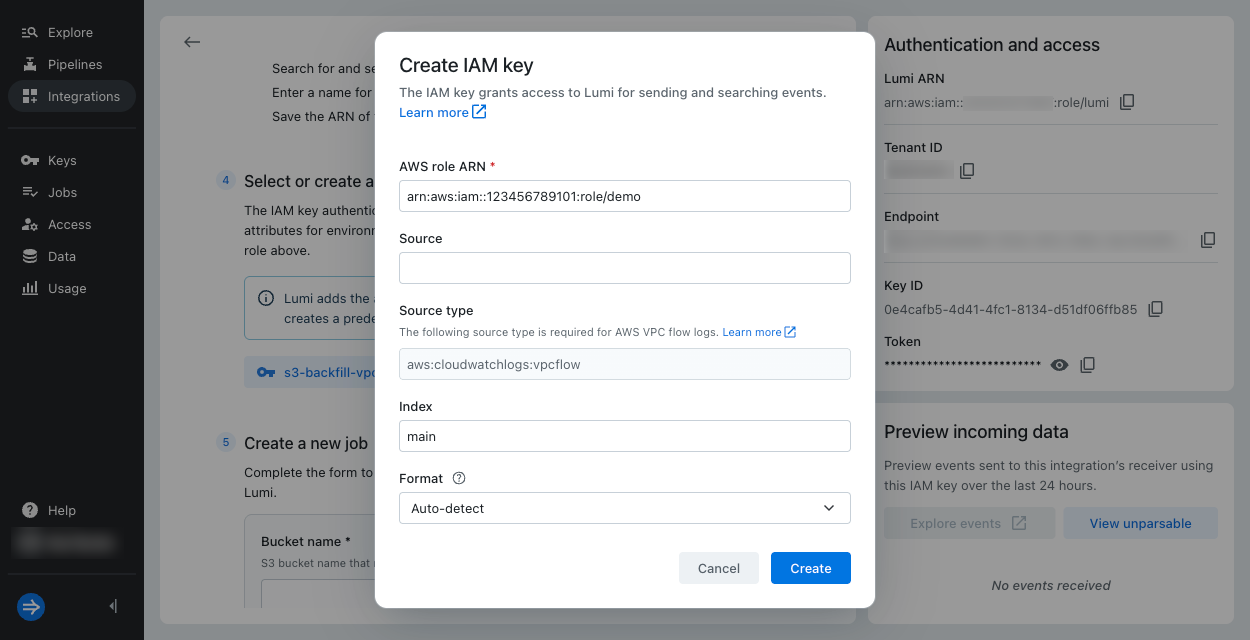
Notice that Source type for your IAM key is automatically set to
aws:cloudwatchlogs:vpcflow. Lumi uses this source type to associate the IAM key with the AWS VPC flow logs predefined pipeline.If you use an existing key, manually update its source type to
aws:cloudwatchlogs:vpcflow. -
Click Create.
4. Upload data
In this section, you upload a sample VPC flow log file to your S3 bucket. The example data contains four logs that show accepted and rejected traffic flows to a network interface on July 20 and 29, 2026.
- Download and save the example data file
vpc_flow_logs.log. - In the AWS console, go to Amazon S3.
- Select your S3 bucket.
- Click Upload > Add files, then choose the
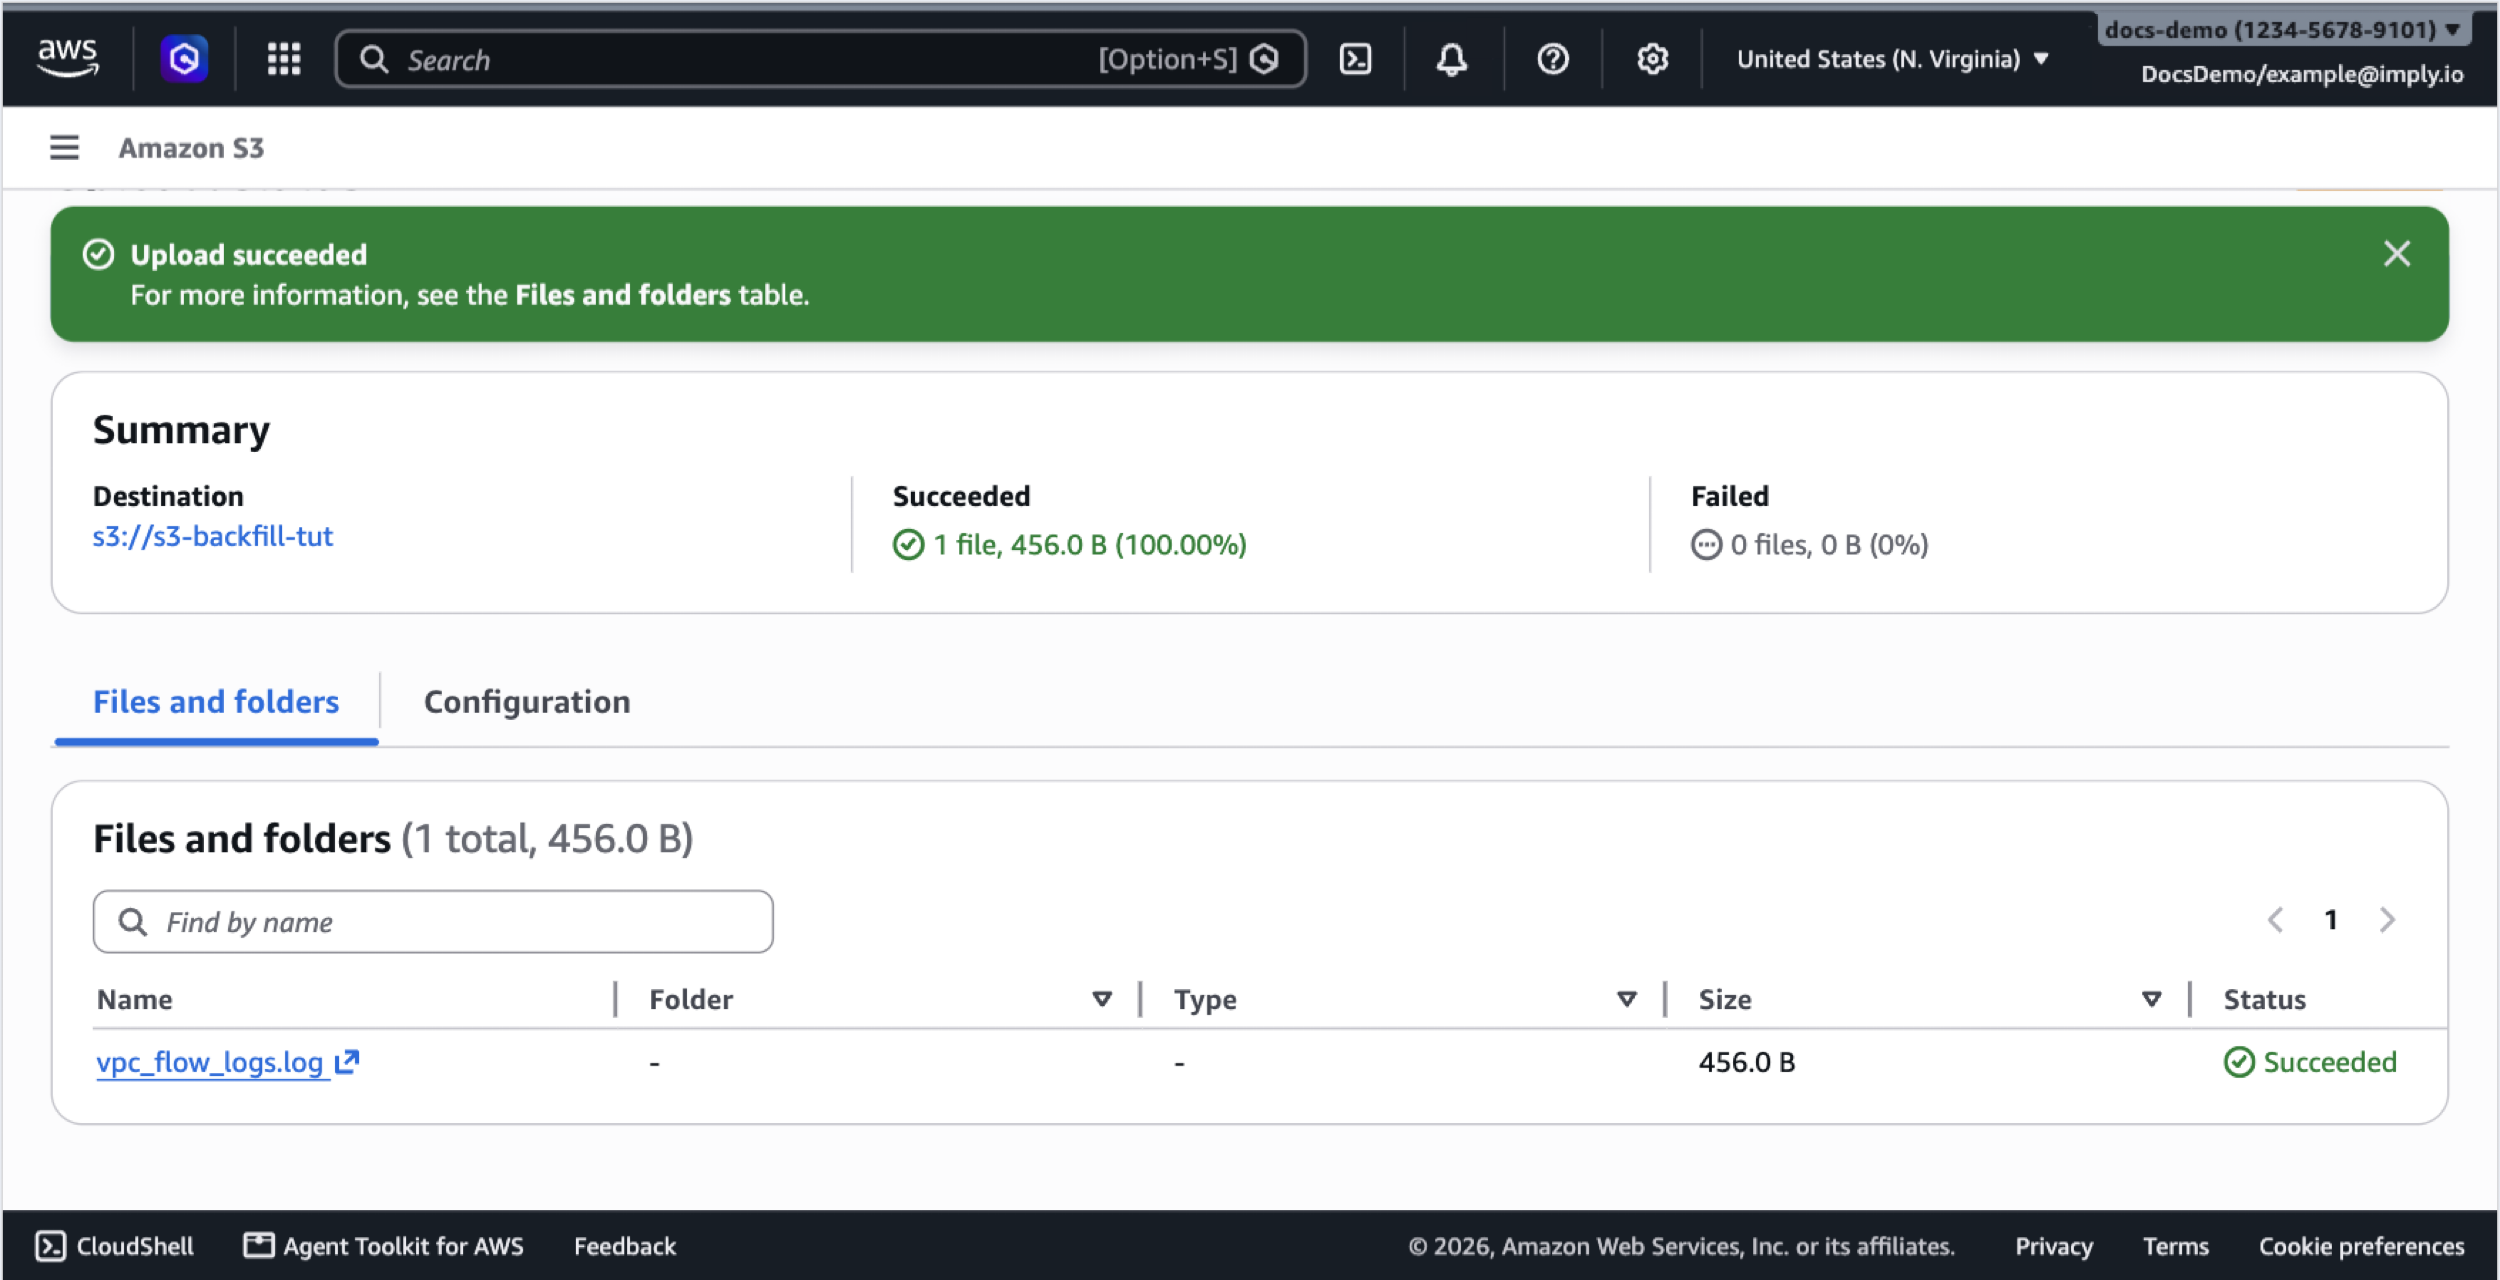
vpc_flow_logs.logfile you downloaded. - Click Upload.
- Successful upload returns the message: "Upload succeeded."
5. Create a job
In this section, you create an ingestion job to send your VPC flow log data from your S3 bucket to Lumi.
-
Return to the AWS VPC flow log integration in Lumi.
-
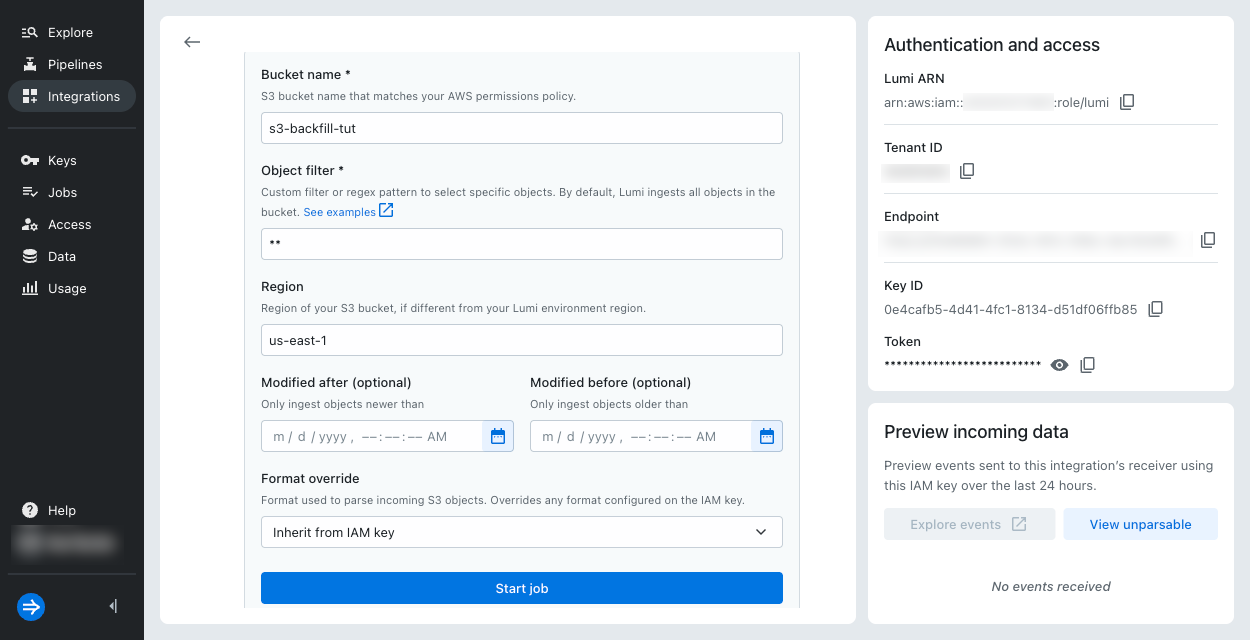
In the Create a new job pane, enter the name of your S3 bucket in Bucket name.
-
In Object filter, enter
**. This pattern ingests all objects in the bucket. If you have other objects in the bucket, modify the pattern to match your file. For example,tutorial/vpc_flow_logs.log. -
If your S3 bucket is located in a different region than your Lumi environment, enter the region of your S3 bucket in Region.
-
Click Start job.
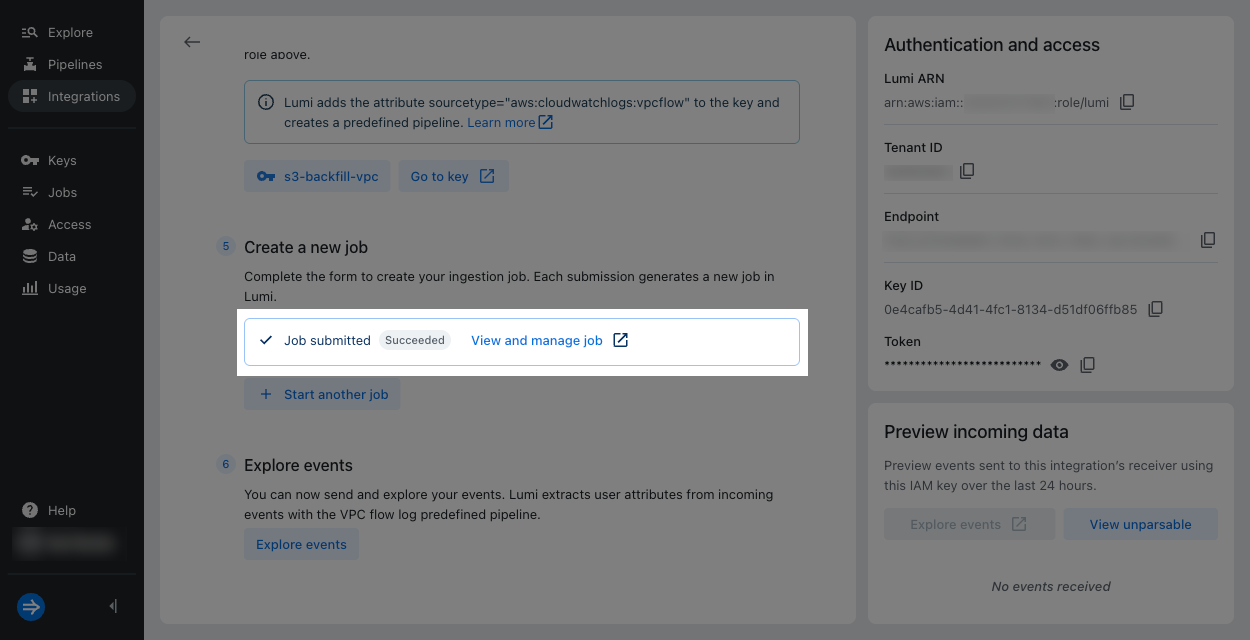 Upon a successful job submission, you should see a popup box in the bottom right corner that says "Job submitted."
You should also see the job status go from
Upon a successful job submission, you should see a popup box in the bottom right corner that says "Job submitted."
You should also see the job status go from AcceptedtoSucceeded.infoIf logs appear in the Preview incoming data pane, it means they're not processed by the predefined pipeline. Confirm that your key has the correct source type.
6. Preview data
In this section, you view the transformed VPC flow logs in Lumi.
-
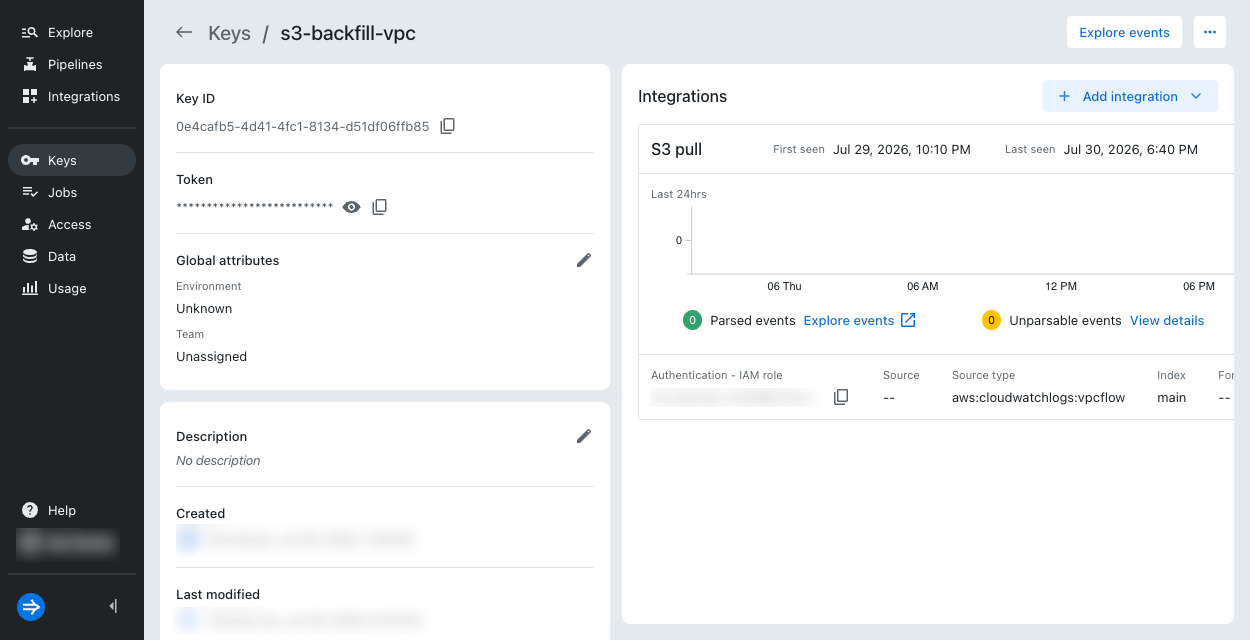
From the Lumi navigation menu, click Keys and select your IAM key.
-
In the Integrations pane, click Explore events. Lumi takes you to the explore view and applies a filter for the IAM key.
-
Adjust the time range selector to filter to start at
07/28/2026, 6:00 PMand end at07/29/2026, 11:00 PMto capture all events.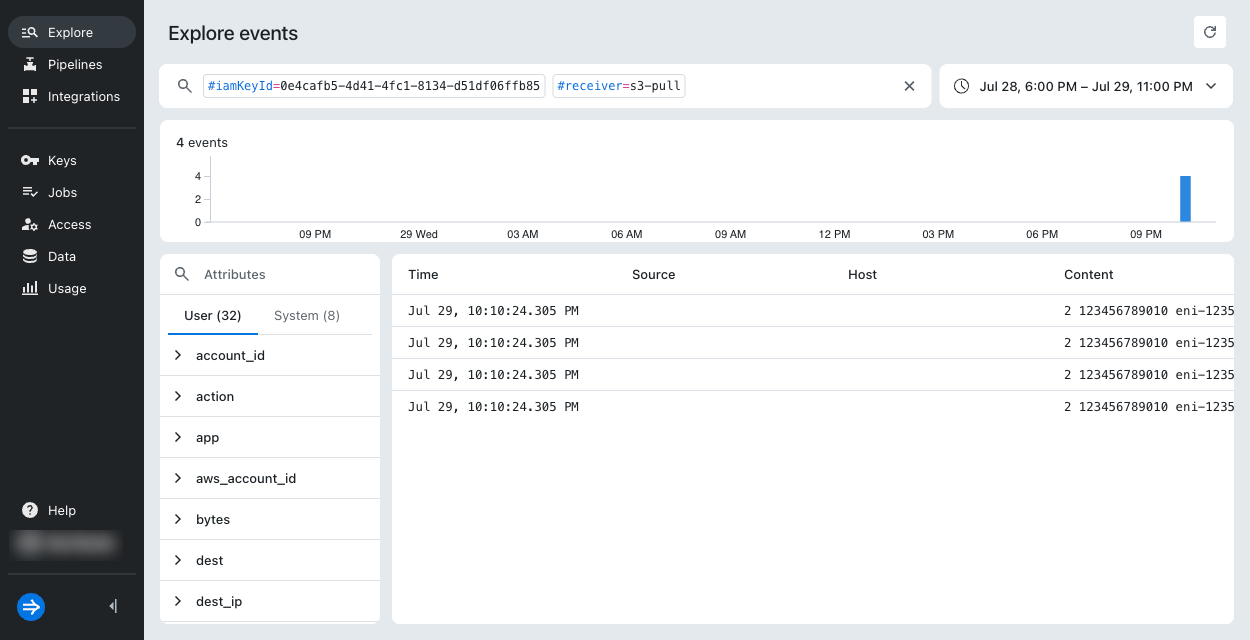
-
Select an event to view its attributes. For details on the attributes, see Event model.
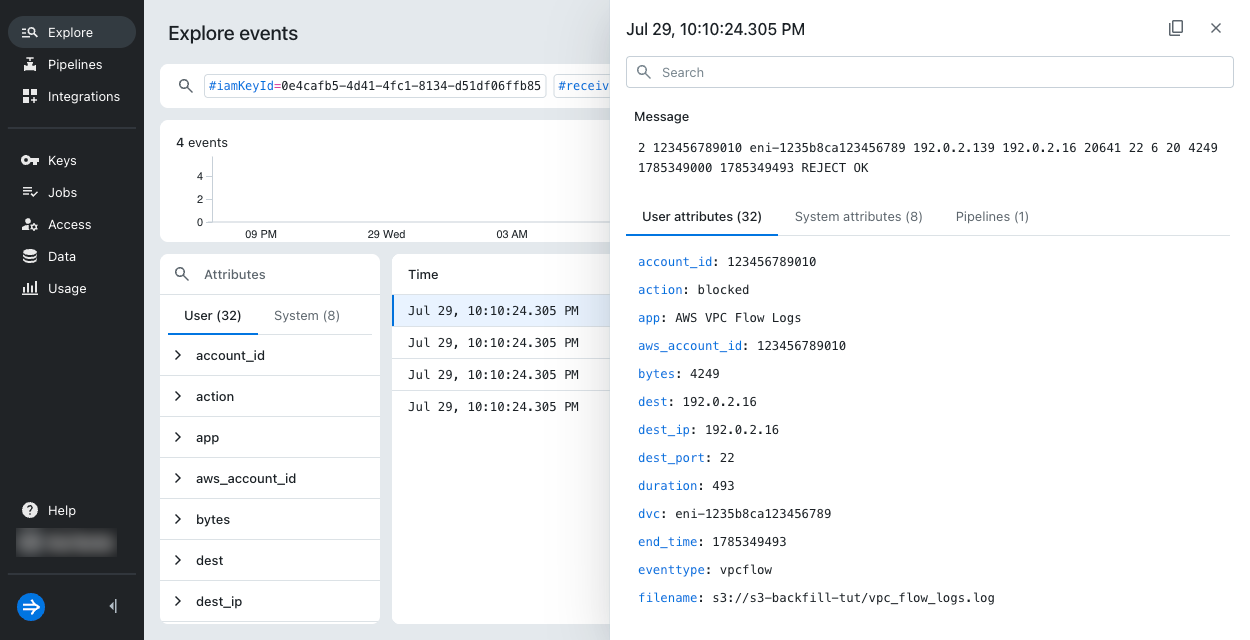 If the predefined pipeline didn't process the events, the only user attributes available are the file name, index, and source type.
7. View predefined transformations
In the last step of the preview data section, you saw that the attributes come from the predefined pipeline. In this section, you view how the predefined pipeline creates the action user attribute:
-
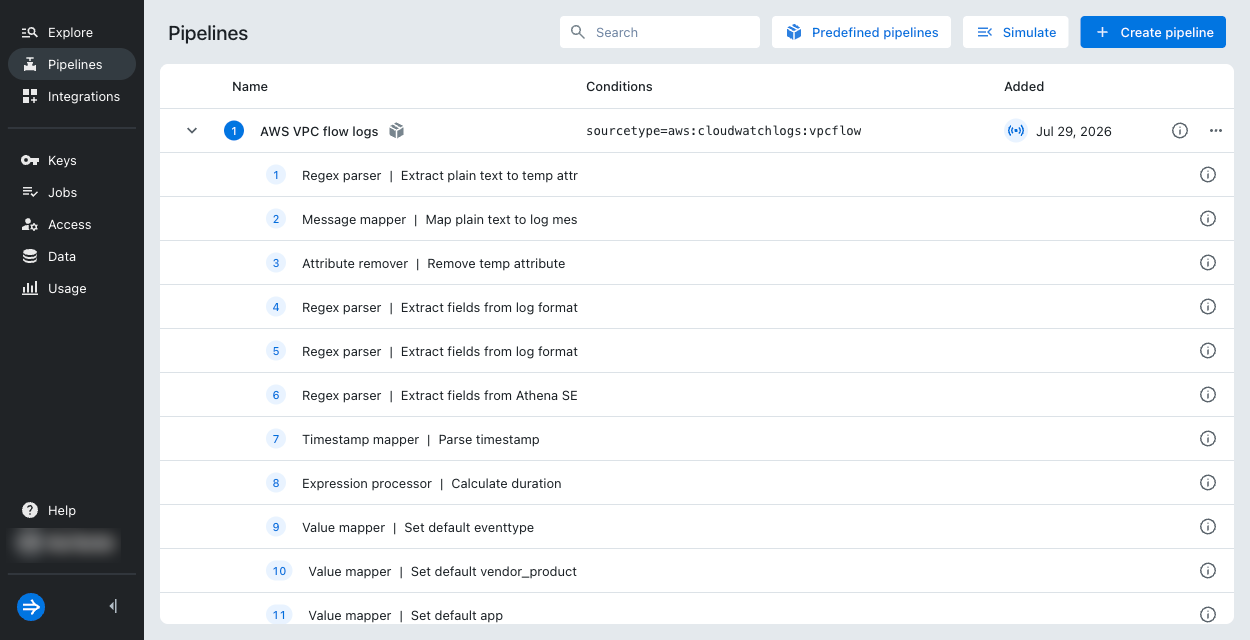
Select Pipelines > AWS VPC flow logs to view the predefined pipeline that processed your VPC flow logs.
-
The first several regex parsers extract user attributes from the raw message. Subsequent processors use these attributes to create or map additional user attributes. In this case, the source of
actioncomes fromvpcflow_action, which is extracted by the processor Extract fields from log format. -
Later in the predefined pipeline, look for the redaction processor named
Normalize vpcflow_action. It reassignsvpcflow_actiontounknownif its original value is-. -
Finally, find the lookup mapper named
Action lookup. It creates a new user attribute calledactionand assigns the valueallowedorblockeddepending on whethervpcflow_actionisACCEPTorREJECT. This shows how the predefined pipeline transforms the raw VPC flow log data into theactionattribute seen in the preview.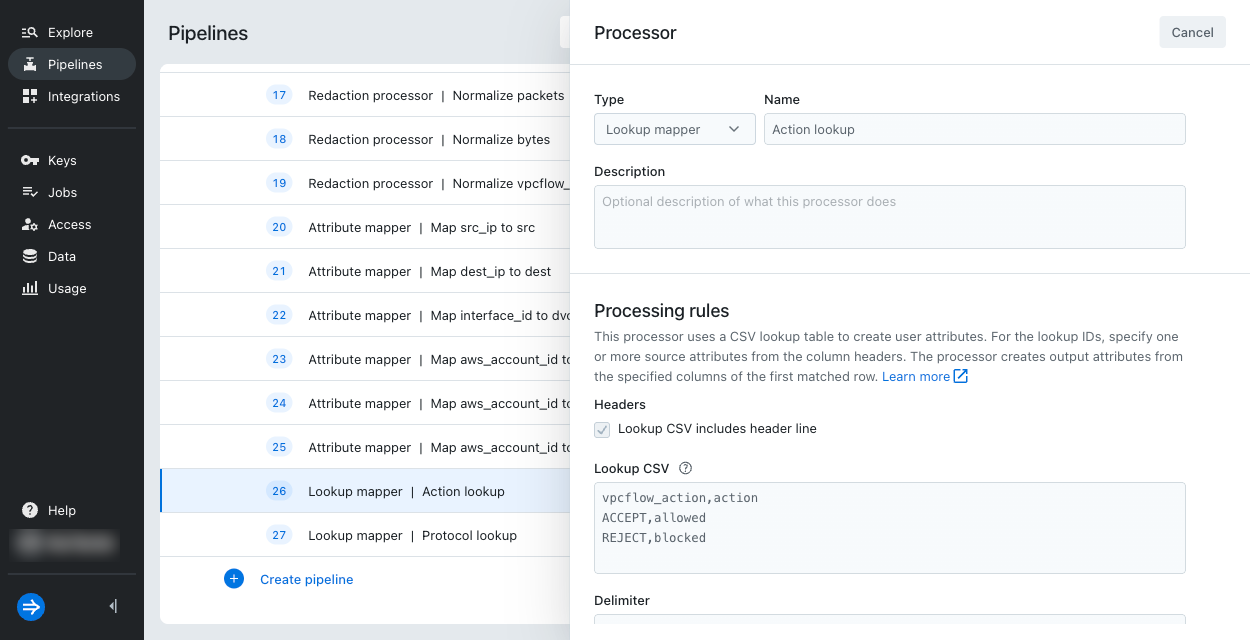 When
When vpcflow_actionisunknown, theactionuser attribute is not created.In most cases, you can use the predefined pipeline as is without needing to understand where each attribute comes from. If you need to modify processing, you can duplicate the pipeline and make changes to your copy. Be sure to disable the original predefined pipeline if you do so. For more information, see Customize processing.
Learn more
For more information, see the following topics:
- Backfill events with S3 pull to learn about how backfill jobs work.
- How to search events with Lumi to walk through a set of example queries using Lumi query syntax.
- Work with predefined pipelines to learn how predefined pipelines process common event formats.
- Predefined pipelines reference to see the available predefined pipelines in Imply Lumi.