Connect external data
AI summary
About AI summaries.
An external data connection lets Imply Lumi query data that stays in your own Amazon S3 storage without ingesting it into Lumi. This topic explains how to create a connection to external data. For how the external data feature works and when to use it, see External data.
Prerequisites
To connect external data, you need the following:
- Virtual tier enabled for your Lumi account. If you don't have access to the virtual tier, contact your Imply support representative.
- Virtual compute pool. See Create a virtual compute pool. The first pool you create becomes the default pool.
- Lumi user with the Admin role. For information on roles and permissions, see Use roles to control access.
- Source logs in an S3 bucket and an S3 location where Lumi can write its index.
- AWS user with permission to set up roles.
Connect external data
You connect external data through the connection wizard. Lumi saves your progress as a draft as you go, so you can leave the wizard and finish later.
To start, go to External data in the Lumi navigation menu, then click Create connection to open the wizard. If you don't see External data in the menu, contact your Imply support representative.
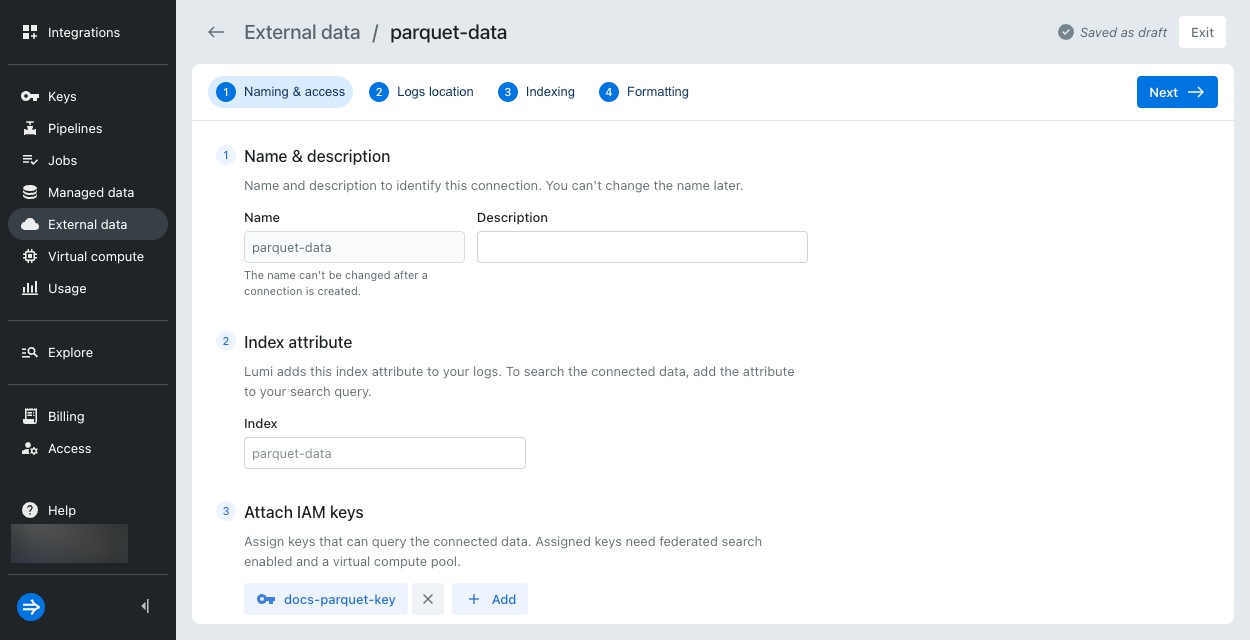
Name the connection and attach keys
On the Naming & access page, name the connection and attach the IAM keys that can query the external data:
- Set the connection details:
- Name: Name to identify the connection. You can't change this after you create the connection.
- Description: Optional description to identify the connection.
- Index attribute: Index attribute that Lumi adds to your logs. To search the external data, add this attribute to your search query. If you leave it blank, the index attribute defaults to the connection name.
- Under Attach IAM keys, create or assign the keys that can query the data. Attaching a key is optional to save the draft connection configuration, but you can't query the data until you attach a key. We recommend creating a new IAM key for each connection, and using that key to provision a federated provider in Splunk®. For how keys route to pools and which keys you can attach, see Keys and pools.
- Click Next.
Set the logs location
On the Logs location page, point Lumi to your source data. Lumi only reads from this location and never writes to it.
- Under Location, set the following:
- Region: AWS region where your logs are stored.
- Bucket: S3 bucket that holds your logs.
- Path: Path to your logs within the bucket.
- Create an IAM role in your AWS account and add the Trust policy and Inline permissions shown in the wizard. The trust policy lets Lumi assume the role, secured by a unique external ID. Use the copy button to copy the policy. Lumi uses the inline permissions to read your logs in the specified S3 bucket.
- Click Verify to test that the role can access the bucket.
- Once access is verified, click Next.
Set the index location
On the Indexing page, set the S3 location where Lumi writes its index of your data. Unlike the logs location, Lumi reads from and writes to this location.
- Under Location, set the following:
- Region: AWS region for the index location.
- Bucket: S3 bucket where Lumi writes the index.
- Path: Path to the index within the bucket. A path is required, and it can't be the bucket root. Lumi writes many files and directories during indexing, so it needs an empty path that it can own. If the index and your logs share a bucket, set the index path outside the logs path so Lumi can't re-ingest index files as logs.
- Create an IAM role in your AWS account and add the Trust policy and Inline permissions shown in the wizard.
If your S3 bucket uses AWS KMS server-side encryption (SSE-KMS), add thekms:Decryptpermission to the trust policy. The trust policy lets Lumi assume the role, secured by a unique external ID. Use the copy button to copy the policy. Lumi uses the inline permissions to write the index. - Click Verify to test that the role can access the bucket.
- Once access is verified, click Next.
Set the formatting and connect
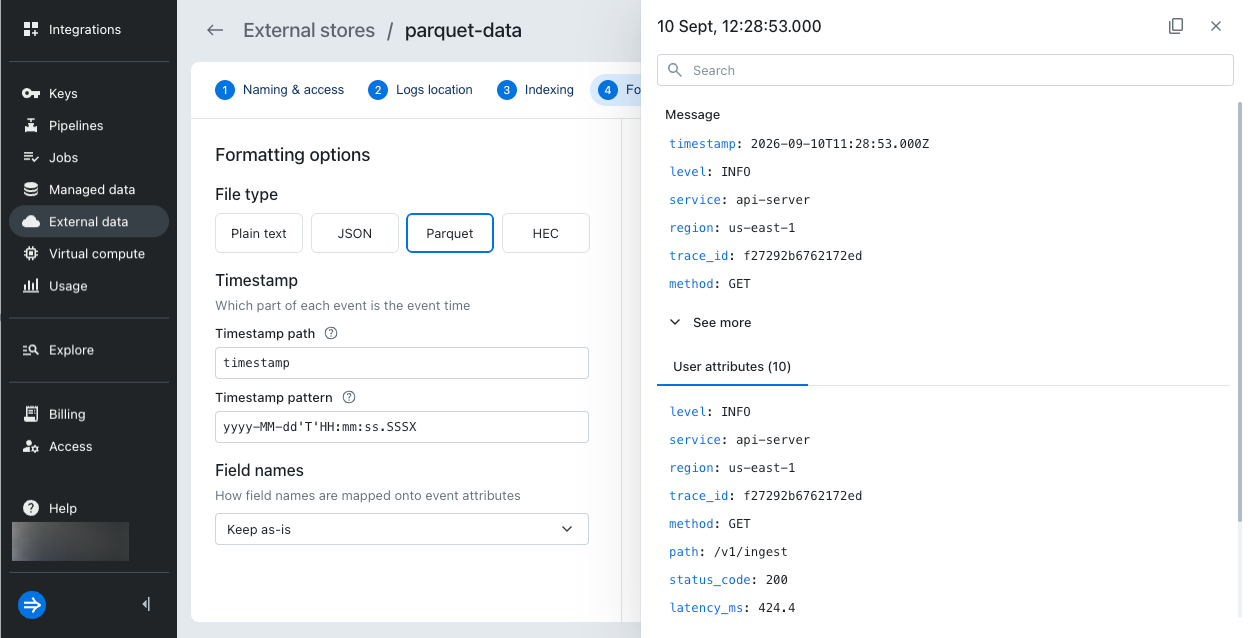
On the Formatting page, tell Lumi how to read your files. The File type you select determines how Lumi reads your data, which fields it extracts, and how you search the data. Lumi shows a sample preview so you can check the result before you complete the connection.
- Under File type, select the format of your files: Plain text, JSON, Parquet, or HEC.
- Configure the options for your file type. See File type options.
- Check the Sample preview to confirm Lumi parses your data as expected.
- The Parsed events tab shows the events Lumi extracts.
- The Files tab shows the source files sampled.
Preview sampling reads the first 100 files or 10,000 events, whichever comes first.
You can click an event to see its details and attributes.
- Click Connect.
Lumi creates the connection and begins indexing your data.
The connection uses eager mode, which re-indexes all data when any data in the bucket changes. As Lumi indexes, the connection's status moves through Indexing in progress to Indexed. On the main External data page, the Indexing status column shows this completed state as Done.
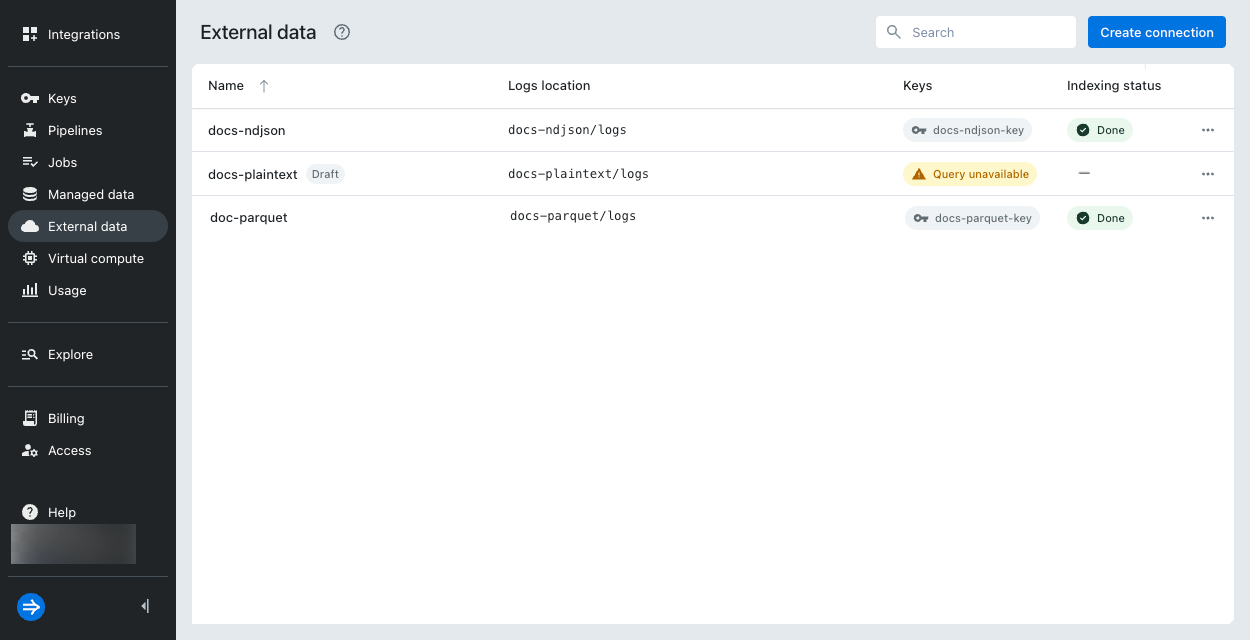
Query unavailable in the Keys column indicates that the connection has no IAM keys attached.
Once the data is indexed, you can query it from Splunk. You can't query external data directly in Lumi.
File type options
Configure the following options for the file type you selected.
- Plain text
- JSON
- Parquet
- HEC
Plain text files have no inherent structure, so Lumi extracts no fields. Connections to plain text data support keyword search only, so you can search the raw text by keyword but not by field.
- Timestamp regex: Regular expression that locates the timestamp within each line. For example,
\d{2}/[A-Za-z]{3}/\d{4}:\d{2}:\d{2}:\d{2} [+-]\d{4}finds27/Aug/2026:23:32:19 +0000in a line. - Date-time format:
DateTimeFormatterpattern that parses the located timestamp and must include the time zone or offset. For example,dd/MMM/yyyy:HH:mm:ss Zparses27/Aug/2026:23:32:19 +0000.
Lumi extracts each key in the JSON object as a searchable field.
- Format: JSON layout of your files. Select NDJSON for newline-delimited JSON, with one object per line. For CloudTrail format, Lumi reads the timestamps and field names automatically, so you don't need to configure them.
- Timestamp path: Field that holds the event time, for example
timestamp. - Timestamp pattern:
DateTimeFormatterpattern that matches the timestamp value. Must include the time zone or offset. For example,yyyy-MM-dd'T'HH:mm:ss.SSSXmatches2026-08-27T23:59:48.271Z. - Field names: How field names map to event attributes. Select Keep as-is to preserve original names, or Strip leading underscores to remove a leading underscore.
Parquet files carry a schema, so Lumi extracts every column as a searchable field.
- Timestamp path: Column that holds the event time, for example
timestamp. - Timestamp pattern:
DateTimeFormatterpattern that matches the timestamp value and must include the time zone or offset. For example,yyyy-MM-dd'T'HH:mm:ssXXXmatches2026-10-01T14:55:36+01:00. - Field names: How field names map to event attributes. Select Keep as-is to preserve original names, or Strip leading underscores to remove a leading underscore.
HEC events carry their own timestamps and metadata, so no configuration is needed.
Lumi extracts the standard HEC metadata (host, source, sourcetype, index) as searchable fields.
You can search the event payload by keyword but not by field name.
This applies whether the payload is raw text or a JSON object.
Edit a connection
To edit a connection, go to the External data page and click Edit for the connection. Lumi also enters edit mode if you type an existing connection's name when you create a connection.
You can change the following:
- Index attribute: Change the index attribute Lumi adds to your logs.
- Formatting: Change the file type options and run a new sample preview.
- IAM keys: Attach or remove keys.
You can't edit any other connection details. To change anything else, delete the connection and create a new one.
Delete a connection
To delete a connection, go to the External data page, click the ellipsis next to the connection name, then click Delete.
Query the external data
You query external data through Splunk federated search. Use the IAM key attached to the connection to provision a federated provider in Splunk, then query using the connection's index attribute.
A single IAM key can't query both external and managed data. Create separate keys for each, and provision a separate federated provider in Splunk for each key. See Which keys you can attach for the rules Lumi enforces.
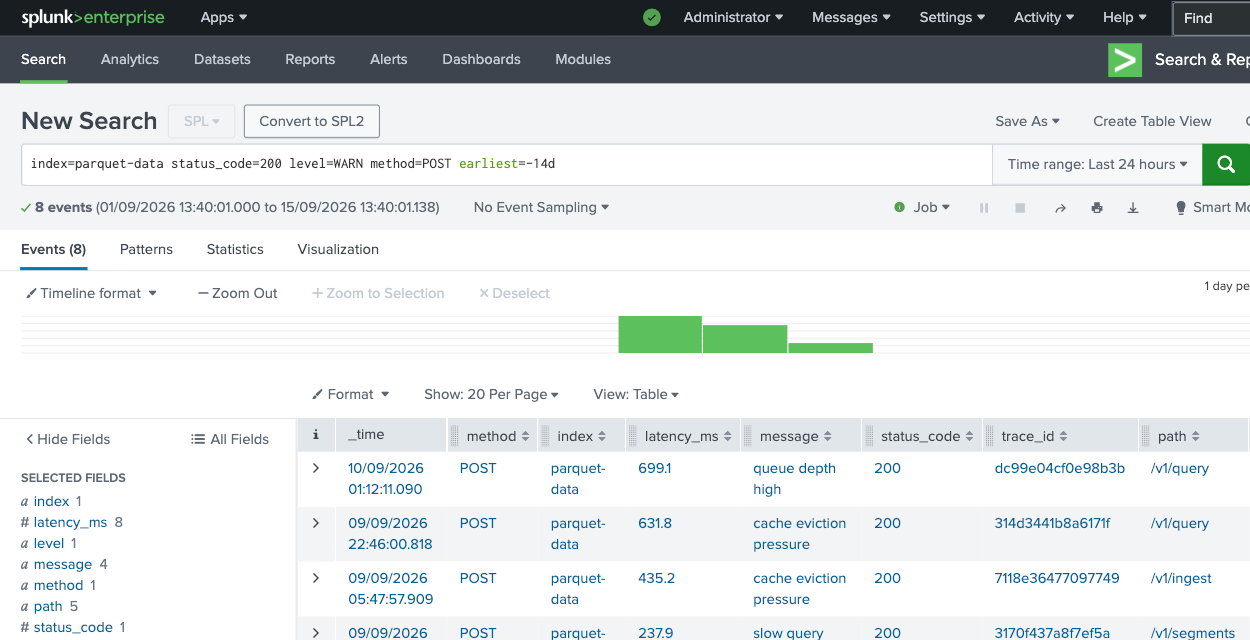
External data queries run on the virtual compute pool assigned to the attached IAM key.
The first query after the pool has been idle may incur a cold start while Lumi provisions compute and loads the data it needs to serve the query. Lumi loads this data into virtual storage, not into your S3, and discards it when the pool shuts down. For more information, see Idle time and cold starts.
For the provider setup steps, see Set up Splunk transparent federated search.
What you can search
The file type you selected when creating the connection determines how you can search it. All file types support keyword search. Field-based search depends on whether Lumi extracts fields from the file.
| File type | Keyword search | Field search | Notes |
|---|---|---|---|
| Parquet | Yes | Yes, all fields | Fields come from the file's schema |
| JSON | Yes | Yes, all fields | Fields come from the JSON keys |
| HEC | Yes | HEC metadata only: host, source, sourcetype, index | The event payload is searchable by keyword but isn't available as named fields |
| Plain text | Yes | No | No fields are extracted; keyword search only |
Keys and pools
Each key routes the external data connection's queries to one virtual compute pool. You select that pool when you create a new key while creating the connection or when you assign an existing key. You can assign a key to only one pool, but a pool can serve multiple keys. Name your pools by intended use because pools for managed and external data appear together in the Lumi UI. A clear naming convention helps you tell them apart. For more information, see IAM key access.
You can attach multiple keys to assign different uses to different pools. For example, an interactive team could query through a larger, warmer pool while a scheduled job uses a smaller one, all against the same external data.
Which keys you can attach
You can only attach a key if either of the following is true:
- The key has no integrations enabled.
- The key has the SPL integration and is already attached to an external data connection.
This restriction protects keys that already query managed data through federated search. Attaching such a key to an external data connection could reassign its pool or integration and break those existing queries. That's why Lumi only lets you attach a key with no integrations or a key that already serves another connection.
If you attach an empty key that has no integrations enabled, Lumi adds the federated search integration to it automatically. You don't need to add the integration yourself first.
Learn more
For more information, see the following topics:
- External data for how the external data feature works and when to use it.
- Virtual tier overview for how the virtual tier serves queries against data outside the hot tier.
- Configure a virtual tier to create and manage virtual compute pools.
- Set up Splunk transparent federated search to query your external data from Splunk.