Manage IAM keys
AI summary
About AI summaries.
In Imply Lumi, an IAM key provides the central point of access for sending and searching events. This topic guides you through creating and managing IAM keys.
Prerequisites
To create and manage IAM keys, you need access to Lumi with the Manager or higher role. For more information on roles, see Use roles to control access.
Create an IAM key
You can create an IAM key from the Keys page or while configuring an integration on the Integrations page. Select a tab to view instructions for that approach.
- Keys page
- Integrations page
To create an IAM key from the Keys page:
- From the Lumi navigation menu, click Keys.
- Click + Create key.
- Enter IAM key details:
- Name: Name of the IAM key.
- Description: Optional description for the IAM key.
- Global attributes: Optional values for the environment and team.
These create system attributes on incoming events when you use an ingestion integration.
- Click Create. The key is inactive until you add an integration.
- Click + Add integration, and select an integration to use with the key.
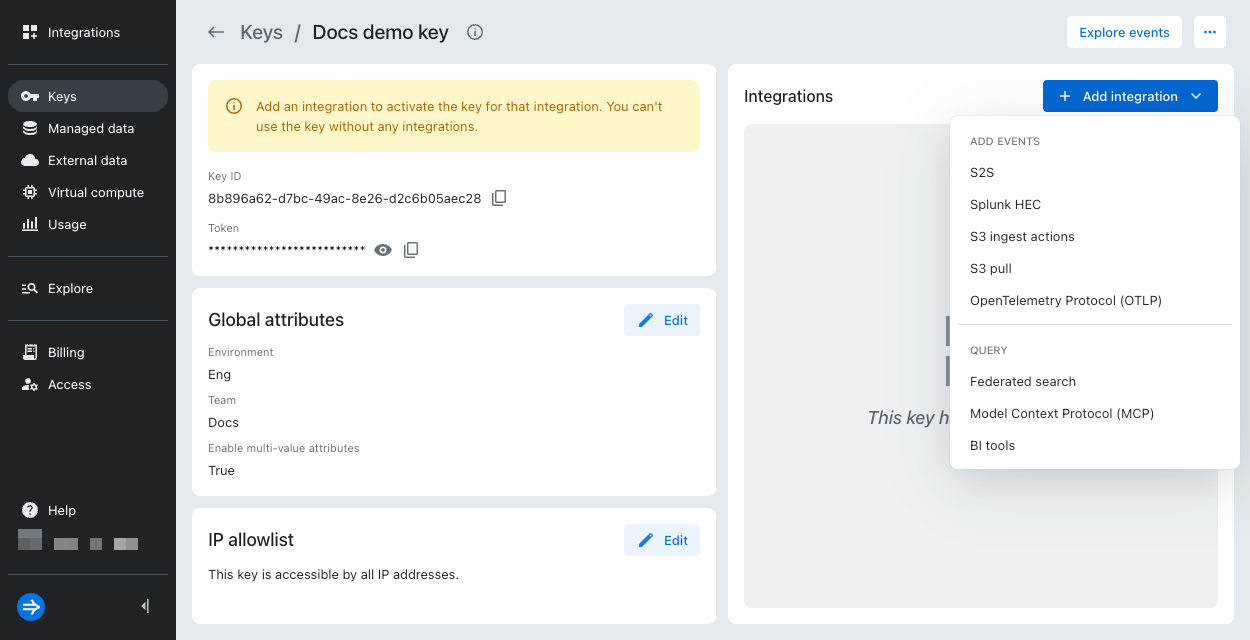
- Configure any IAM key attributes supported by the integration.
- Click Save.
To create an IAM key from an integration tile:
- From the Lumi navigation menu, click Integrations and select the integration you want to use.
- Click Select or create key > Create key.
Lumi automatically enables the integration on the key. - Enter IAM key details:
- Name: Name of the IAM key.
- Description: Optional description for the IAM key.
- Global attributes: Optional values for the environment and team.
These create system attributes on incoming events when you use an ingestion integration.
- Configure any IAM key attributes supported by the integration.
- Click Create.
After you create an IAM key, you can create an IP allowlist to secure the IAM key against unpermitted use. For more information, see IP allowlist.
View an IAM key
Access the Keys page from the Lumi navigation menu to view IAM keys.
View all keys
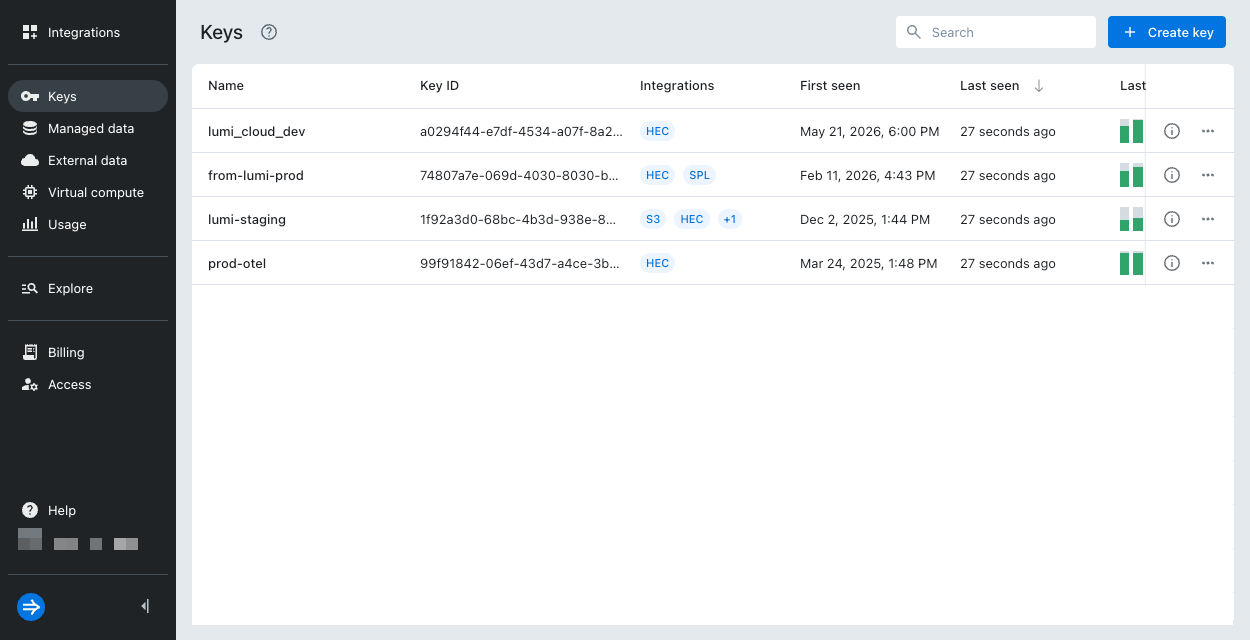
The Keys page shows the following details for an IAM key:
- Key name and ID
- Integrations added to the key
- When the key was created and last active
- Ingestion metrics for events with timestamps from the past 24 hours
- Unparsable events, if any occurred
Click the information icon next to a key to view its description and token. You can use the search bar to filter keys by name, integration type, or IAM key ID.
View key details and metrics
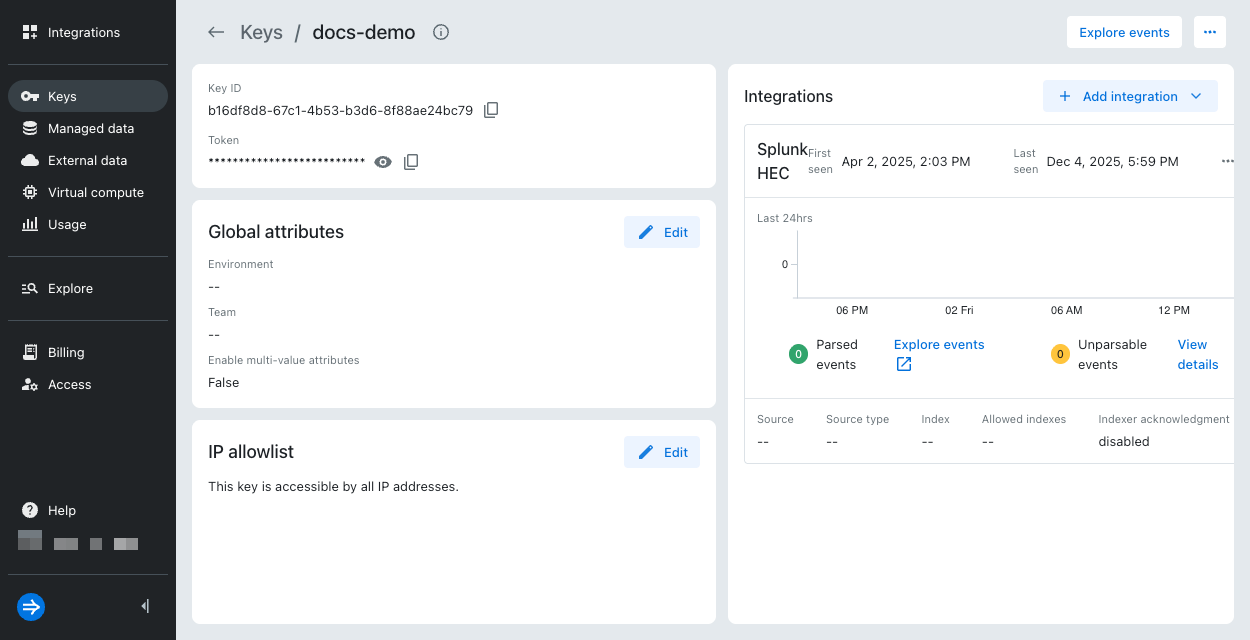
Select an IAM key to view its details. The Integrations pane shows activity from the IAM key for each receiver. Hover over a bar to see usage during that hour. The metrics shown depends on the integration type:
- For application integrations, a green bar indicates the number of searches run in that hour.
- For ingestion integrations, the color of the bar indicates the event status, where green sums the number of successful events and yellow sums the number of unparsable events.
Update an IAM key
The changes you make to the IAM key or its properties can affect your access to add and query events.
To update an IAM key:
- From the Lumi navigation menu, click Keys and select your key.
- Make the desired changes:
- To update the global attributes, click the edit icon in Global attributes.
- To update the IP allowlist, click the edit icon in IP allowlist. For more information about IP allowlists, see IP allowlist.
- To add a new integration, click Add integration and make your selection.
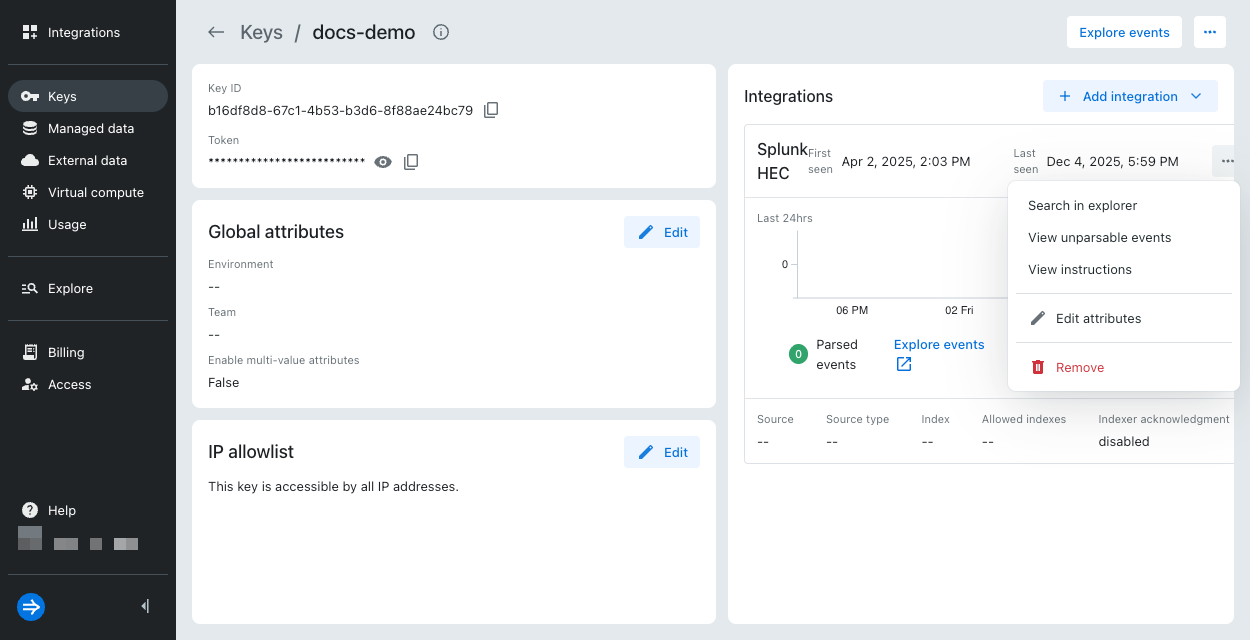
- To remove an integration, click the ellipsis for the integration, then select Remove.
- To update the attributes for an integration, click the ellipsis for the integration, then select Edit attributes.
IP allowlist
This feature is available for Lumi Cloud by default. For Lumi Enterprise, contact your Imply support representative.
You can create an IP allowlist for an IAM key after you create the key. The allowlist restricts which IP addresses and CIDR ranges can use that specific key. For example, if you add the IP 198.51.100.89 to the allowlist for an IAM key with the Splunk HEC integration, traffic to Lumi through the integration must originate from that IP or else the ingestion fails. By default, the IP allowlist is turned off and there are no restrictions on what networks you can use with an IAM key and its integrations.
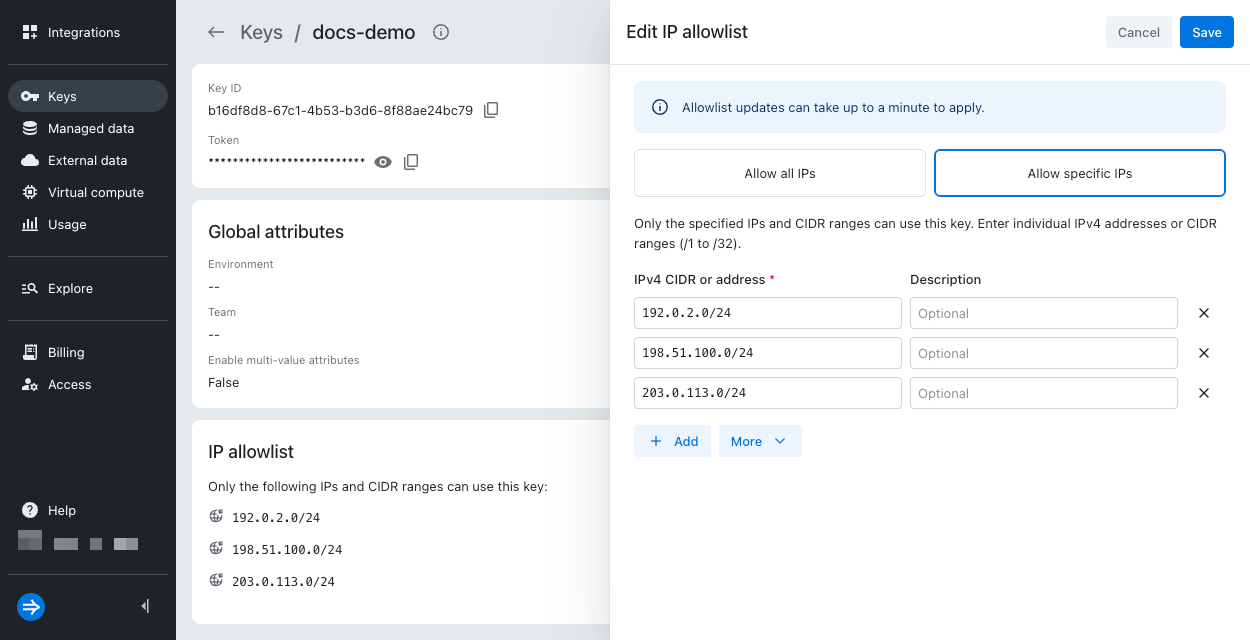
The IP allowlist supports the following integrations: OTLP, Splunk HEC, S2S, S3 ingest actions, MCP, and SPL queries. For Splunk-related integrations, make sure you use the Splunk egress IP since traffic to Lumi originates from there.
IP allowlist restrictions don't apply to the S3 pull integration, including incoming SNS notifications. Lumi initiates S3 pull integrations, so there's no inbound client IP to enforce. SNS source addresses are part of AWS's public shared IP ranges, so they aren't meaningful to enforce against.
Prerequisites
To create or edit an allowlist, you must have either AdministerIAMKeys permission or the ManageIAMKeys permission for a specific key.
The allowlist requires at least 1 IPv4 address or a CIDR range with a prefix from /1 to /32. It can support up to a maximum of 20 unique IPv4 addresses and CIDR ranges.
Edit an allowlist
To create or update an IP allowlist:
-
From the Lumi navigation menu, click Keys and select the key you want to add an allowlist to.
-
Click the edit icon in IP allowlist.
-
Click Allow specific IPs if it isn't already selected and provide a list of up to 20 IPv4 addresses and CIDR ranges.
When you provide IPs and CIDR ranges, you can do any of the following:
- For new or smaller lists, enter them and their optional description manually.
- For an existing list from a different IAM key, copy the list from that key by going to the source key's IP allowlist and selecting More > Copy list. Go to the target key's IP allowlist and select More > Paste list.
- For large lists that are new, create a list in a text editor that follows this format:
IPv4_ADDRESS,DESCRIPTIONCIDR/PREFIX,DESCRIPTIONFor example:
192.168.12.123,VPN IP192.168.12.125/32,Office203.45.128.67,HomeCopy the list to your system's clipboard, and select More > Paste list.
Note the following about pasting a list:
- Pasting a list doesn't overwrite the existing list. It adds any new IPs and CIDR ranges while skipping duplicates.
- Make sure your browser settings allow Lumi to read from the clipboard.
-
Save the list.
To remove an entry from the IP allowlist, click the remove icon (X) next to the address and save the change. To grant access to all IPs instead of only allowing some IPs, select Allow all IPs and save the change.
When you create an allowlist or make an update to one, the changes can take up to a minute to apply.
Delete an IAM key
Deleting an IAM key is a permanent action. It affects all integrations relying on that IAM key for authentication. Before you delete an IAM key, update any related integrations with a new IAM key so the integration can operate without interruption.
To delete an IAM key:
- From the Lumi navigation menu, click Keys.
- Click the ellipsis next to the IAM key you want to delete.
- Click Delete.
- When prompted, type the name of the IAM key you want to delete; then click Delete.
Learn more
For more information, see the following topics:
- IAM keys to learn about how IAM keys work in Lumi.
- IAM key attributes for details on integration attributes.
- Send events for configuring integrations to add data.
- Search events for configuring integrations to query data.