File upload
AI summary
About AI summaries.
To quickly get started with Imply Lumi, you can upload log files. For a step-by-step guide using file upload, see the Quickstart.
This topic describes requirements and configuration for file upload in Lumi.
Prerequisites
To upload files to Lumi, you need the following:
- Access to Lumi with the Data manager role or higher. For information on roles and permissions, see Use roles to control access.
- Files in CSV, JSON, Splunk® CSV, Splunk HEC, Parquet or plain text format. For more information, see Event formats.
File size limit
Lumi supports a maximum file size of 200 MB. This limit refers to the size of the file transmitted by the browser or HTTP client.
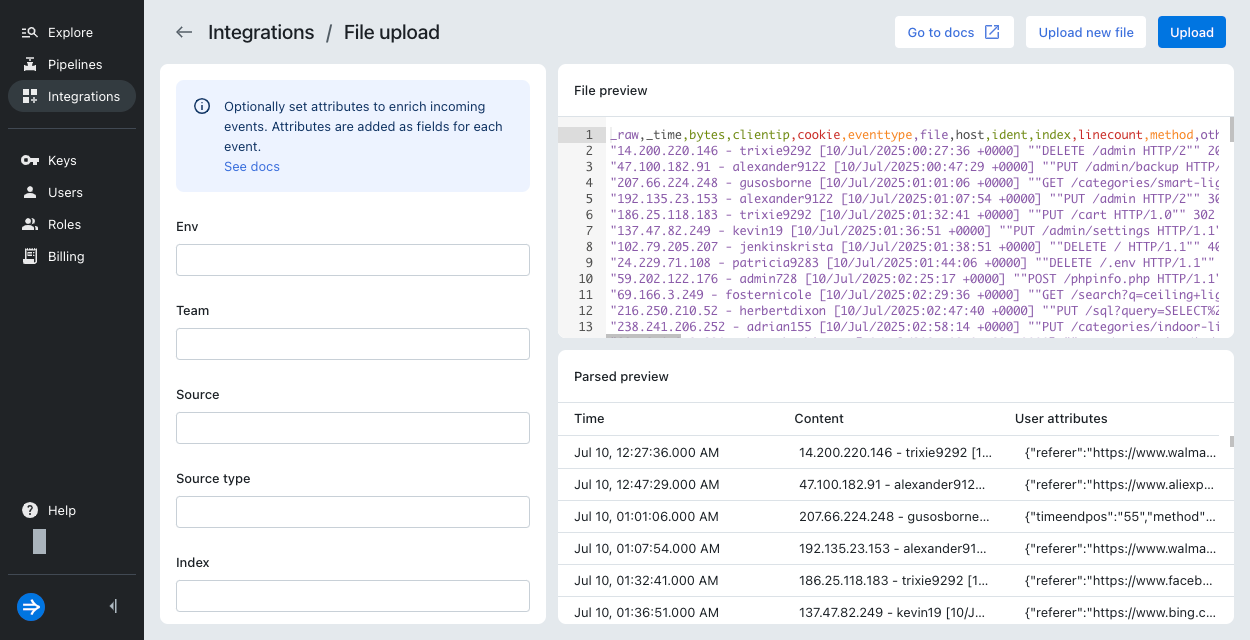
Assign attributes
You can assign the following attributes during file upload:
| Field | Attribute name | Attribute type |
|---|---|---|
| Env | env | System attribute |
| Team | team | System attribute |
| Source | source | User attribute |
| Source type | sourcetype | User attribute |
| Index | index | User attribute |
The user attributes represent Splunk default fields. Use these fields to filer searches or meet a pipeline condition. If the file already defines any attributes, the value in the file overrides the one specified in the UI.
Lumi-assigned attributes
Lumi assigns the following system attributes to every event in an uploaded file:
receiver:imply.filefile: name of the file
Configure JSON upload
In most cases, Lumi parses events as described in the supported event formats. With JSON format, you can customize how Lumi constructs events.
-
Select Integrations in the navigation menu.
-
Select File upload.
-
Click Select file and select your JSON file.
-
Confirm that Format is JSON.
-
Configure the event timestamp. You can skip this step if Lumi detected the timestamp correctly.
-
In Time, select the field that contains the timestamp.
-
In Time format, select the format of the timestamp. See examples of supported timestamp formats.
-
Optionally select a Time zone ID such as
America/Los_Angeles. The time zone only applies when the timestamp doesn't already contain the time zone, and defaults to UTC if unspecified.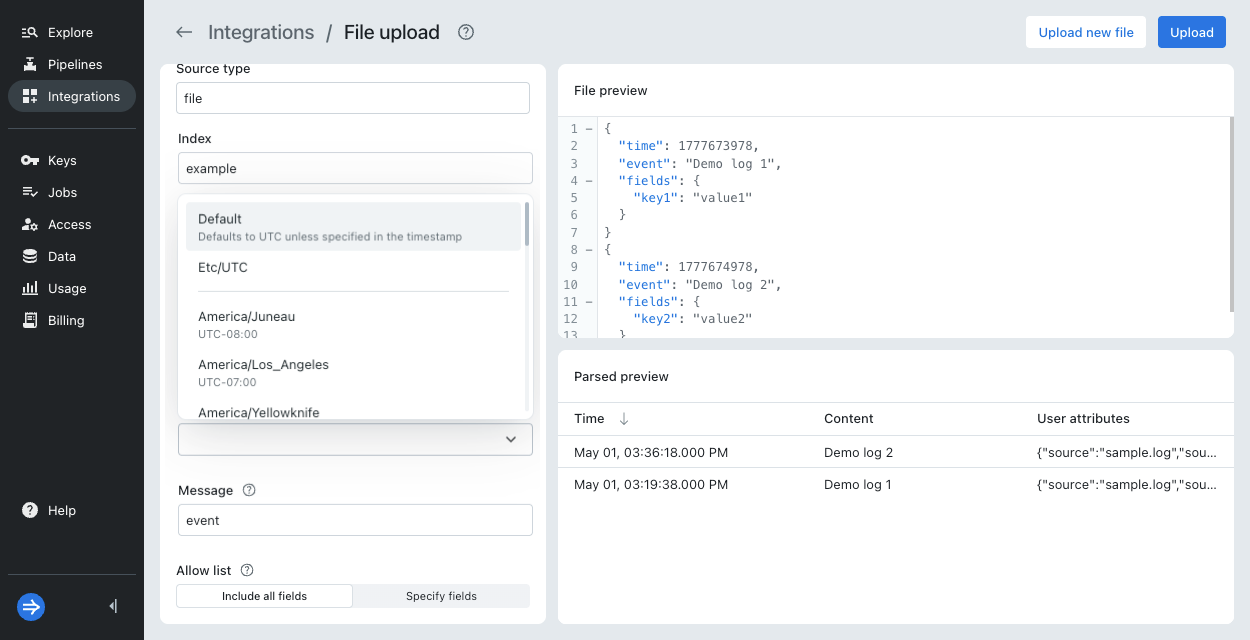
-
-
Configure the event message. Confirm or specify the field in Message. You can specify a single field such as
logor combine multiple fields such asstdin,stdout. If you provide multiple fields, Lumi joins the values in the specified order delimited by a space character.For example,
key1,key2in the following JSON creates the event messageval1 val2:{"key1": "val1","key2": "val2"} -
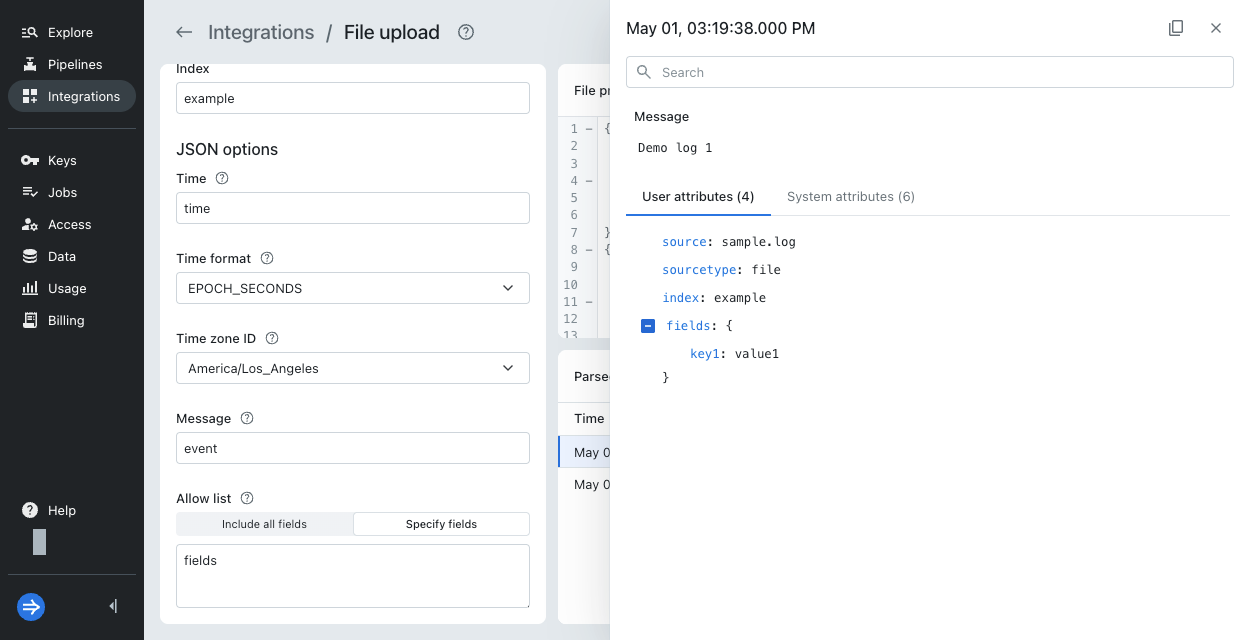
Configure user attributes. By default, Lumi creates user attributes for all fields not used for the timestamp or message. To only store a subset of fields, select Allow list > Specify fields. Enter the fields as a comma-separated list. You can't reuse the timestamp or message fields as user attributes.
-
Select an event in Parsed preview and confirm your event structure.
-
Click Upload.
Learn more
For more information, see the following topics:
- Quickstart to learn to send events to Lumi through file upload.
- Event formats to learn about supported event formats.
- Event model to learn about system and user attributes.
- Transform events using pipelines to enrich or transform events sent to Lumi.
- Search methods to learn how to search events from file upload.