Simulate pipelines and processors
AI summary
About AI summaries.
After you create a pipeline to transform incoming events in Imply Lumi, you can simulate it to preview processing. Pipeline simulation demonstrates the entire flow of processing by one or all pipelines on your sample data. This can help you fix any incorrect parsing configuration, attribute assignment, or processing order so that Lumi transforms your incoming events as you intend.
When you add or update a processor in a pipeline, you can also test it out individually. This lets you see how the processor behaves on its own, helpful to ensure correct operation or troubleshoot pipeline components.
This topic explains how to simulate pipelines and processors.
Simulate pipelines
You can simulate one or all existing pipelines to preview the entire flow of processing. In the simulation dialog, enter the raw event data that your forwarder would send to Lumi. When providing sample events to simulate, note the following details:
- You can sample a maximum of 100 events.
- Format the samples in one of the supported Event formats. You can't mix format types.
- To test a specific pipeline, ensure your events satisfy the pipeline conditions.
For example, if the condition is
host=192*, a sample event requires metadata such as"host": "192.0.2.1". The Lumi UI also lets you set default values forindex,source, andsourcetype, which creates attributes you can use to match a pipeline condition.
To simulate pipelines:
-
Click Pipelines from the navigation menu.
-
To simulate all pipelines, click Simulate in the top right.
To simulate a single pipeline, click the ellipsis next to the pipeline and select Simulate. -
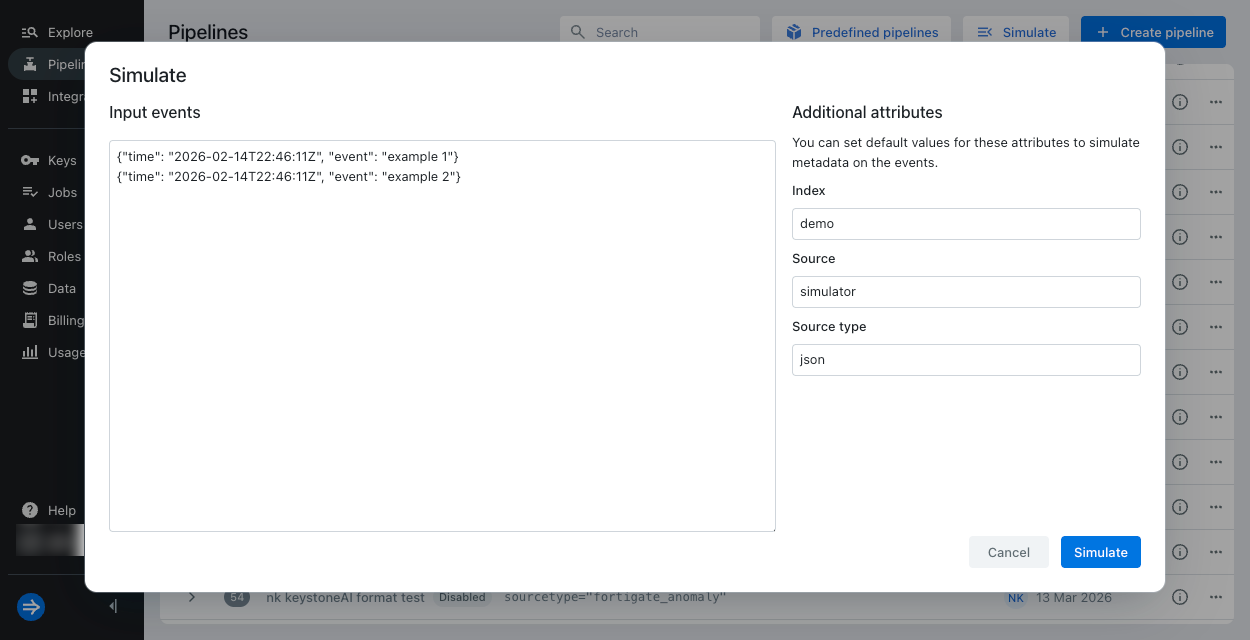
In the dialog, enter your sample events in Input events.
Plain text example:
test event 1test event 2Splunk® HEC JSON example:
{"time": "2026-02-14T22:46:11Z", "event": "example 1"}{"time": "2026-02-14T23:46:11Z", "event": "example 2"}Generic JSON example:
{"time": "2026-02-14T22:46:11Z", "log": "example 1", "host": "192.0.2.1"}{"time": "2026-02-14T23:46:11Z", "log": "example 2", "host": "203.0.113.0"} -
Optionally enter default values for Index, Source, and Source type, which creates the user attributes
index,source, orsourcetype, respectively. You can use these fields to satisfy a pipeline condition, view how a processor will use or transform the attribute, or simply view the created attribute on the processed event.Lumi only assigns these values when they're not already specified in the event or assigned by a another pipeline. This follows the same behavior as default values on an IAM key.
-
Click Simulate.
-
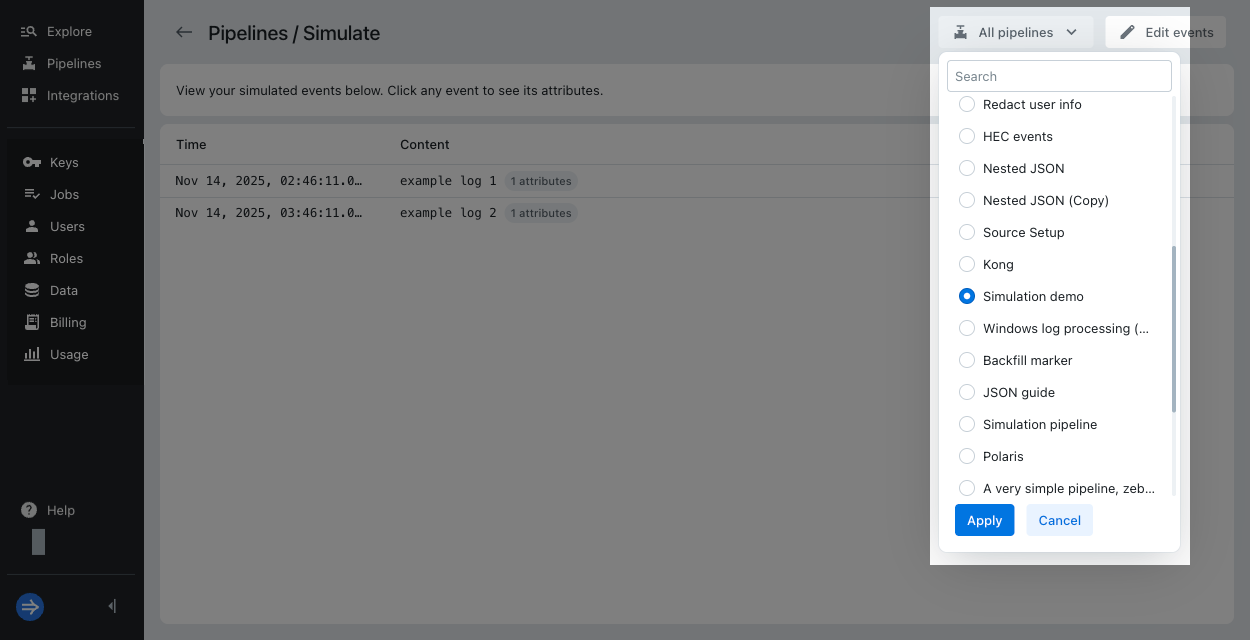
Lumi shows the processed events. Click an event to see its details.
The following screenshot shows simulated results for the Splunk HEC JSON sample events. In this example, the simulated pipeline uses the condition
index=demoand contains value mappers to assignidanduser.
-
To change which pipeline to simulate, click the drop-down in the top right corner and select your pipeline or All pipelines.
-
Optionally select Edit events to update the sample events or default attribute values.
Try out processors
To preview how a processor operates, use the Try it out section to enter sample data and view the processed output.
Sample input
Your sample input should match the event format as you expect it to be when it enters the processor. Unless the processor is first in a pipeline, the sample input won't be the same as your raw event but rather the output of the previous processor or pipeline.
You don't need to provide the entire event to try out a processor, only the attributes you want to test.
For example, if you just want to preview regex parsing on host, you don't need to provide source in the sample input.
The format of the sample input depends on the processor:
- Some processors have the input field Sample attributes, where you provide a JSON object containing source attribute names and their values.
- Other processors use the input field Sample, where you enter only the string value, such as the event message.
Sample output
The Expected output section shows the processed result in three parts:
- Timestamp: Simulated timestamp for the event.
- Message: Event message body (
_log). To populate this, include_login your sample attributes JSON. - User attributes: Output attributes after processing.
Examples
The following examples cover a few common processor types. See Processors for a full list.
Attribute mapper
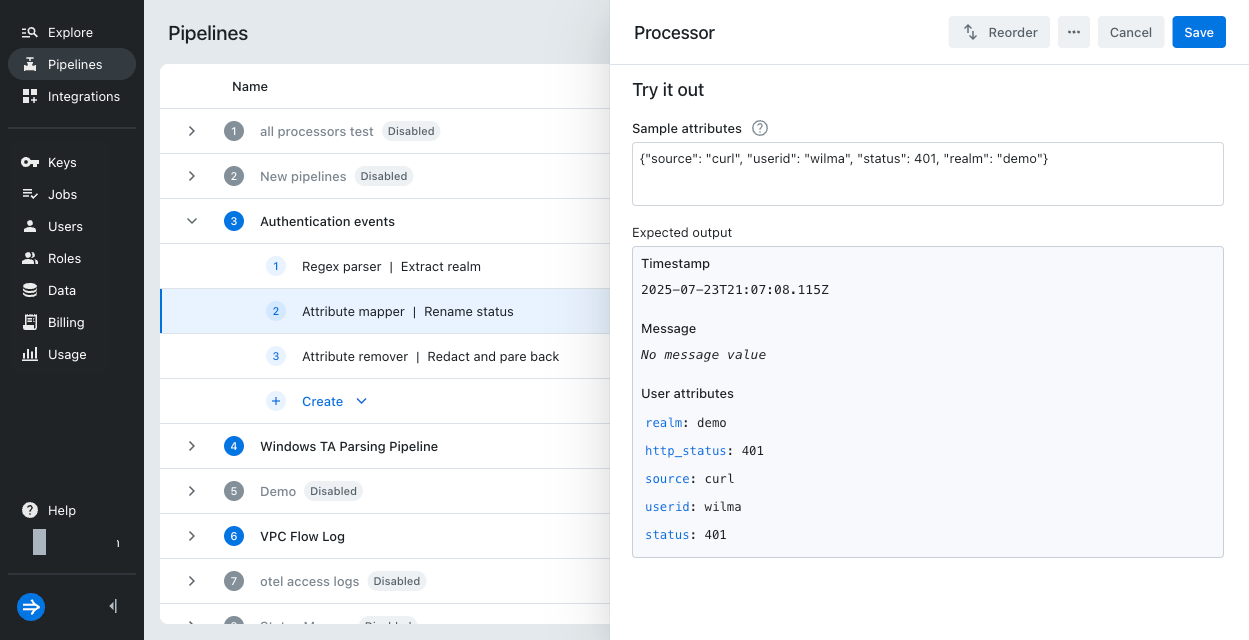
The attribute mapper uses source attribute names and values as sample input.
Example input:
{"source": "curl", "userid": "wilma", "status": 401, "realm": "demo"}
Expected output with Source attribute status and Output attribute http_status:
Regex parser
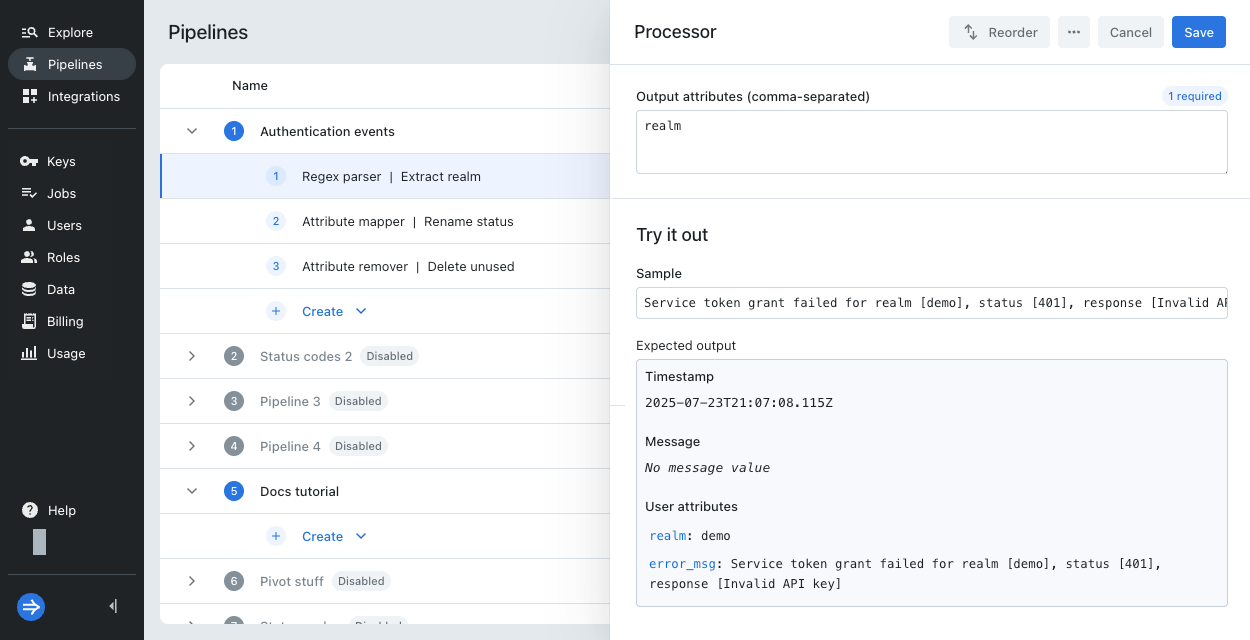
The regex parser samples directly from the attribute value. Even though you might select Extract from user attribute as the source, you don't supply the user attribute name in the sample.
Example input:
Service token grant failed for realm [demo], status [401], response [Invalid API key]
Expected output with Extract from user attribute error_msg with Regular expression realm\s\[(\w+)\]:
Key-value parser
The key-value parser takes only a sample value without the attribute name.
For example, if you have an attribute called cloud which stores the JSON {"platform": "aws_eks", "provider": "aws", "region": "us-east-1"},
you only enter the JSON object in the sample without including the attribute name cloud.
Enter a sample that corresponds to the pattern you selected in the processor configuration.
Example inputs for each parser pattern:
- Equality:
key=value - JSON:
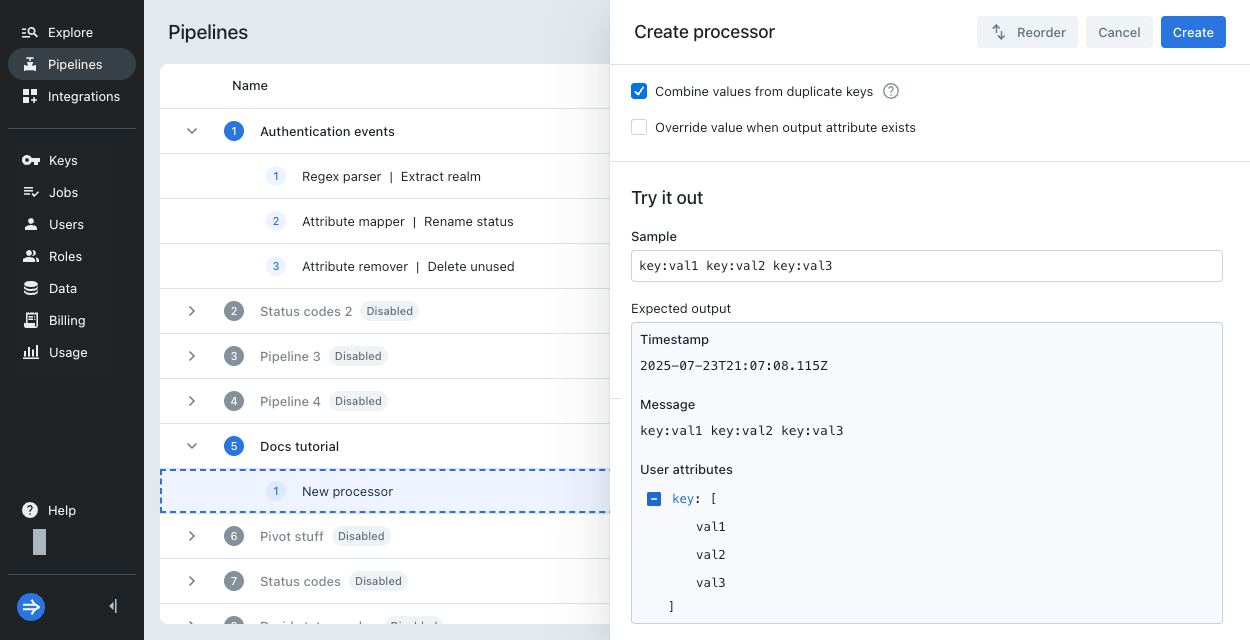
{"key1": "val1", "key2": {"key3": "val3"}} - Regex:
key:val1 key:val2 key:val3for the regex(\w*):(\w*) - XML:
<root><key>value</key></root>
Expected output with Regex (\w*):(\w*):
Learn more
See the following topics for more information:
- Manage pipelines and processors for how to create and manage pipelines and processors.
- Processors reference for the types of processors available in Lumi.