Guide for Amazon S3 ingestion
This guide walks through the end-to-end process to ingest data into Imply Polaris from Amazon S3. For information on creating S3 connections in Polaris, see Connect to S3.
The following diagram summarizes the end-to-end process of connecting to your S3 source and ingesting from it. Shaded boxes represent steps taken within Polaris, and unshaded boxes represent steps taken outside Polaris.
The screen captures and instructions in this guide show the configurations for Amazon services on October 2023. They may not reflect the current state of the product.
Prerequisites
To complete the steps in this guide, you need the following:
-
An Amazon S3 bucket containing objects to ingest. See Supported formats for requirements on the data format for ingestion.
-
The Amazon Identity and Access Management (IAM) permissions to create roles, create policies, and attach policies to roles. See the AWS documentation on Allow users and groups to create and modify roles.
-
Permissions in Polaris to create tables, connections, and ingestion jobs:
ManageTables,ManageConnections, andManageIngestionJobs, respectively. For more information on permissions, visit Permissions reference.
Get Imply's IAM role identifier
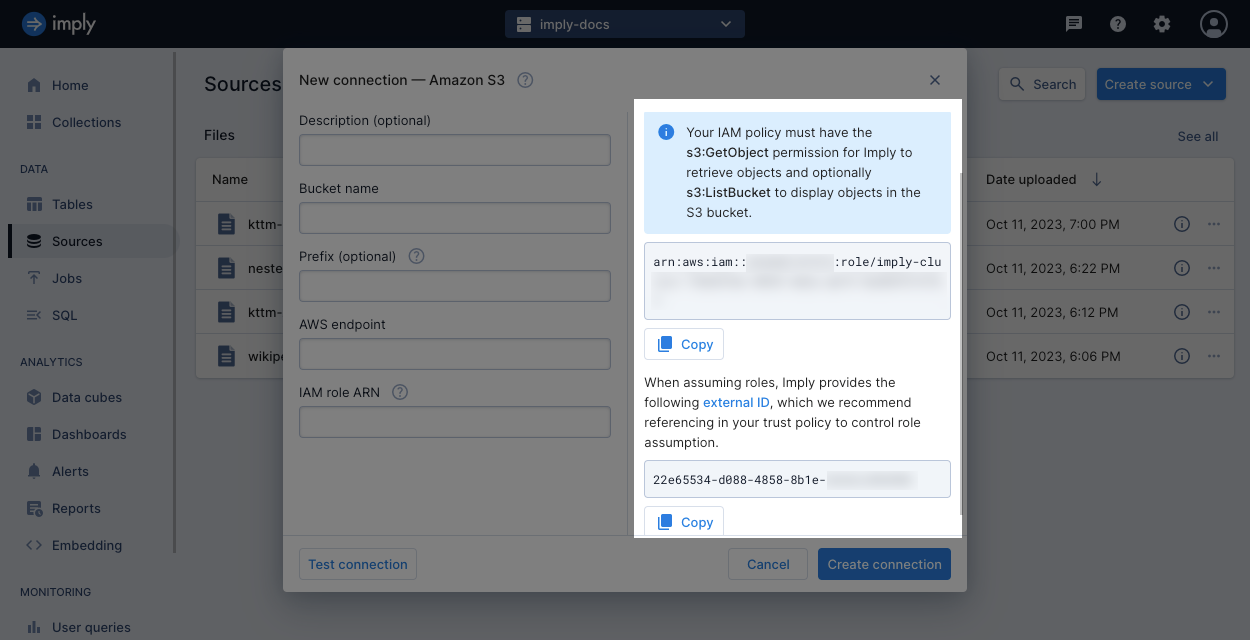
In this section, you record the Amazon Resource Name (ARN) and the external ID of Imply's AWS role. When you create a new role in AWS, you include these details to allow Imply to assume your role.
-
In Imply Polaris, go to Sources > Create source > Amazon S3.
-
Copy and save the ARN and the external ID of Imply's IAM role in the New connection dialog.
Get the S3 bucket ARN
In this section, you record the Amazon Resource Name (ARN) of your S3 bucket.
-
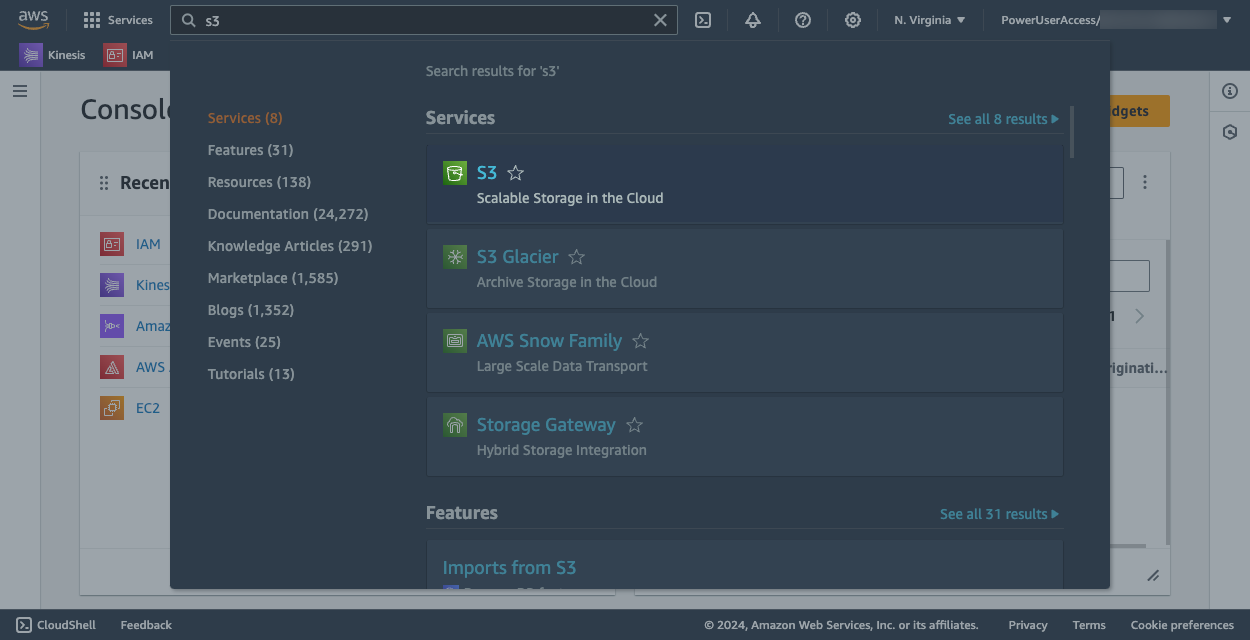
In AWS, search for "S3" and select that service.
-
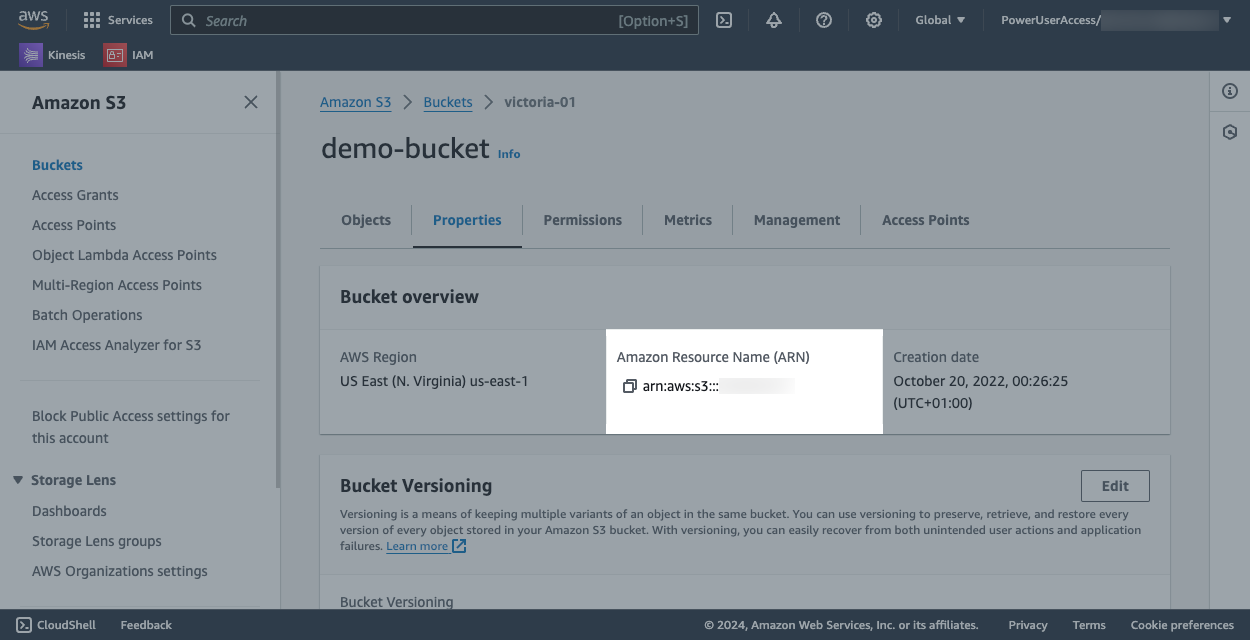
Click Buckets in the left pane and then click the name of your bucket.
-
Click the Properties tab and copy and save the ARN of the bucket. You'll need it in a later step.
Create an AWS permissions policy
In this section, you create a permissions policy that grants permissions to access specific S3 resources. When you create a new role in AWS, you attach the permissions policy to the role, so that your role has permission to access the resources.
-
Navigate to the IAM Dashboard in Amazon Web Services (AWS).
-
Select Policies in the left sidebar, then click Create policy.
-
In the Select a service section, select
S3. -
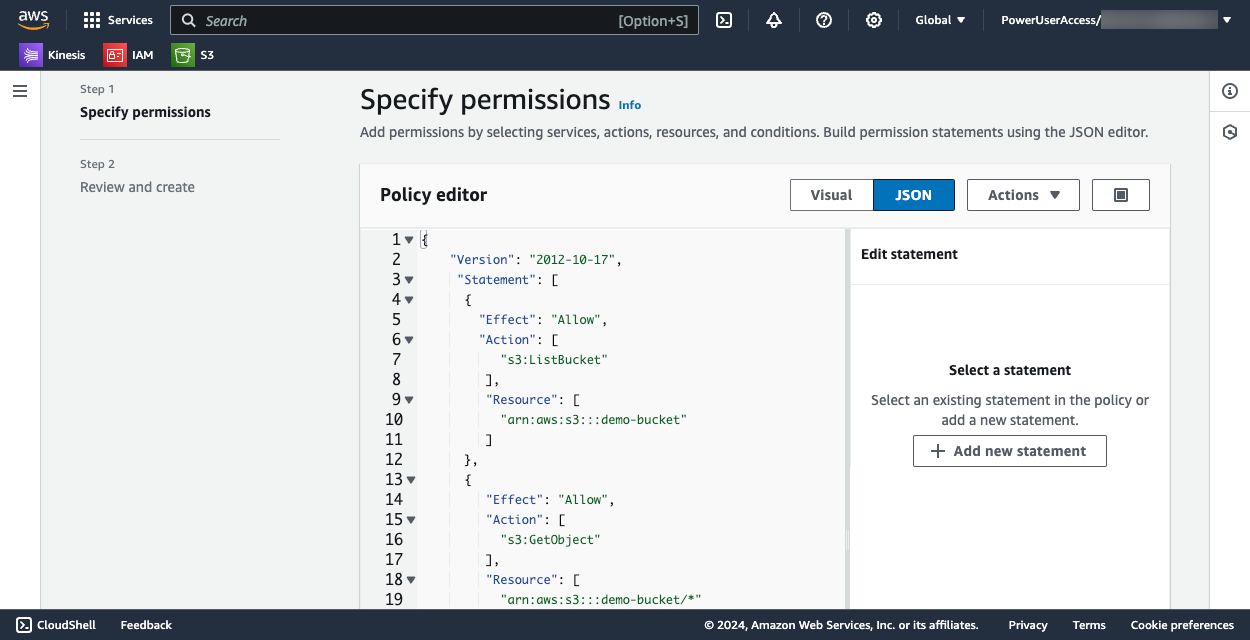
Click the JSON tab.
-
Replace the contents in the Policy editor with the following policy. Replace
S3 ARNwith the S3 bucket ARN you copied in the previous section.{"Version": "2012-10-17","Statement": [{"Effect": "Allow","Action": ["s3:ListBucket"],"Resource": ["S3 ARN"]},{"Effect": "Allow","Action": ["s3:GetObject"],"Resource": ["S3 ARN/*"]}]}The policy editor in the UI should look something like this:
-
Click Next.
-
Provide a name for the permissions policy, then click Create policy.
Note that if your S3 bucket uses server-side encryption with AWS Key Management Service (AWS KMS) keys (SSE-KMS), you need to add the kms:Decrypt permission to the policy.
For more information, see the AWS documentation on SSE-KMS encryption.
To grant this permission, add the following statement to the permissions policy:
{
    "Effect": "Allow",
    "Action": "kms:Decrypt",
    "Resource": "arn:aws:kms:REGION:ACCOUNT_ID:key/KMS_KEY_ID"
}
Replace REGION, ACCOUNT_ID, and KMS_KEY_ID with your AWS region, account ID, and the ARN of the specific KMS key used to encrypt the data.
Create an AWS IAM role
In this section, you create an AWS IAM role to which you attach the permissions policy to grant access to the S3 resources and a trust policy to authorize Imply to assume the role.
-
Navigate to the IAM Dashboard in Amazon Web Services (AWS).
-
Select Roles in the left sidebar, then click Create role.
-
For the trusted entity, select Custom trust policy.
-
In the Custom trust policy section, AWS provides a template trust policy for your role. In the
Principalobject, enter the following key-value pair. ReplaceIMPLY ARNwith the ARN you saved from the previous section. This allows Imply's IAM role to assume the role that you create."AWS": "IMPLY ARN"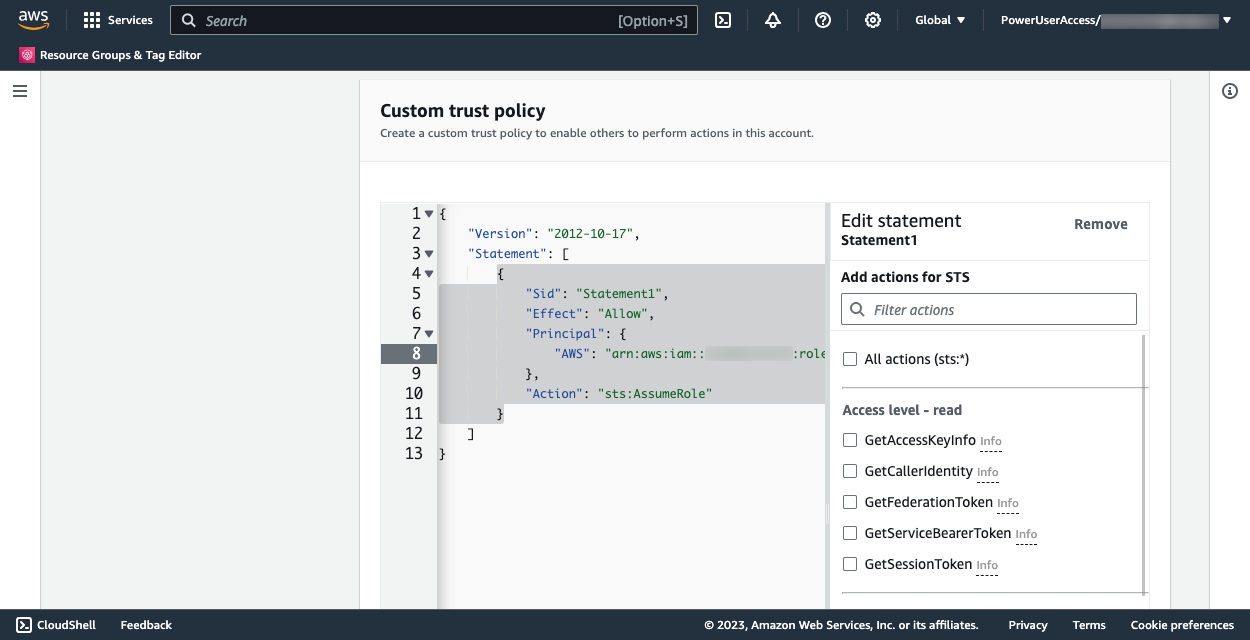
-
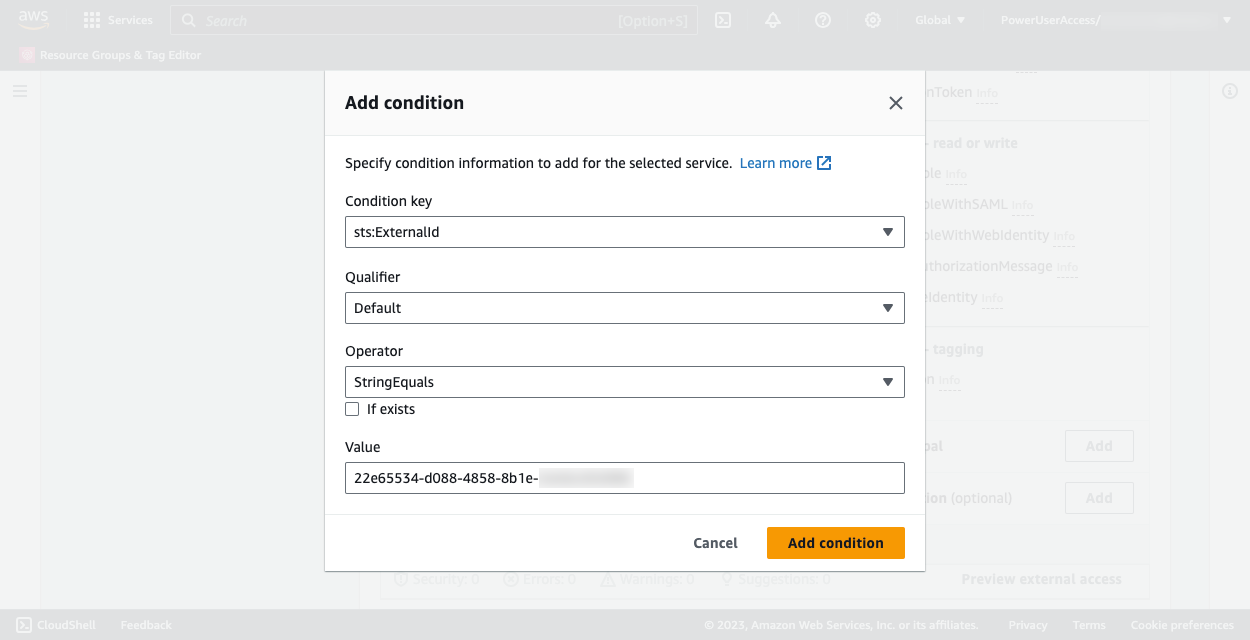
In the Edit statement pane, identify the section for Add a condition and click Add.
-
Complete the following details:
- Condition key: Select
sts:ExternalId. - Qualifier: Select
Default. - Operator: Select
StringEquals. - Value: Enter the external ID of Imply's IAM role you saved from the previous section.
- Condition key: Select
-
Click Add condition, then click Next.
-
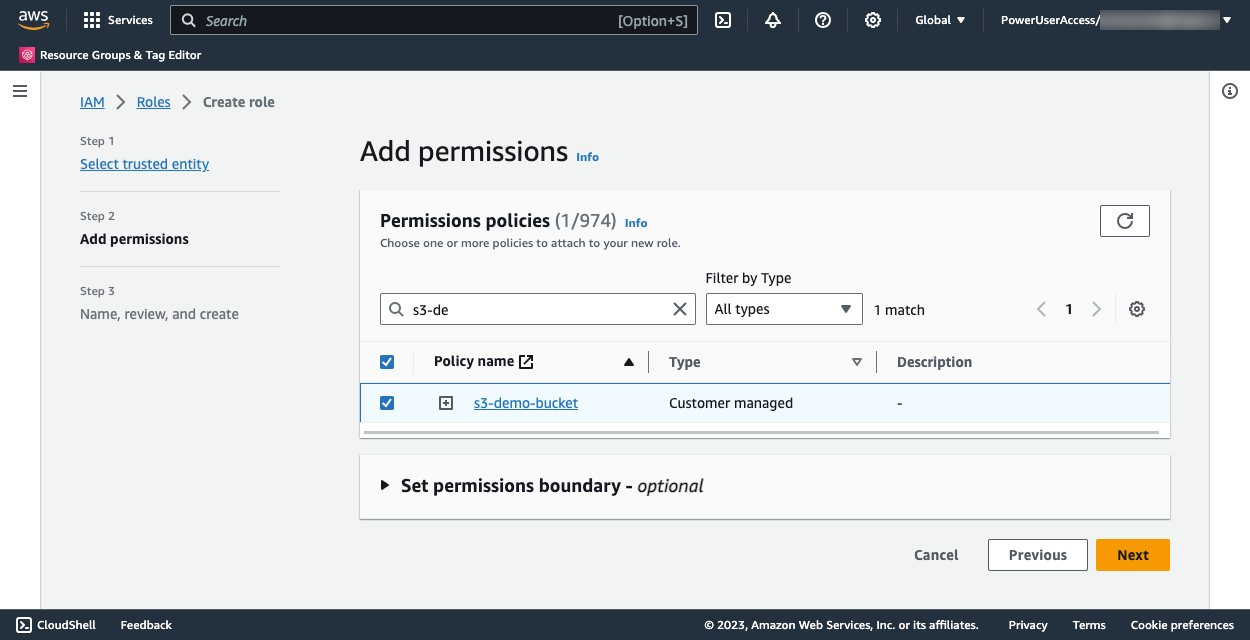
Now you add permissions to the AWS role. This allows your IAM role to access your S3 bucket.
Search for and select the policy name you created in the previous section.
-
Click Next.
-
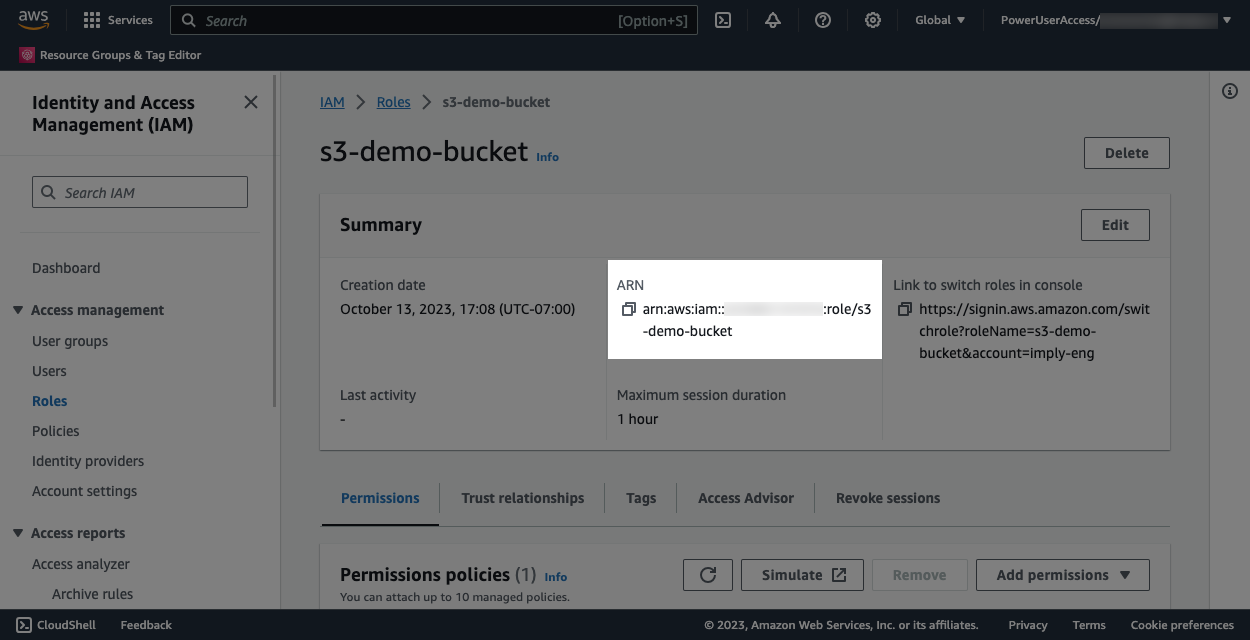
Enter a descriptive value for Role name, review the trust and permissions policies, then click Create role.
-
Click the role to view its details. Record the ARN of the role to use when you create a connection in Polaris.
Create an S3 connection
In this section, you create an Amazon S3 connection in Polaris. First follow the steps in Get Imply's IAM role identifier.
-
In Imply Polaris, go to Sources > Create source > Amazon S3.
-
In the New connection dialog, enter the following details:
- Connection name: A unique name for your connection.
- Description: An optional description for the connection.
- Bucket name: Name of the S3 bucket to ingest data from.
- Prefix: An optional prefix to limit access to certain files in the bucket.
- AWS endpoint: The endpoint of the S3 service, such as
s3.us-east-1.amazonaws.com. - IAM role ARN: The ARN of the AWS role you created.
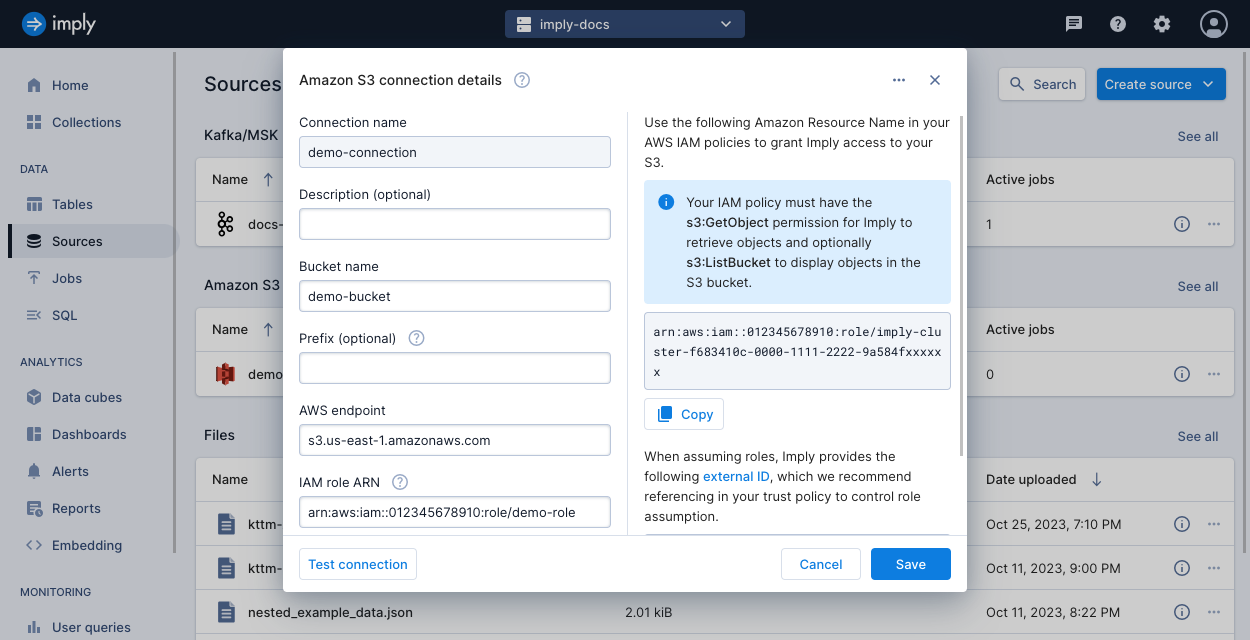
For more details on these fields, see S3 connection information.
Start an ingestion job
In this section, you create an ingestion job to add data from the S3 connection into a table in Polaris.
In this guide, Polaris automatically creates the table based on details in the job definition. For greater control on your table properties such as its partitioning or schema enforcement, create the table manually before starting your first ingestion job. For details, see Introduction to tables.
-
In Imply Polaris, go to Jobs > Create job > Insert data.
-
Click New table.
-
Enter a name for the table, and click Next.
-
Select the Amazon S3 source, then the connection name. Polaris lists the objects in the bucket that it has permissions to view based on the
ListBucketpolicy and the connection prefix.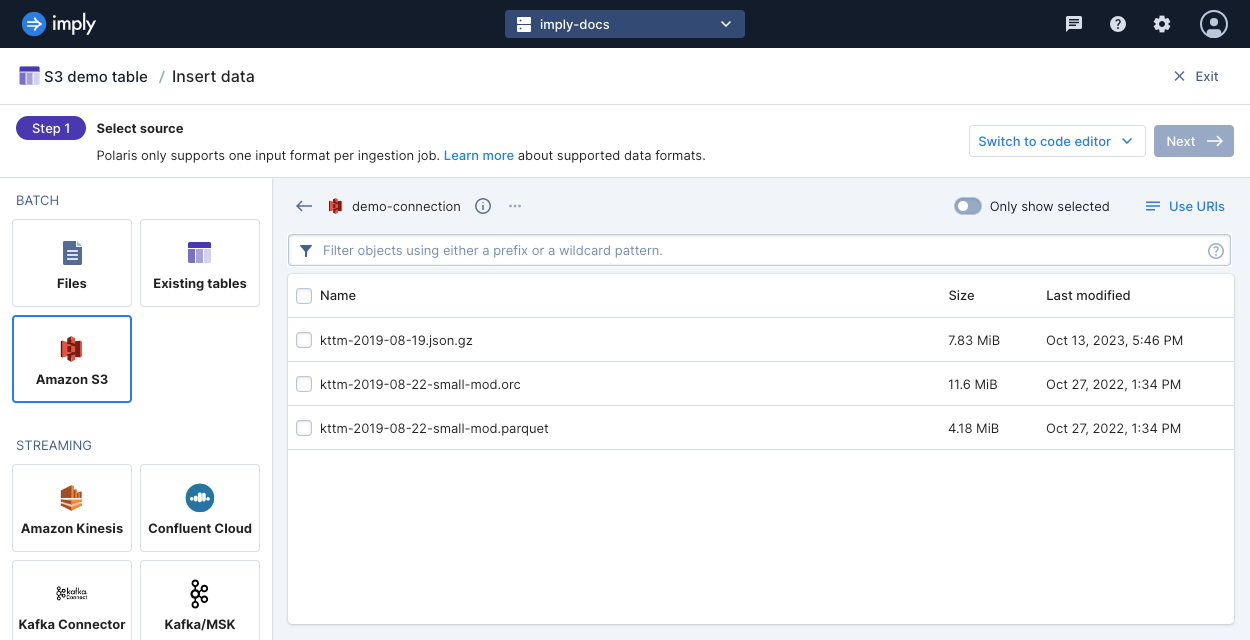
-
Select the file to ingest, then click Next.
-
Verify the input format and fields in the parsed data and click Continue.
-
Continue through the load data wizard and configure your ingestion job based on your data and use case.
-
Click Start ingestion to begin ingestion.
Learn more
See the following topics for more information:
- Connect to S3 for information on creating an Amazon S3 connection in the Polaris UI.
- Ingest data from S3 by API for information on using the Connections v1 API and the Jobs v1 API to ingest data from Amazon S3.