User management in Pivot
You use Imply Pivot user management features to create and authorize user accounts that are native to Pivot.
Alternatively, you can set up external authentication via LDAP or OIDC, and map user properties to Pivot roles and permissions.
This topic outlines how to manage roles, permissions, and users in Pivot.
Manage roles and permissions
Every user within Imply can belong to one or more roles. A role is a collection of permissions allocated to a user. Imply creates some roles by default but you can modify the set of roles to fit your specific use cases.
To manage roles:
Access Imply Pivot and click the user icon in the top right corner.
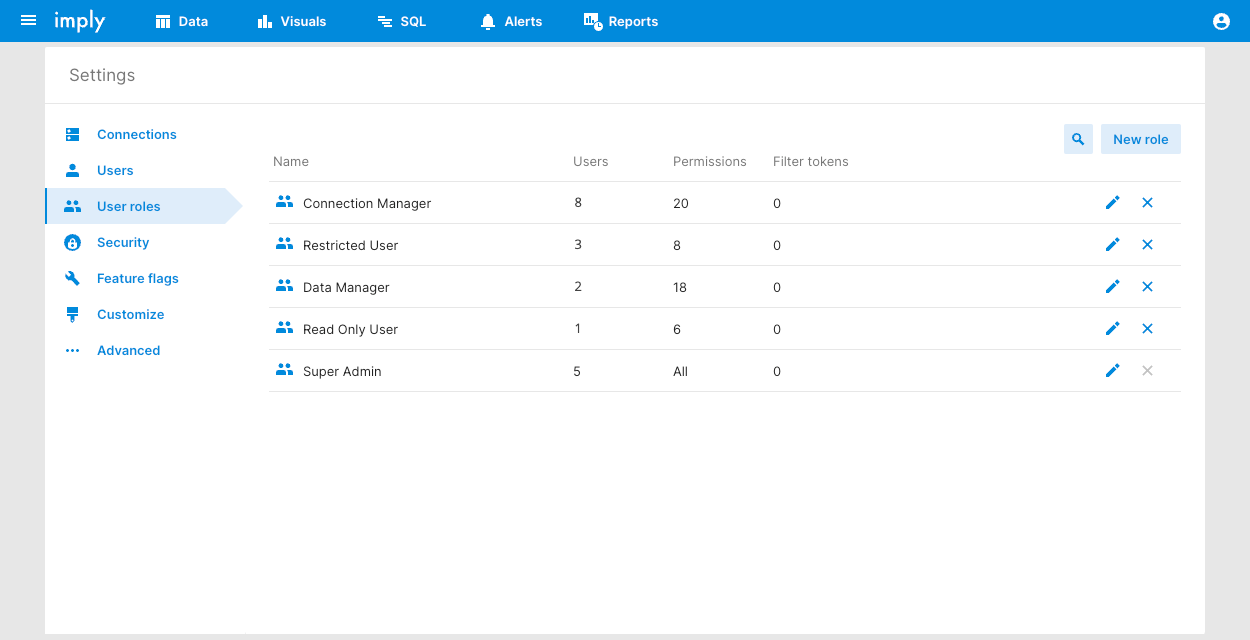
Click Settings > User roles.

Click New role to add a role.
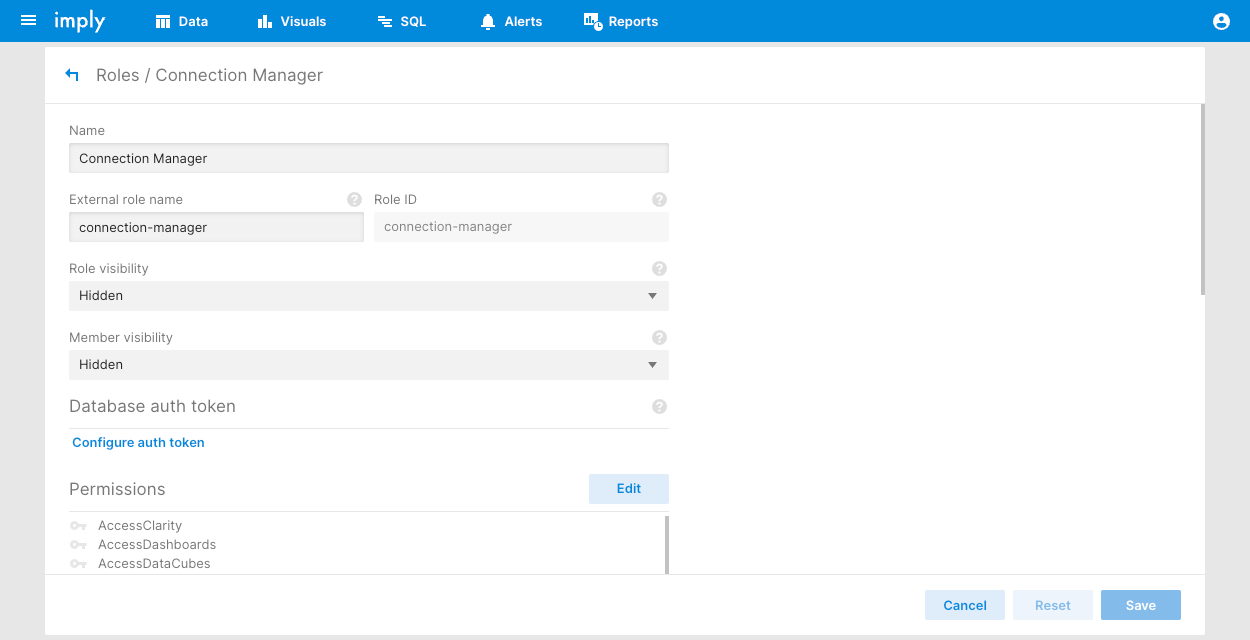
Click a role Name to edit it and assign permissions to it.
You can't edit the Super Admin role which permits all actions.
Complete the role properties as follows:
- Name: Name of the role.
- External role name: Name of the role in an external system that maps to this role. For example, an LDAP role.
- Role ID: ID of the role. Pivot assigns the role ID and you can't change it.
- Role visibility and Member visibility: Who can see the role and its members. See Role and member visibility for more information.
- Database auth token: Enable access to specific Druid data. See Database auth tokens for more information.
- Permissions: Permissions assigned to the role. See Permissions for a full list.
- Filter tokens: Apply a filter token to restrict access to row-level data. See Filter tokens for more information.
Permissions
The possible permissions, grouped by category, are as follows:
System permissions
AccessClarity: Access Imply Clarity.ConfigureLookAndFeel: Access the Customize tab in Settings to select a theme, logo, and colors for the UI.ManageApiTokens: Create and delete API tokens when API access is configured.ManageConnections: Manage database connections in Settings > Connections.SeeErrorMessages: View UI error notifications and receive error email messages for alerts and reports, in addition to system-related errors. An alert owner must have this permission for an alert to send errors by email or webhook.
User and roles permissions
ImpersonateUsers: Assume the settings and permissions of another user. Note that a user can't impersonate a user with more permissions.ManagePasswords: Reset user passwords.ManageUserRoles: Create, modify, and delete user roles. Note that users can't create or modify a role which grants more permissions than they possess.ManageUsers: Create, modify, and delete users. Note that users cannot create or modify a user to have more permissions than they have.ManageUserStates: Disable and lock user accounts.SeeOtherUsers: Takes precedence over role visibility controls. Users with this permission can see all roles and users in the system.
Datasource permissions
AccessDatasets: Access the Data tab.ManageDatasets: Access the Druid console.
Data cube and dashboard permissions
AccessVisualization: Access the Visuals tab.AdministerDashboards: View and manage all dashboards irrespective of their sharing and access configuration.AdministerDataCubes: View and manage all data cubes regardless of their sharing and access configuration.CreateDataCubes: Create and duplicate data cubes within the access granted via their individual configuration.CreateDataCubesFromSqlQuery:ChangeDataCubes: Modify and delete data cubes within the access granted via their individual configuration.ChangeDashboards: Create, modify, and delete dashboards within the access granted via their individual configuration.DownloadAsync: Download from a data cube using the async download feature.DownloadData: Download a limited number of rows (up to a configurable limit) for a data cube. The download limit is set to 5000 rows by default. For more information, see Download data.DownloadLargeData: Download an unlimited number of rows for a data cube. For more information, see Download data.FilterWithRegex: Use the regex filter for string dimensions.MonitorQueries: Monitor the database queries that Pivot data cubes and dashboards execute.QueryRawData: See the raw unaggregated data behind a data cube visualization. Note that this permission is independent from theAccessSQLpermission. A user withoutQueryRawDatacan still query raw data via the SQL tab if they have theAccessSQLpermission.
SQL query permissions
AccessSQL: Access the SQL tab. Note that users with SQL access can effectively perform arbitrary queries.AdministerSavedQueries: View and modify all saved SQL queries.
Alert permissions
AccessAlerts: Access the Alerts tab.AdministerAlerts: View and manage all alert configurations irrespective of their sharing and access configuration.ChangeAlerts: Create, modify, and delete alerts within the access granted via their individual configuration.CreateElevatedAlerts: Override the Minimum alert frequency and Minimum alert timeframe settings on a data cube. See Managing data cubes and Alerts for more information.ManageAlertsWebhooks: Configure alerts to send webhook notifications.
Report permissions
AccessScheduledReports: Access the Reports tab.AdministerScheduledReports: View and manage all report configurations regardless of their sharing and access configuration.ChangeScheduledReports: Create, modify, and delete reports within the access granted via their individual configuration.
Role and member visibility
When you create a role, you can define how the role and users assigned to the role appear when you're using access control lists to share Pivot assets such as data cubes, dashboards, alerts, and reports.
The Role visibility and Member visibility properties control this visibility. For each property, there are three options:
- Hidden: The role or its members are hidden from all access control lists.
- Visible to members of this role: The role or its members are only visible to other members of the role in access control lists.
- Visible to all users: The role or its members are visible in all access control lists.
The SeeOtherUsers permission takes precedence over role visibility controls. Users with this permission can see all roles and members.
Manage users
To manage users:
Access Imply Manager and click the user icon in the top right corner.
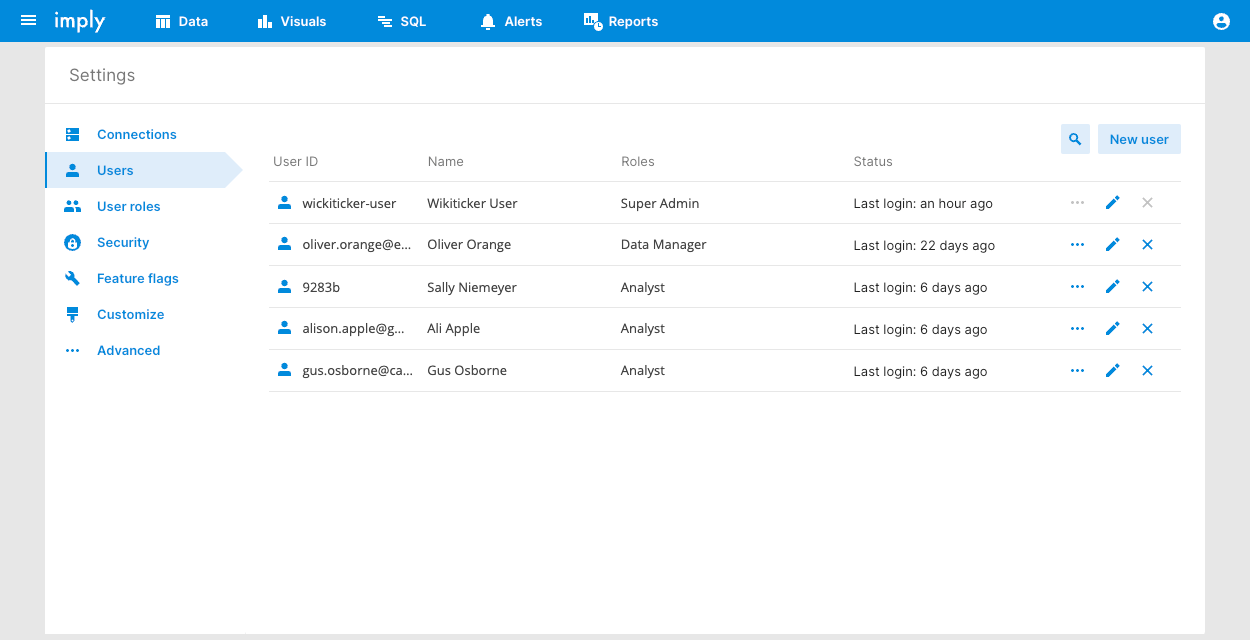
Click Settings > Users.

Click New user to add a user.
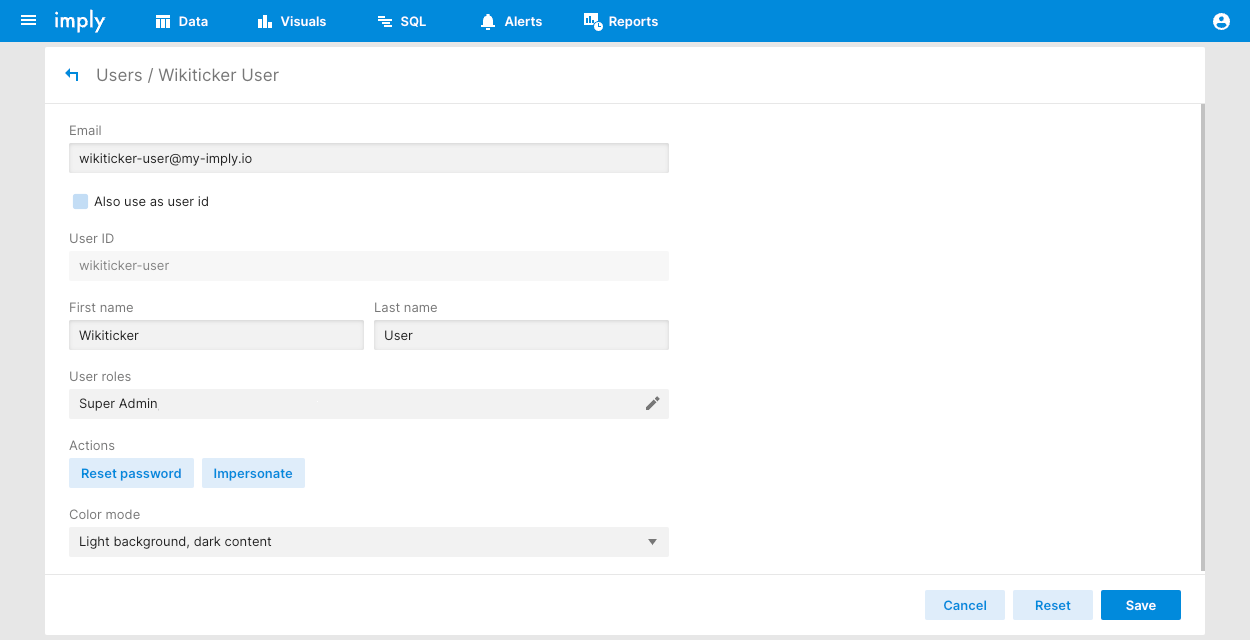
Click a user Name to edit it and assign roles to it, for example:

Complete the user properties as follows:
- Email: Email address of the user. You can opt to use the email address as the user ID.
- User ID: ID of the user. Unless you opt to use the email address, Pivot assigns the user ID and you can't change it.
- First name and Last name: Name of the user.
- Use roles: Roles to assign to the user.
- Color mode: Apply light or dark mode to the user. Light mode is the default.
Imply Enterprise Hybrid considerations
In Imply Enterprise Hybrid, you can edit roles and assign certain permissions to them. You can't edit the Super Admin role which permits all actions.
Permissions relevant to Enterprise Hybrid are as follows:
ManageUsers: Ability to create, modify, and delete all users.ManageClusters: Create and terminate clusters. Users without this permission see the Visuals interface after login.ManageDatasets: Ingest data, modify and delete datasets within Druid.AdministerDataCubes: View and modify data cubes regardless of their sharing and access configuration.AdministerDashboards: View and modify dashboards regardless of their sharing and access configuration.ChangeDataCubes: Create, modify, and delete data cubes within the access granted via their individual configuration.ChangeDashboards: Create, modify, and delete dashboards within the access granted via their individual configuration.AccessSQL: Access the SQL tab and perform queries.AccessVisualization: Access the Visuals tab.AccessDataset: Access the Data tab.