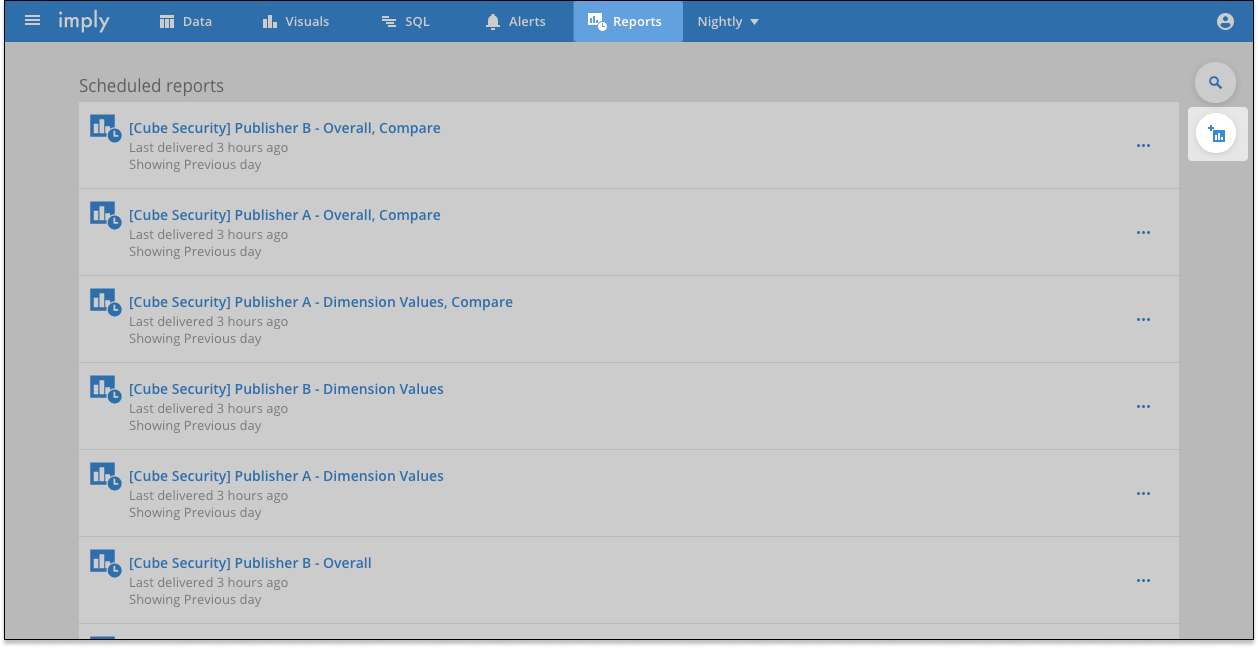
Scheduled reports
You can configure scheduled reports to be delivered regularly, either in your application or via email. Scheduled report configurations support all existing data export formats, such as CSV, JSON, and Excel for email attachments. Additionally, report configurations support email delivery to external, non-Pivot users.
Report access and setup
In on-prem deployments, you can access the scheduled reports feature during your free trial period. For commercial use, though, you must have a specially configured Pivot license to use scheduled reports. If you are unable to set up the correct permissions to manage this feature, contact an Imply representative.
You can control a user's ability to view, create, and administer report configurations using Pivot's role-based access control:
- You must have the
AdministerScheduledReportspermission to manage ownership of report configurations. - To configure report emails that have attachments, users also need permission to download or to export data.
To enable delivery options for scheduled reports, you must first set mailTransportOptions in your Pivot server configuration. See Pivot server config for details.
Create a report
To create a new scheduled report:
On the home page, click Reports in the top navigation bar.
Click Create scheduled report:
Complete the following fields:
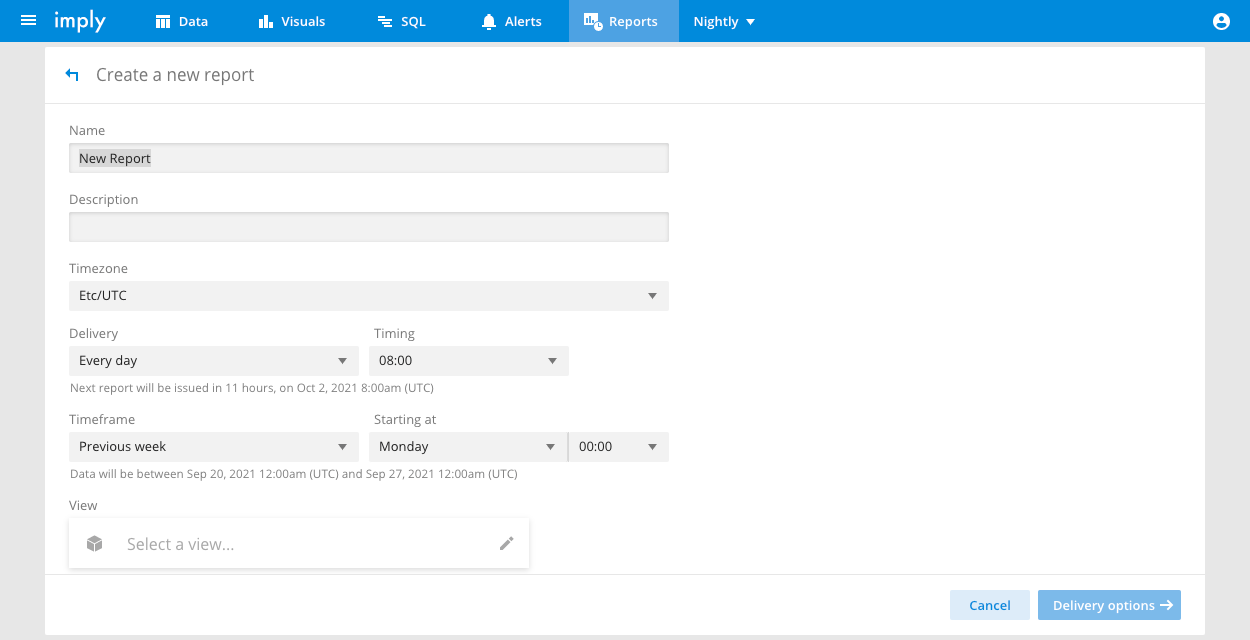
Descriptions of these fields appear below:
Field Description Name Enter a name or title for your report. Description Optionally, enter a description for your report. Timezone Select the timezone for your report's delivery. Delivery Select how often you want to receive your report. Timing Select when you want your report to be delivered. Timeframe Select the timeframe you want your report to cover. View Select the data cube you want your report to cover. Click Set up view.
Create a view for your report.
Click Continue.
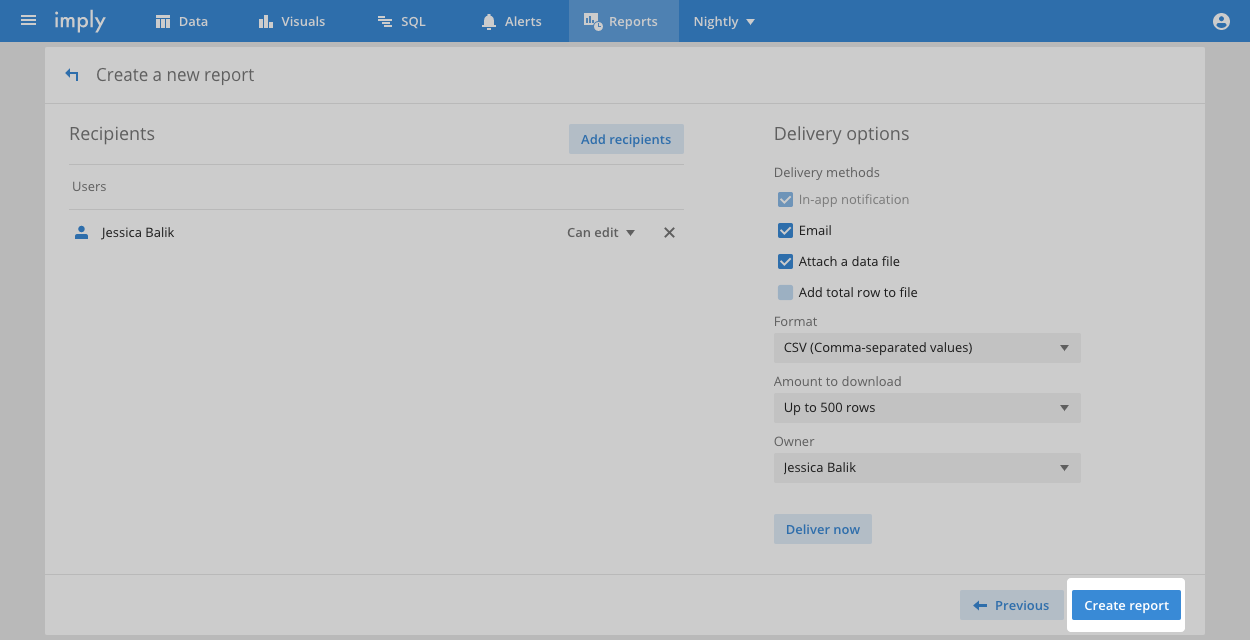
Click Delivery options:
- You can add both Pivot users and external email addresses as recipients of the report. You can also add Pivot users either as viewers or as editors. Editors can modify the report's configurations.
- Under Delivery options, you can configure how report instances are sent and the content they contain.
- Report instances always appear in the reports feed ("In-app notification").
- You can also send reports via email. In an on-prem deployment, You must configure Pivot to send emails.
- Optionally, you can attach a data file in CSV, TSV, XLSX, or JSON format. Enabling Add total row to file adds a line to the attachment that shows an overall total. You can't apply this option to JSON format attachments.
- Click Create report:
Reports and restricted data cube access
The following restricted access methods apply to reports:
- Reports configured against data cubes with PII masks or subset filters properly apply these filters to any generated report data.
- Reports configured against data cubes using filter tokens apply the report creator's filter token expression to all data.
Custom email delivery
If you configure your report for email delivery, you can also customize its email template by adding an entry in the emailTemplates block named reports:
emailTemplates:
  - name: 'reports'
    subject: '${title}',
    html: |
      <html>
      <head/>
      <body>
        <h2>${title}</h2>
        <dl>
          <dt>Description</dt>
          <dd>${description}</dd>

          <dt>Time frame</dt>
          <dd>${timeFrame}</dd>

          <dt>Filters</dt>
          <dd>${filter}</dd>
        </dl>
        <p>
          <a href="${link}">Open interactive report</a>
        </p>
        <p>
          ${data}
        </p>
      </html>
You can use the following interpolation properties in the email's subject and body:
| Property | Description |
|---|---|
| title | The report's title |
| description | The report's description |
| timeFrame | The time window for the report data |
| filter | The data cube filters applied to the report data |
| data | A preview of the report data rendered as an HTML table |
| link | A link to a Pivot data cube view for the report instance. This requires the linkHostName config setting to be configured |
Report error notifications
Users with the SeeErrorMessages permission can view report errors in the UI and receive email messages related to report errors. See User management in Pivot for more information.