Load Hadoop data via Google Dataproc
This topic describes the steps to set up Hadoop batch indexing for an Imply cluster running on Google Kubernetes Engine (GKE) with Google Dataproc.
The processes outlined in this topic use Imply 2023.07, Google Dataproc 2.0, and Hadoop 3.3.3. For the most recent instructions for Dataproc, see the Dataproc documentation.
Find your Imply Manager pod name
You need your Imply Manager pod name to copy the Dataproc configuration files to Imply in a later step. To locate it:
-
Go to your Google Cloud dashboard and navigate to Kubernetes Clusters.
-
Click the name of your cluster.
-
Open the Google Cloud shell terminal and run the following command to find the Manager pod name, for example
imply-default-manager-xxxxx-yyyy.kubectl get pods -
Make a note of the Imply Manager pod name.
Create or configure your Dataproc cluster
If you already have a Dataproc cluster, go to Copy configuration files. To create a Dataproc cluster, follow these steps:
-
In the Google Cloud dashboard, click Clusters in the left pane.
-
Open the Google Cloud shell terminal and run the following command to create a cluster. Replace
cluster-namewith the name of the cluster,region-namewith the region andXwith the number of worker nodes that you want to run in the cluster.gcloud dataproc clusters create cluster-name --region-region_name --num-workers=XFor example:
gcloud dataproc clusters create test-dataproc --region-us-central1 --num-workers=2 -
Once Google creates the cluster, it appears in the cluster list in the console. Google creates the cluster with a default bucket.
You can specify a bucket when you create the cluster, or update it later. See
gcloud dataproc clustersin the Google command reference for more information.
You must enable connectivity between your Imply GKE cluster and your Dataproc cluster. You can achieve this if they are both in the same Virtual Private Cloud (VPC)—this allows for internal IP-based communication. Ensure that your firewall rules for both GKE and Dataproc allow the necessary traffic.
Copy configuration files
To copy configuration files from your Dataproc cluster to your Imply cluster:
-
In the Google Cloud console, click the name of your Dataproc cluster.
-
Click VM instances.
-
Click the name of the master instance, for example test-dataproc-m.
-
Click CONNECT TO SERIAL CONSOLE.
-
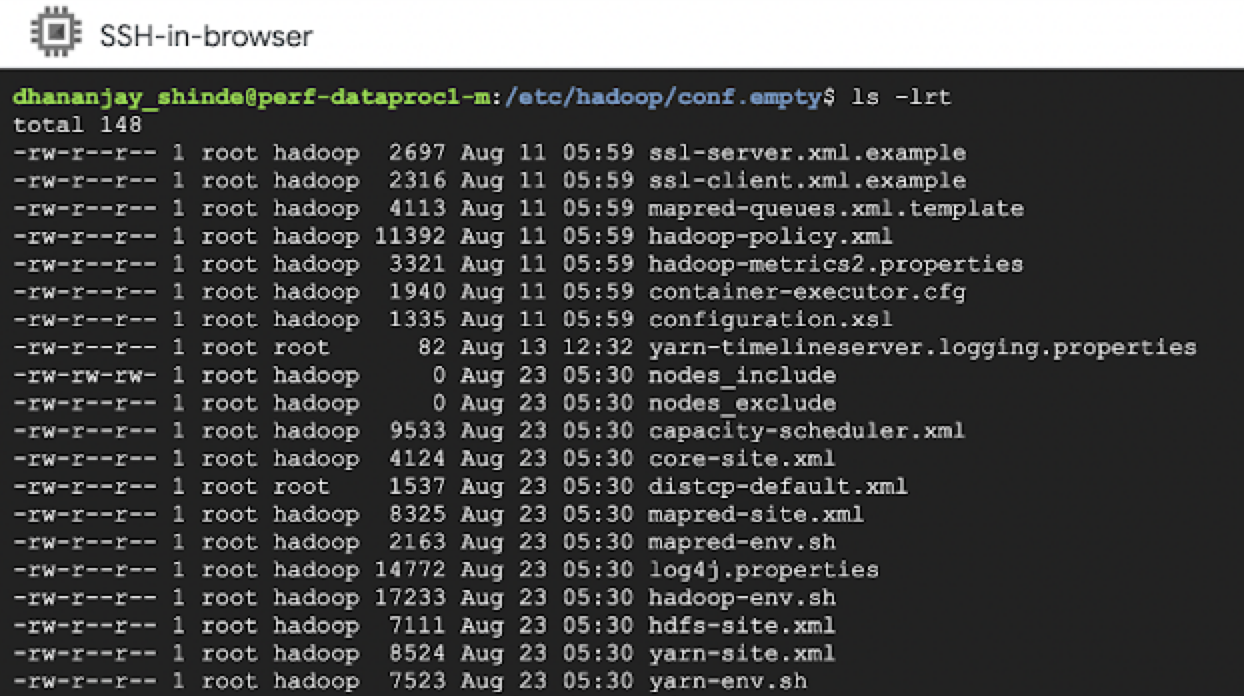
Navigate to
/etc/hadoop/confand list the contents, for example:
Copy the following configuration files to your Imply Manager:
hdfs-site.xmlmapred-site.xmlyarn-site.xmlcore-site.xml
-
Run the following command to copy the files, using the Imply Manager pod name you saved earlier. You can find your Dataproc cluster Zone in the Google Cloud console:
gcloud compute scp dataproc-master:/path/to/source/files/file-name imply-manager-podname:~/ --zone=ZONEFor example:
gcloud compute scp dataproc-master:/etc/hadoop/conf/core-site.xml imply-default-manager-xxxxx-yyyy:/mnt/var/user/ --zone=us-central1 -
Run the following command to copy the
gcs-connector.jarfile to your Imply Manager:gcloud compute scp dataproc-master:/usr/local/share/google/dataproc/lib/gcs-connector.jar imply-manager-podname:~/ --zone=ZONEFor example:
gcloud compute scp dataproc-master:/usr/local/share/google/dataproc/lib/gcs-connector.jar imply-default-manager-xxxxx-yyyy:/mnt/var/user/ --zone=us-central1
Note that you could copy the configuration files to a VM as an intermediary step, then copy them from the VM to Imply Manager. This saves you from connecting to the Dataproc master instance again if you want to use the files to configure another Imply cluster.
Configure your Imply GKE cluster
To configure your Imply GKE cluster for Hadoop batch ingesting, follow these steps:
-
In the Imply console, locate your cluster and click Manage.
-
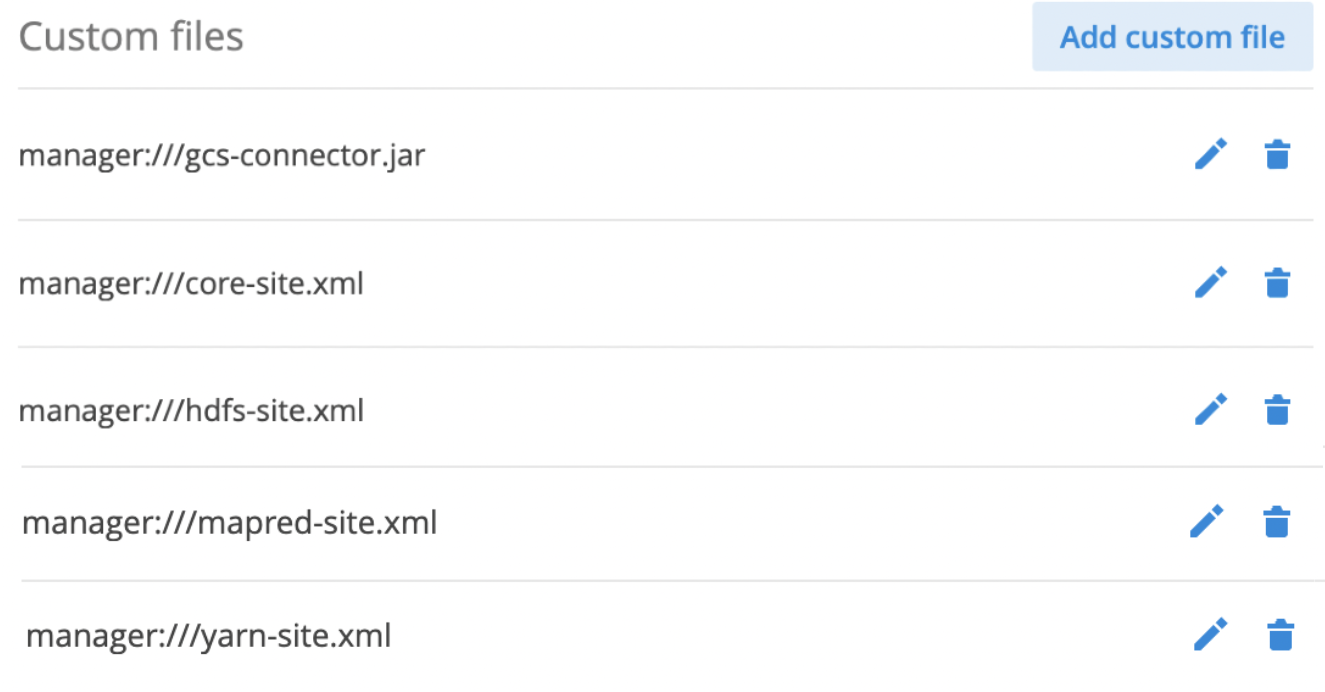
Under Custom files, click Add custom file and add the five files you copied earlier:

Sample Hadoop indexing job
The following example demonstrates how to specify the Hadoop configuration in the jobProperties object of the indexing spec.
-
In the Imply GKE Manager cluster view, click Load data.
-
Select Batch > Other.
-
Use the following template to define your indexing spec. Change the
dataSourceandintervalsand update theioConfig.inputSpec.pathsto point to your input file. Update any other relevant fields to match your data.
Click to see ingestion spec template
 {
  "type": "index_hadoop",
  "spec": {
    "dataSchema": {
      "dataSource": "MY_DATASOURCE",
      "timestampSpec": null,
      "dimensionsSpec": null,
      "metricsSpec": [
      {
        "type": "count",
        "name": "added"
      }
    ],
      "granularitySpec": {
        "type": "uniform",
        "segmentGranularity": "DAY",
        "queryGranularity": {
          "type": "none"
        },
        "rollup": true,
        "intervals": ["MY_INTERVAL_EXAMPLE_2017-01-01/2018-01-01"]
      },
      "transformSpec": {
        "filter": null,
        "transforms": []
      },
      "parser": {
        "type": "hadoopyString",
        "parseSpec": {
          "format": "json",
          "timestampSpec": {
            "column": "currentTime",
            "format": "auto"
          },
          "dimensionsSpec": {
            "dimensions": [
              "app_name_id",
              "country",
              "direction_change"
            ]
          }
        }
      }
    },
    "ioConfig": {
      "type": "hadoop",
      "inputSpec": {
        "type": "static",
        "paths": "gs://bucket/path/MY_FILE.json"
      },
      "metadataUpdateSpec": null,
      "segmentOutputPath": null
    },
    "tuningConfig": {
      "type": "hadoop",
      "workingPath": null,
      "partitionsSpec": {
        "type": "hashed",
        "numShards": null,
        "partitionDimensions": [],
        "partitionFunction": "murmur3_32_abs",
        "maxRowsPerSegment": 20000
      },
      "shardSpecs": {},
      "indexSpec": {
        "bitmap": {
          "type": "roaring"
        },
        "dimensionCompression": "lz4",
        "stringDictionaryEncoding": {
          "type": "utf8"
        },
        "metricCompression": "lz4",
        "longEncoding": "longs"
      },
      "indexSpecForIntermediatePersists": {
        "bitmap": {
          "type": "roaring"
        },
        "dimensionCompression": "lz4",
        "stringDictionaryEncoding": {
          "type": "utf8"
        },
        "metricCompression": "lz4",
        "longEncoding": "longs"
      },
      "appendableIndexSpec": {
        "type": "onheap",
        "preserveExistingMetrics": false
      },
      "maxRowsInMemory": 500000,
      "maxBytesInMemory": 0,
      "leaveIntermediate": false,
      "cleanupOnFailure": true,
      "overwriteFiles": false,
      "ignoreInvalidRows": false,
      "jobProperties": {
        "mapreduce.job.classloader": "true",
        "mapreduce.job.classloader.system.classes": "-javax.el.,org.apache.commons.logging.,org.apache.log4j.,org.apache.hadoop.,com.google.cloud.hadoop.fs.gcs.",
        "mapreduce.framework.name": "yarn"
      },
      "combineText": false,
      "useCombiner": false,
      "numBackgroundPersistThreads": 0,
      "forceExtendableShardSpecs": false,
      "useExplicitVersion": false,
      "allowedHadoopPrefix": [],
      "logParseExceptions": false,
      "maxParseExceptions": 0,
      "useYarnRMJobStatusFallback": true,
      "awaitSegmentAvailabilityTimeoutMillis": 0
    },
    "context": {
      "forceTimeChunkLock": true,
      "useLineageBasedSegmentAllocation": true
    }
  },
  "hadoopDependencyCoordinates": null,
  "classpathPrefix": null,
  "context": {
    "forceTimeChunkLock": true,
    "useLineageBasedSegmentAllocation": true
   }
 }