Schema auto-discovery on ingestion jobs
When you ingest data into Imply Polaris, Polaris can automatically detect the schema of the input fields of your source data. Unless you specify otherwise, Polaris ingests the input fields into dimensions with the same names and data types. This is known as schema auto-discovery for ingestion jobs. A long-running streaming ingestion job automatically detects new input fields and ingests them into the table as events get consumed or published from the event stream.
Prerequisites
You can use schema auto-discovery when the following conditions hold:
- The source of ingested data comes from an event stream.
- The target of the ingestion job has a flexible schema mode. If you do not create a table before ingestion, Polaris automatically creates a new table in flexible mode. For more details, see Create a table.
The target table may either be detail or aggregate.
Required mappings
While not required for schema auto-discovery for jobs, you still need to define the input fields and mappings in the following situations:
- When you specify the input and mapping for the primary timestamp,
__time. - When you change the name or data type of the input field.
- When you apply a transformation to the input field.
- When you apply an aggregation function to an input field. The output of the aggregation defined in the ingestion job maps to a measure in an aggregate table.
A mapping can only refer to fields declared in the ingestion job's input schema. It cannot refer to other mappings or to auto-discovered fields that are not declared.
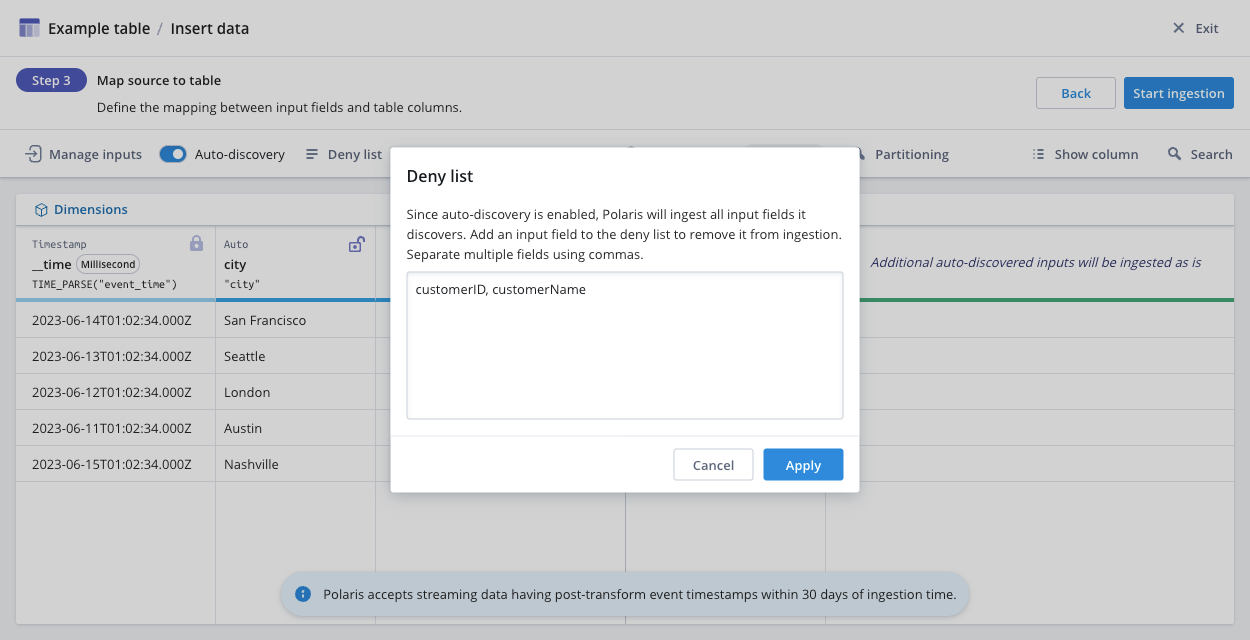
Deny list
There may be columns in your input data that you do not plan to query.
You can exclude input fields from ingestion by adding them to the deny list.
You may also want to add the date column that gets mapped to __time to avoid ingesting that input field twice.
Access the deny list on the Map source to table stage of ingestion:
When creating a job using the API, exclude input fields using dimensionExclusions.
You cannot update a job to update its deny list. To make changes to the deny list, cancel the ingestion job and submit a new one with the updated list.
Polaris updates the deny list when you take any of the following actions:
- Remove a column during the Map source to table stage of the ingestion wizard.
- Rename an input field. For example, if you rename
columnAtocolumnB, Polaris automatically addscolumnAto the deny list. If you intend to ingest bothcolumnAandcolumnBas their own separate columns, removecolumnAfrom the deny list.
Example
This example shows how schema auto-discovery works for streaming ingestion jobs. You should already be familiar with how to create tables and ingestion jobs.
This example assumes you have a working streaming source, such as from Confluent Cloud or Amazon Kinesis. For details on creating streaming connections, see Create a connection.
-
Create a table in Flexible schema mode. Fill in the table name and select a table type. In this example, the table name is
Example table, and the table type is set to Aggregate. -
In the table view, click Load data > Insert data.
-
In the Select source step, select your streaming source. Click Next.
-
In the Parse data stage, select the input format of your data. Click Continue.
-
In the Map source to table stage, Polaris displays the data types of auto-discovered dimensions as Auto.
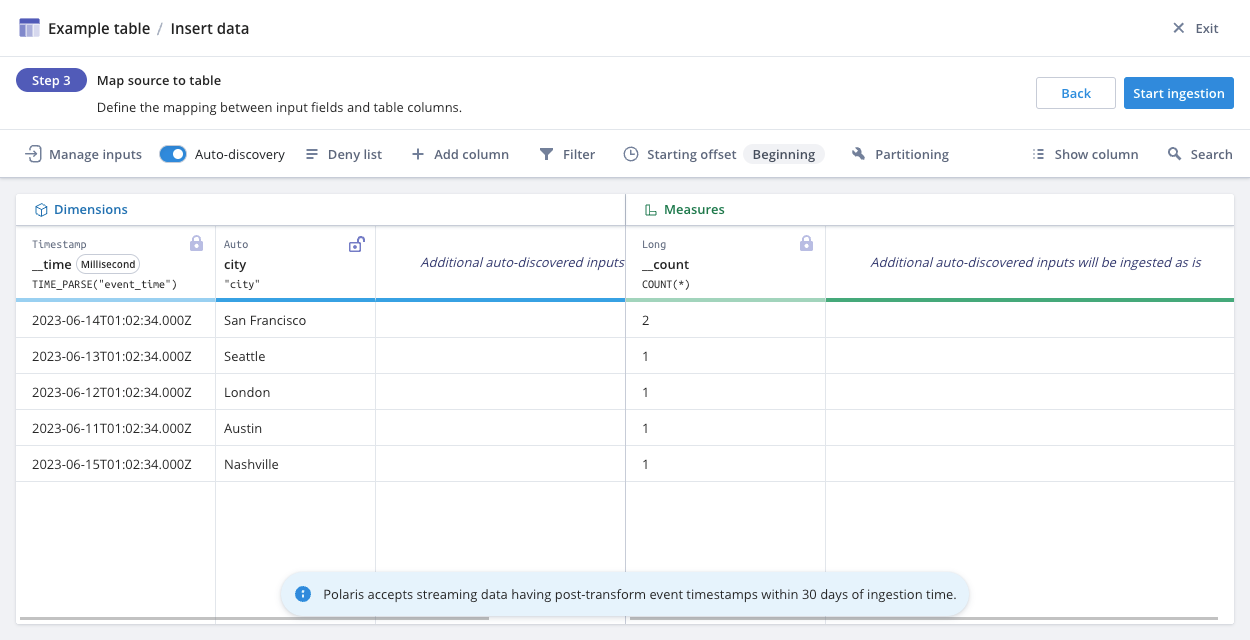
To add a new column, select Add column from the menu bar. Select Dimension or Measure, then define the column's name and input expression.
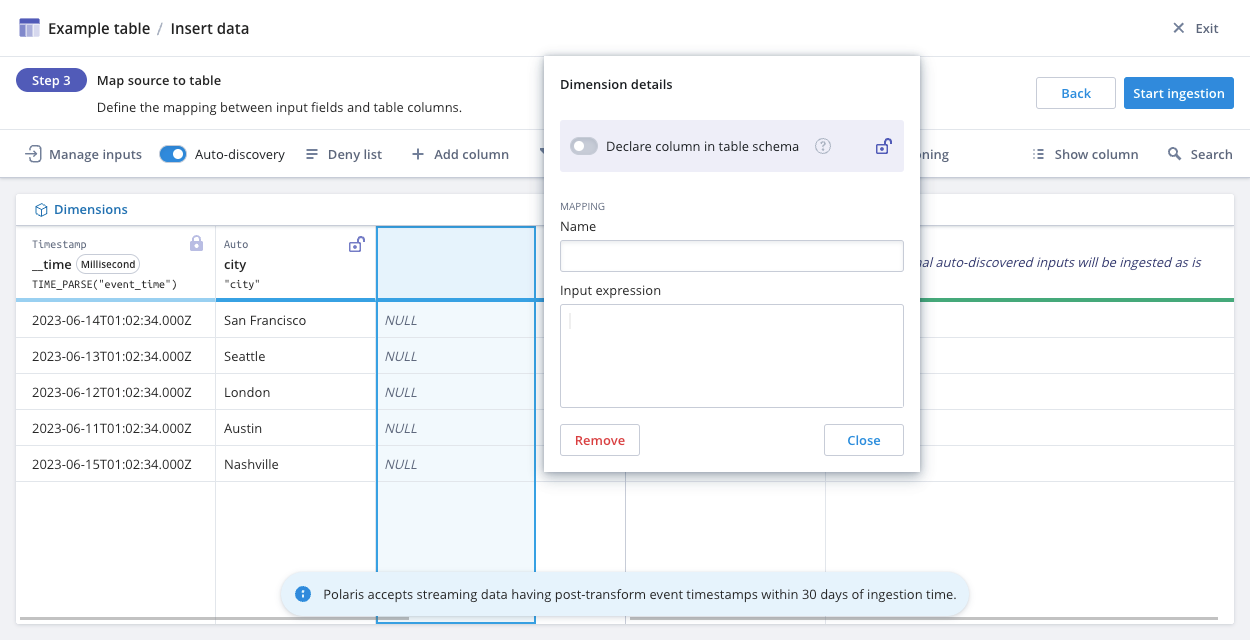
If the input expression references an input field that hasn't been defined, Polaris displays a dialog for you to add the input field.

Auto-discovered dimensions are undeclared and may change data type as more data is ingested. To enforce a strict schema for a certain column, select the toggle to Declare column in table schema. Declared columns display the declared data type in the column header. For information about declaring columns in a flexible table, see Flexible table.

-
Click Start ingestion to begin the ingestion job.
Learn more
See the following topics for more information:
- Create a streaming ingestion job by API for an example of how to enable schema auto-discovery using the Polaris API.
- Create an ingestion job for more details on ingestion jobs.
- Introduction to tables to learn about flexible tables.
- Streaming ingestion for streaming ingestion sources.