Replace data
If you want to make changes to existing data stored in an Imply Polaris table, you can replace the data for a specified time interval or all the data.
There is no option to update or replace by row in Polaris.
This topic covers the concepts of data replacement and how to use the Polaris UI to replace data. For information on how to replace data with the API, refer to Jobs v1 API.
Prerequisites
To replace data, you need the ManageTables and ManageIngestionJobs permissions. These permissions are assigned to the Organization Admin, Project Admin, and Data Manager groups by default.
For information on permissions, see Permissions reference.
How replacing data works
The process for replacing all data in a table is the same as replacing day by interval except you don't have to specify a time interval.
Replacing data for a table in Polaris works similarly to batch ingestion for data, except that it applies to a specific time range for the data set.
When you replace data:
- Polaris updates only the rows specified by the time interval.
- Any data outside the time interval within your table remains unaffected.
- Polaris discards any data from your source that lies outside the time interval for the replacement.
To replace all data within a table, you can specify an interval that covers the table's entire time range.
From the Polaris UI, choose Replace data from the ellipsis menu (...) on the table details page to launch an ingestion job to replace data for your table.
Set a replacement time interval
Polaris lets you specify the start time and the end time of the interval to replace. Polaris automatically adds the time interval you specify for replacing existing data to filter your source data.
The time granularity for the replacement interval depends on the time partitioning setting for the table, such as the default "day" granularity.
The replacement time interval must have a span coarser than the table’s time partitioning. For example, if a table has a time partitioning of day, you cannot specify an eight hour interval such as 2022-06-01T00:00:00Z/2022-06-01T08:00:00Z; however, you can specify an eight day interval such as 2022-06-01/2022-06-09.
Polaris replaces all data in the interval, including the From date and excluding the To date. The UI shows you the exact time range of the data affected by the replace data operation, for example: "Replacing data from 08/19/2019 T00:00:00 up to 08/21/2019 T00:00:00."
View and modify schema mapping
After you choose a source file, Polaris samples your source data and automatically maps columns from your source data to existing columns in your table when it detects matching column names. You can see the automatic mapping on the Design schema page. For example, Polaris adds columns from the source data that were not previously in the schema.
You can modify or delete any fields as necessary for the schema. The schema changes in ingestion jobs to replace data do not affect the rows outside the time interval.
For existing rows in your table outside the interval to replace, the value for any new columns is null.
Example
Imagine you are working with the clickstream data in the "Koalas to the Max" table from the Quickstart. This example shows you how to replace the existing data with the same data set, but with an additional column "geocode" that you can use to set up a Geo dimension type in a data cube.
Download kttm-replace.json.tar.gz for use in the following example.
The "Koalas to the Max" table from the Quickstart contains clickstream data for two days: 2019-08-19 and 2019-08-20. The following steps guide you through replacing all data within the table.
Navigate to the "Koalas to the Max" table you created in the Quickstart. Note that there are 29 columns in the table.
Click Load data > Replace data.
Select Replace data by time interval and confirm your choice.
If you select Replace all data, you don't have to specify a time interval.
Specify a time interval:
- For the From date, enter the year, month, and day:
2019 08 19. - For the To date, enter the year, month, and day:
2019 08 21. Note that the Polaris UI displays the time interval to replace: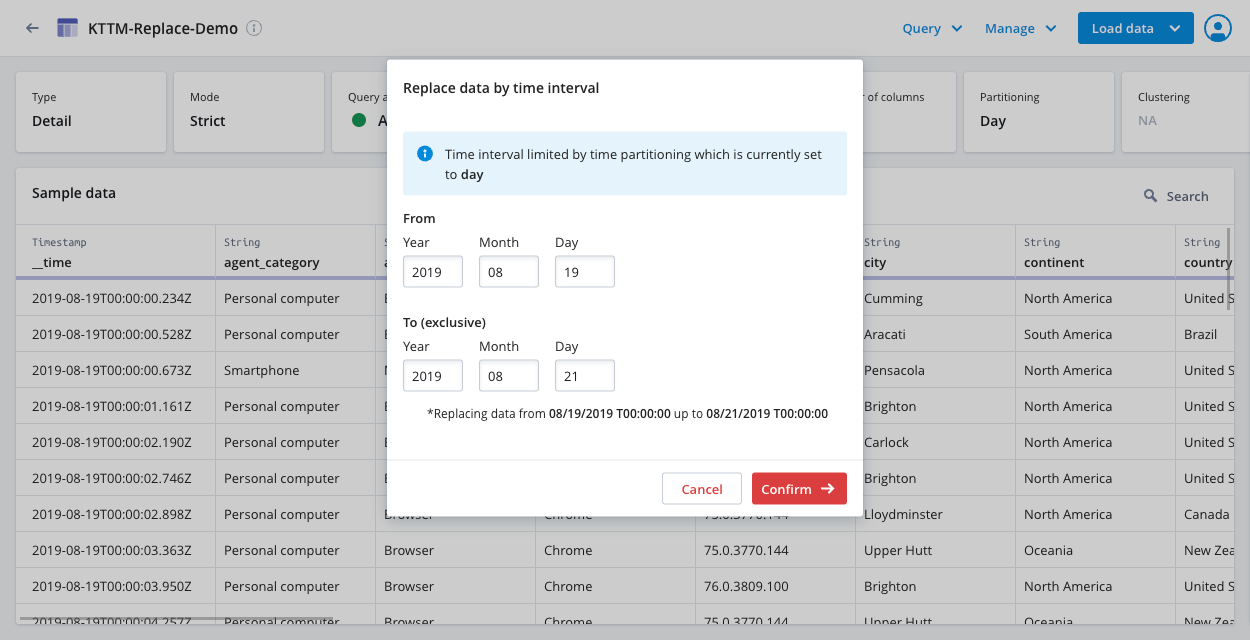
- For the From date, enter the year, month, and day:
Click Confirm to confirm your choice.
Click Confirm on the confirmation dialog to reconfirm you want to replace data.
On the Select source page, click Files > Upload files from your computer and choose the file you downloaded earlier:
kttm-replace.json.tar.gz.Once the file is uploaded, click Next.
Click Continue to skip through the Parse data page.
On the Map source to table page, look for the column named
geocode: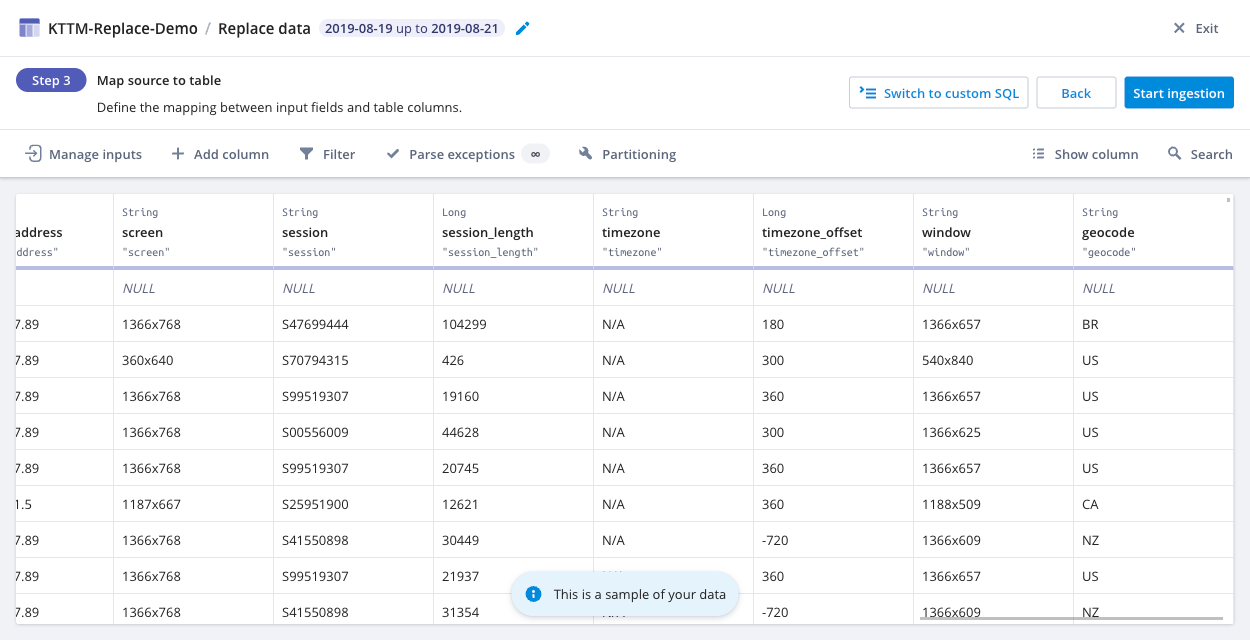 For the sake of the example, accept the schema changes as presented in Polaris.
When working with your own data, you may want to add or remove columns as needed.
For the sake of the example, accept the schema changes as presented in Polaris.
When working with your own data, you may want to add or remove columns as needed.Click Start ingestion. When your ingestion job completes, you can see that there are now 30 columns and all rows have a value for the "geocode" column.
Learn more
See the following topics for more information:
- Polaris quickstart for a walk-through of batch ingestion.
- Replace data by API for how to use the Polaris API to replace data.