Imply Polaris on Microsoft Azure
You can deploy Imply Polaris projects on Microsoft Azure for seamless integration with Azure services and infrastructure.
For supported ingestion sources, see Batch ingestion and Streaming ingestion.
Azure Marketplace
You can sign up for a Polaris account directly on Polaris or through Azure Marketplace to take advantage of integrated billing.
When you sign up for Polaris through Azure Marketplace, Microsoft bills you directly and lists Polaris charges as a line item on your invoice. For more information, see Overview of billing and invoicing for marketplace customers in the Azure documentation.
This section describes how to sign up for a Polaris account through Azure Marketplace. To sign up directly on Polaris, follow the steps in the Quickstart.
The screen captures and instructions in this section show the configurations for Microsoft Azure in June 2024. They may not reflect the current state of the product.
Prerequisites
Before you sign up for a Polaris account through Azure Marketplace, make sure you have:
- An active Azure account and subscription.
- Sufficient permissions to subscribe to Azure Marketplace services.
Sign up through Azure Marketplace
Follow these steps to sign up for a Polaris account through Azure Marketplace. For information about SaaS resource management in the Azure portal, see Azure documentation on SaaS subscription lifecycle management.
- Log in to the Azure portal and go to Marketplace.
- Search for "Imply Polaris" and click the Imply Polaris tile.
- On the Imply Polaris page, click Plans + Pricing.
- Select the plan you want to subscribe to and click Subscribe. See Polaris plans for more information.
- Select a Subscription and Resource group to manage deployed resources.
- Enter a Name for your SaaS subscription to easily identify it later. The name can contain only letters, numbers, and
-_.()characters. It must be between 1 and 64 characters and not end with a period.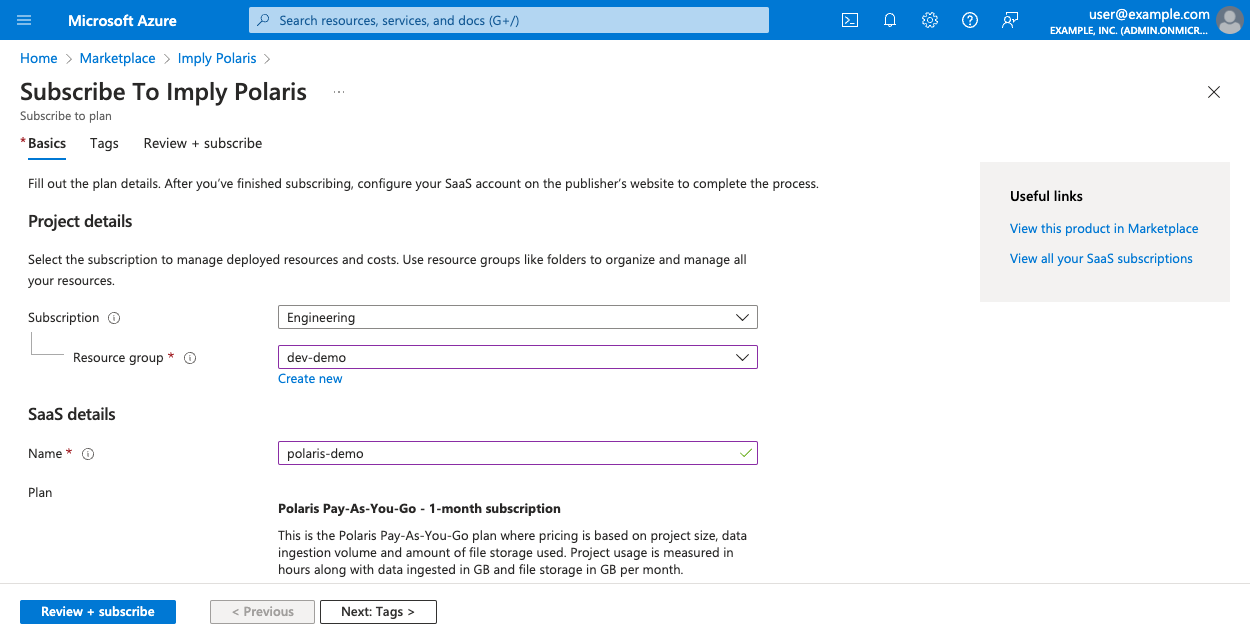
- Configure Recurring billing. When recurring billing is on, your subscription automatically renews at the end of the billing term.
- Tags are optional. To enter tags, click Next: Tags>. For more information, see Use tags to organize your Azure resources and management hierarchy in the Azure documentation.
- Click Review + subscribe.
- Review the terms of use and click Subscribe.
- Once resource validation completes, you should see the Subscription progress page. Click Configure account now.

- This takes you to the Terms and Conditions page for Imply. Review the terms and conditions and click Accept.
- Complete setting up your subscription in Imply.
- Click Sign up and link to Azure.
You will receive two emails from Polaris: one asking you to verify your email and another one welcoming you to Polaris. Follow the link in the welcome email to log in to your Polaris organization. From here, you can create your first project in Polaris.
Note that you can also access your organization through the resource created in the Azure portal.
Learn more
See the following topics for more information:
- Create and manage projects for managing projects in the Polaris UI.
- Azure regions for supported Azure regions.
- Guide for Azure Blob Storage ingestion for an end-to-end guide to Azure Blob Storage ingestion in Polaris.
- Guide for Apache Kafka on Azure Event Hubs ingestion for an end-to-end guide to Azure Event hubs ingestion in Polaris.
- Azure networking options for private networking options between Azure and Polaris.
- Known limitations for information about Polaris product limitations.