Create an ingestion job
In Imply Polaris, you can launch an ingestion job to load data into a table. Within your ingestion job, select the source of data, specify the destination table, and map the input fields from the source to the table columns. You can use the Polaris UI or the Jobs v1 API to launch and manage ingestion jobs. If the input schema is different from the table schema, you can transform input data while mapping input fields to table columns during ingestion.
This topic covers the basics of ingestion job creation and the options for transforming source data in the Polaris UI. For information on launching ingestion jobs programmatically, see Create an ingestion job by API. To use SQL to define your batch ingestion job, see Ingest using SQL. See Manage ingestion jobs for details on viewing, canceling, and recreating ingestion jobs.
Billing for ingestion
Polaris operates on a consumption-based pricing model based on processed bytes. See Billing: Data ingestion for details on the data ingestion billing tiers.
Prerequisites
Users with the ManageIngestionJobs permission and members of the Organization Admin, Project Admin, or Data Manager groups can create ingestion jobs. For information on permissions, see Permissions reference.
Ingest data
To launch an ingestion job from the Polaris console, do the following:
If you haven't already, create a new data source. See Ingestion sources for information on the available sources and their requirements. See Create a connection for information on how to create a connection.
From the Jobs tab, select Create job > Insert data. Select the table to ingest data into. If the table doesn’t exist, click New table and provide the name of the table. Polaris determines the appropriate table type and schema mode from the ingestion job. For more details, see Create a table.
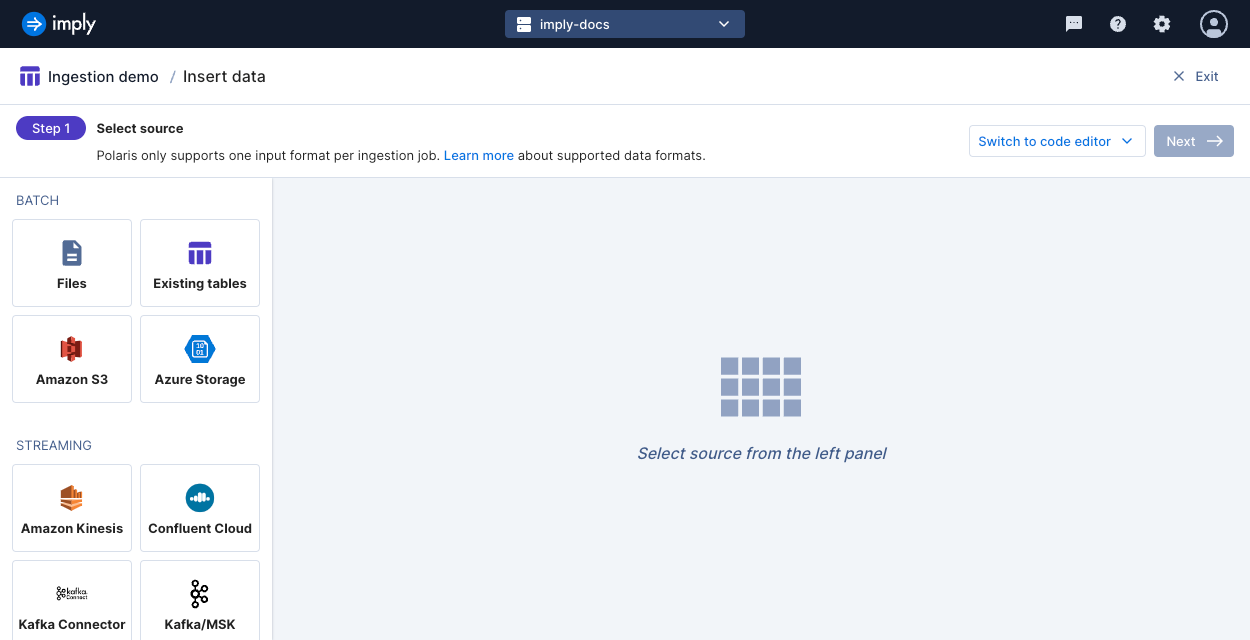
Select the source of data for ingestion, then click Next.
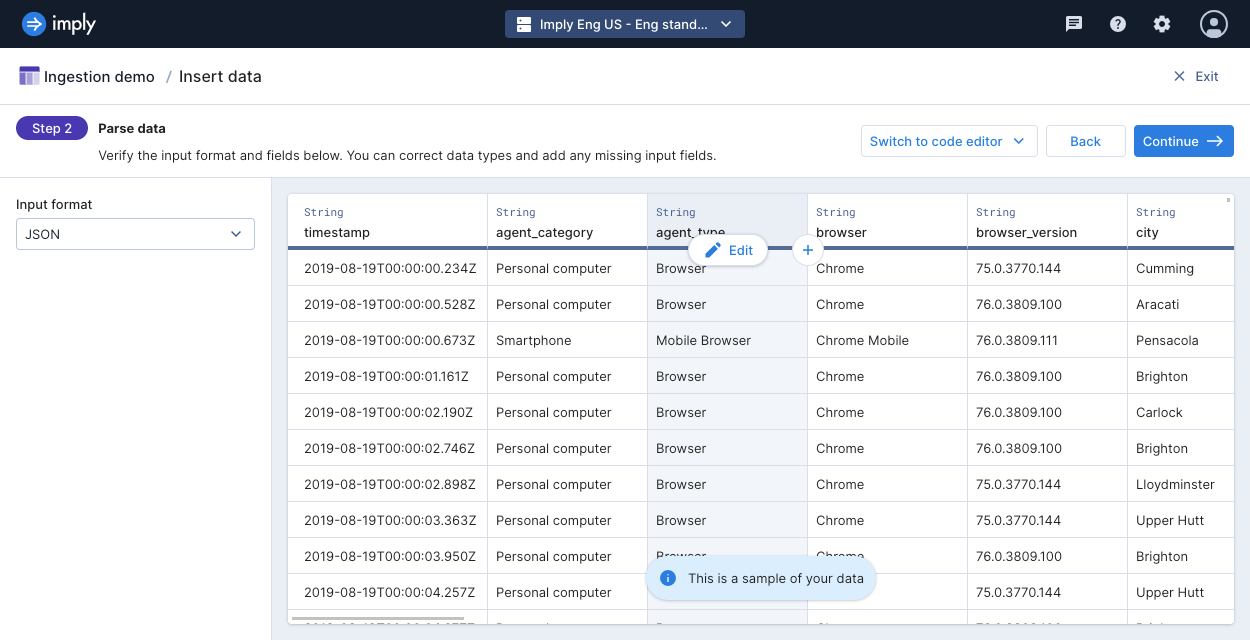
Polaris parses your data and displays a sample output. You can correct data types, add missing input fields, or remove unnecessary fields. You can configure how Polaris parses delimiter-separated or nested data in this stage. Then click Continue.
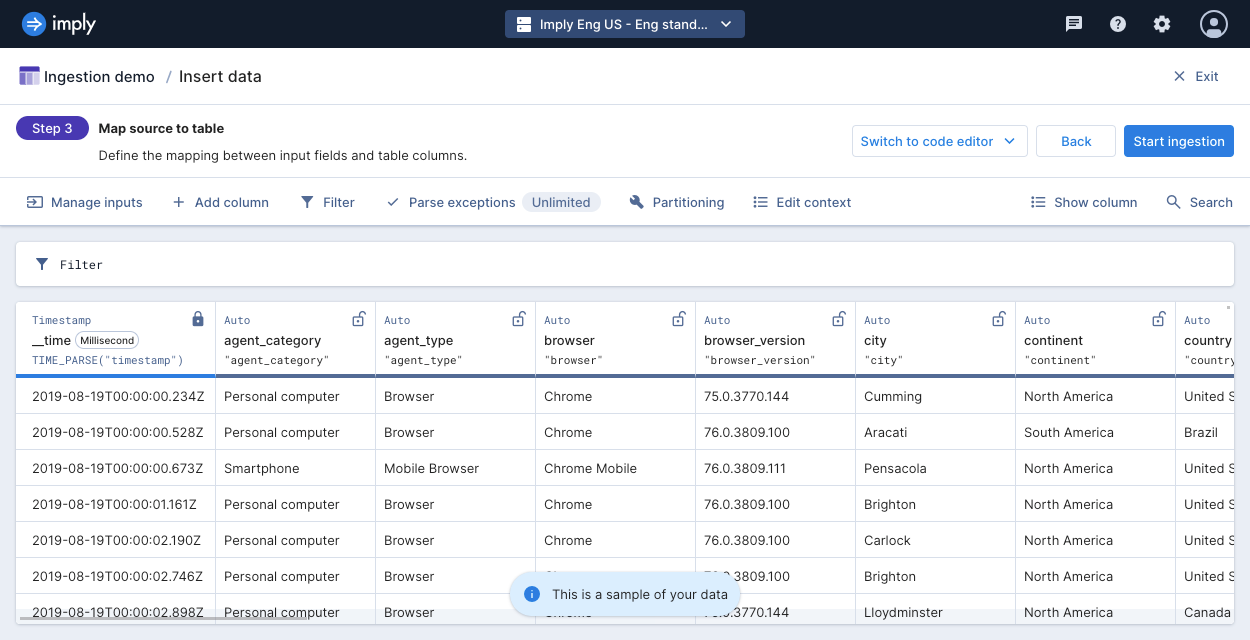
Next, map your input fields to your table columns.
Use the column editor to change column names and data types and map and transform input data.
For automatically created tables, the mappings determine the table type assigned to the table. If the mappings include an aggregation function, Polaris creates an aggregate table. Otherwise, Polaris creates a detail table. Since the table type cannot be changed after ingestion, confirm the type at the first ingestion job. If you do not have any aggregation functions but want an aggregate table, create the table before the ingestion job.
To set the rollup granularity for an aggregate table, click the primary timestamp column and select Edit.
In the menu bar above the column editor, you can also:
Click Start ingestion to launch the ingestion job.
To learn how to stop an ingestion job, see Stop a job.
Map and transform data with input expressions
When you ingest data, you define mappings in the ingestion job to describe how input fields map to table columns. A mapping takes an input expression and the name of an output column.
An input expression describes how to compute the value of a table's column from the input fields. It can accept a simple value, such as a single input field name, or a combination of input fields and Apache Druid® SQL operations.
To ingest your data as is, without any transformation, set the input expression to the name of the input field.
This applies an identity mapping from the input field to a table column.
For example, the input expression "user_ID" maps an input field named user_ID to a column with the same name.
The resulting column is a dimension.
In other cases, you may want to transform your data, such as shown in the following examples:
Sum two input fields:
"inputField1" + "inputField2"Parse a timestamp and round it to the nearest hour:
TIME_FLOOR(TIME_PARSE("timestamp"), 'PT1H')Sum the rolled up rows of an input field:
SUM("view_count")
Reference timestamp
Polaris always stores the primary timestamp in the __time column of your table.
You can directly map or transform a timestamp from your source data to map to __time.
If you don't have an input field containing timestamps, you can set a default value.
You must always include a mapping for __time.
For more information and examples, see Timestamp expressions.
If the source data has null or unparseable timestamps, Polaris fails the ingestion job. Either assign a default timestamp using an input expression, or filter out null timestamps using an ingestion filter.
Usage notes
Note the following details when writing input expressions:
- Enclose each input field within an expression in quotation marks, such as
"inputField1" + "inputField2". - Only reference fields that exist in the source data. Input expressions can't refer to other expressions.
Supported functions
For reference on the functions you can use for input expressions, see Input expressions reference.
Schema auto-discovery
Streaming ingestion jobs into flexible tables can use schema auto-discovery to automatically map input fields to table dimensions. With this feature, Polaris automatically discovers the input fields and maps them to table dimensions using the identity mapping.
Otherwise, you must list the input field and mapping for each field you want to ingest.
The ingestion wizard UI includes this for you.
In the API, you define these in source.inputSchema and mappings, respectively.
Without schema auto-discovery, Polaris doesn't ingest any unmapped input field even if the table has a column with the same name.
Ingestion example
The following example shows how to map input fields to output columns with input expressions while transforming some of the source data.
Before you start, you must:
- Download the
docs-data.jsonsample dataset. - Upload the
docs-data.jsonto the staging area in Polaris.
Before ingestion, make the following modifications in the map schema view:
Hold the pointer over the
__timecolumn, then click Edit. Concatenate thedateandtimeinput fields and parse the expression in ISO 8601 format using this input expression:TIME_PARSE(CONCAT("date", 'T', "time"))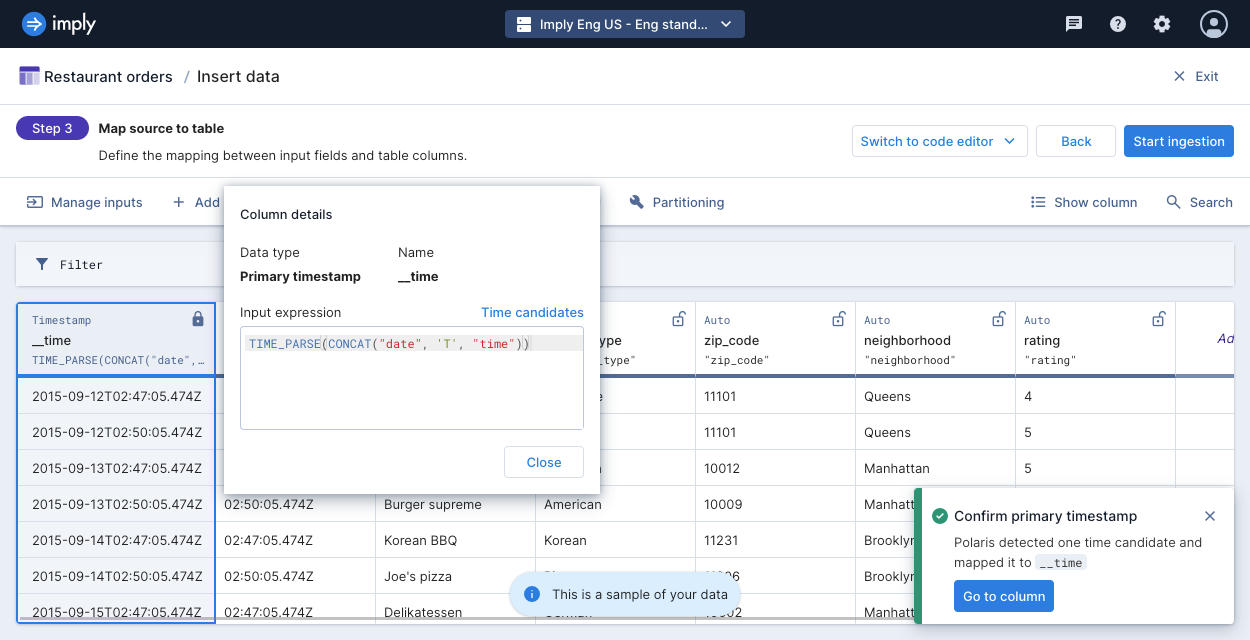
Hold the pointer over the
timecolumn, then click Edit > Remove.Hold the pointer over the
neighborhoodinput field, then click Edit. Convert the lowercase data to uppercase with this input expression:UPPER("neighborhood")Click Add column to add a new dimension column. Name the column
next_inspectionand enter the following input expression:TIMESTAMPADD(YEAR, 1, TIME_PARSE(CONCAT("date", 'T', "time")))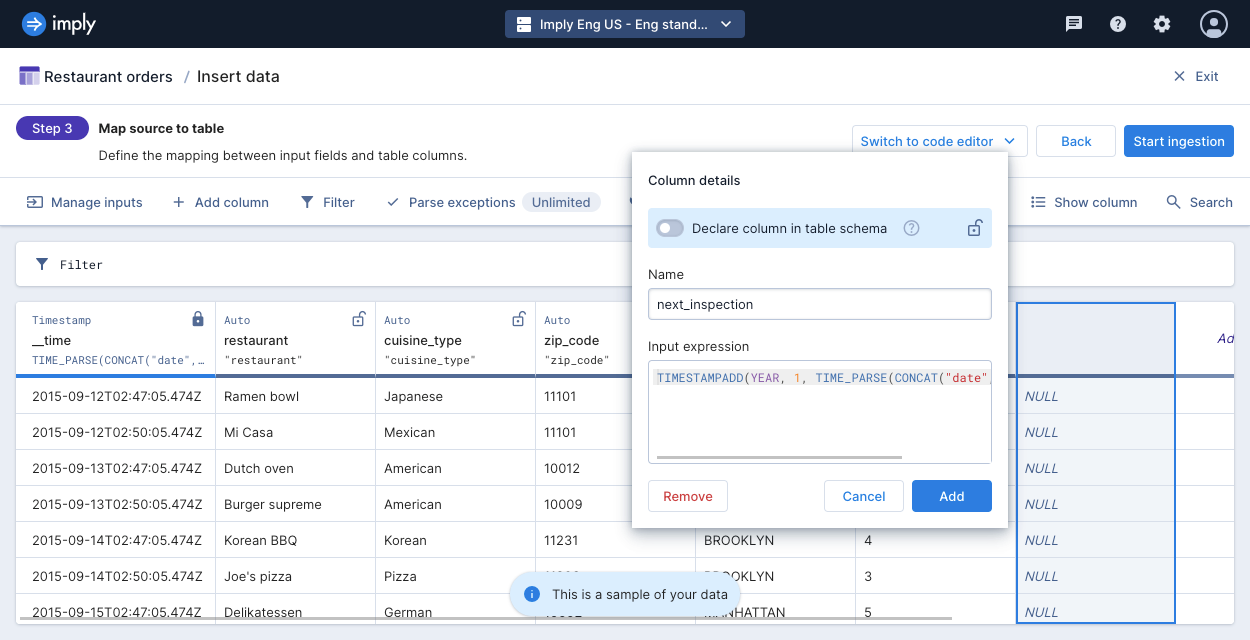
Click Add. The output adds a year to the primary timestamp and returns a new timestamp in milliseconds.
Click Start ingestion to launch the ingestion job.
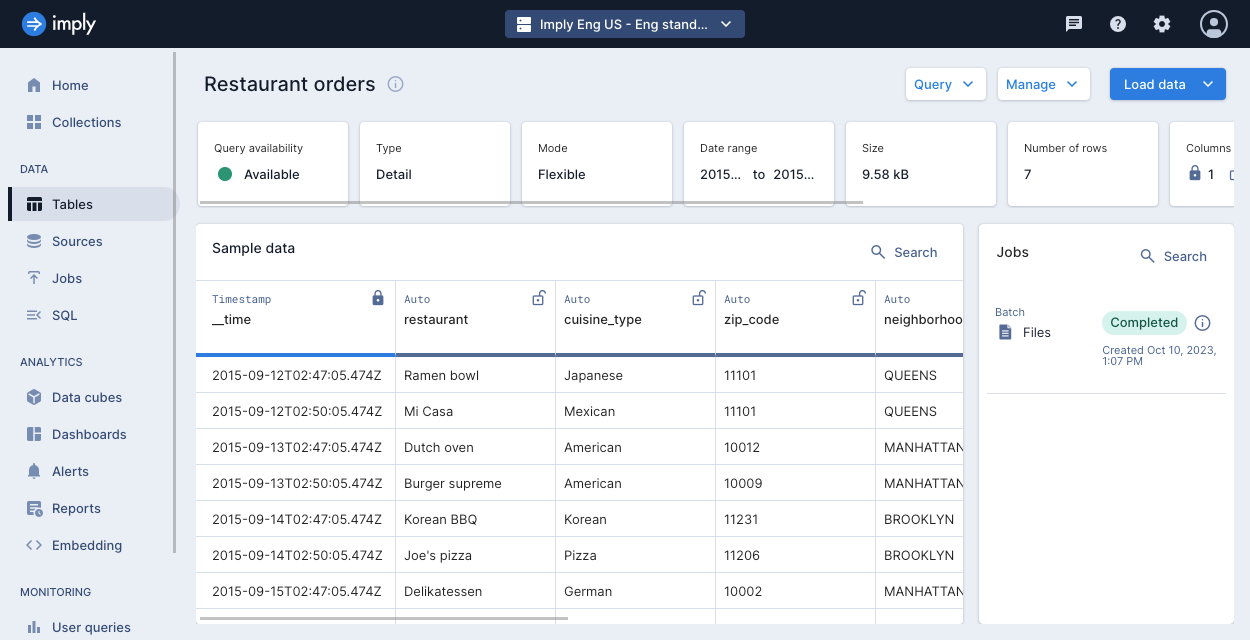
Once the job is complete, inspect the table. Note how the
__timecolumn is constructed from thedateandtimeinput fields, as well as the newnext_inspectioncolumn which was not present in the original dataset.The following screenshot shows the ingested table:
Learn more
See the following topics for more information:
- Create ingestion jobs by API for creating and managing ingestion jobs programmatically.
- Ingest using SQL for creating batch ingestion jobs using SQL.
- Manage jobs to view and manage your jobs.
- Ingestion sources overview for reference on sources for data ingestion.
- Schema auto-discovery on ingestion jobs for ingesting streaming data without input expressions.
- Troubleshoot data ingestion for troubleshooting data ingestion.
- Replace data for how to replace existing data in a table.