Guide for Confluent Cloud ingestion with Confluent Schema Registry
This guide walks through the end-to-end process to ingest data into Imply Polaris from Confluent Cloud when you've published the data using Confluent Cloud Schema Registry.
Polaris requires a schema as part of the ingestion job if your events are in Avro or Protobuf format. You can specify the schema for the input data inline, where you provide the JSON or Base64-encoded schema itself, or you can create a connection to the schema registry associated with the published events.
If you publish Kafka messages using a schema registry, you must create a connection to the schema registry and refer to that connection in the ingestion job. You can't provide an inline schema to read messages that are published with a schema registry.
For information on creating Confluent Cloud connections in Polaris, see Connect to Confluent Cloud. For information on creating Confluent Schema Registry connections in Polaris, see Connect to Confluent Schema Registry.
The following diagram summarizes the end-to-end process of ingesting from data with a schema registry. Shaded boxes represent steps taken within Polaris, and unshaded boxes represent steps taken outside Polaris.
The preceding diagram uses the following acronyms:
- CC: Confluent Cloud
- CSR: Confluent Schema Registry
The screen captures and instructions in this guide show the configurations for Confluent Cloud services in September 2024. They may not reflect the current state of the product.
Prerequisites
To complete the steps in this guide, you need the following:
-
A Confluent Cloud account containing an Apache Kafka® topic that has an Avro or Protobuf schema set.
-
A schema registry in Confluent Schema Registry that contains the Avro or Protobuf schema.
-
The Confluent Cloud permissions to do the following:
- View cluster settings in the Confluent Cloud console.
- Create an API key with access to Kafka resources.
- Create an API key for the Stream Governance API.
- Produce messages to Kafka topics.
See the Confluent Cloud documentation on Access management.
-
Permissions in Polaris to create tables, connections, and ingestion jobs:
ManageTables,ManageConnections, andManageIngestionJobs, respectively. For more information on permissions, visit Permissions reference.
Get details from Confluent Cloud
In this section, access the Confluent Cloud console to get information on cluster settings, the topic, and the schema registry. you get the Confluent Cloud bootstrap server details and record the name of the topic that Polaris will ingest data from.
Cluster settings
Get the Confluent Cloud bootstrap server details for Polaris to access the cluster:
-
In the Confluent Cloud console, access your cluster and click Cluster Settings in the left pane.

-
Copy and save the Bootstrap server setting.
Topic
Record the name of the topic that Polaris will ingest data from:
-
From your cluster dashboard, click Topics in the left pane.
-
Copy and save the Topic name to ingest data from.
-
Select the topic and click the Schema tab.
-
Ensure you have a message value schema for your Avro or Protobuf data.

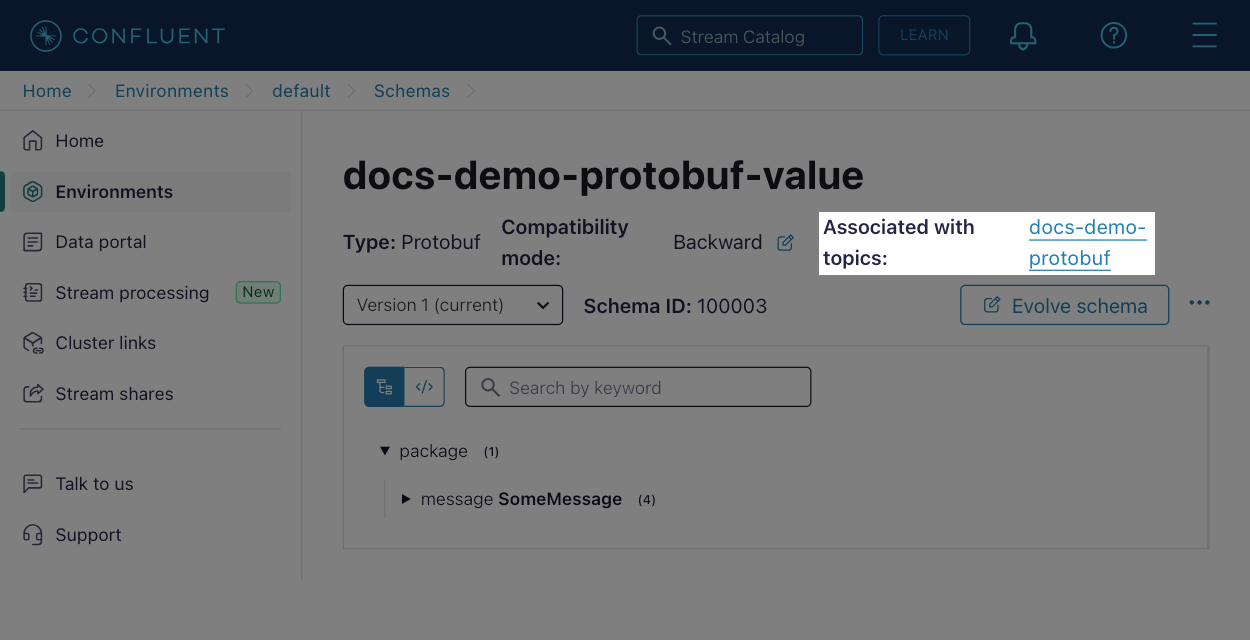
Schema Registry
Verify that you have a Schema Registry subject for the topic:
- From your cluster dashboard, click Schema Registry in the left pane.
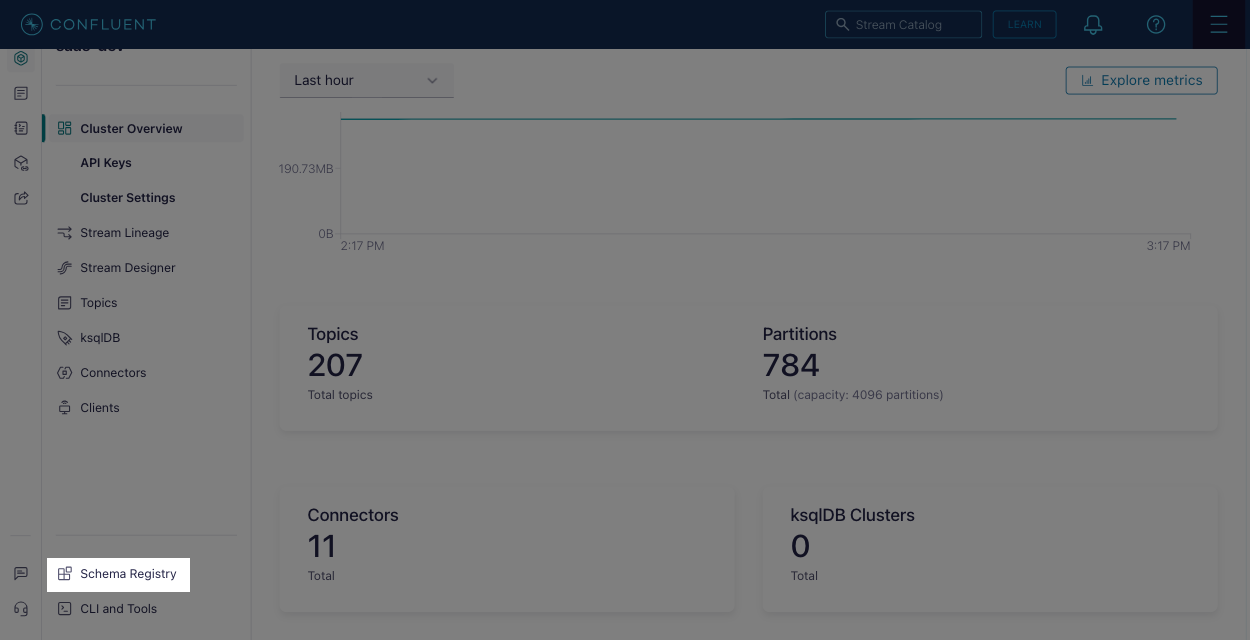
- Select the subject with the schema and ensure that it lists the same topic.
Create API keys in Confluent Cloud
In Confluent Cloud, you create two API keys, one to access the Kafka cluster that contains your event data and one to access Schema Registry that stores the message schema. Polaris uses the API keys to authenticate with Confluent Cloud.
For information on resource scopes for API keys in Confluent Cloud, see Use API Keys to Authenticate to Confluent Cloud.
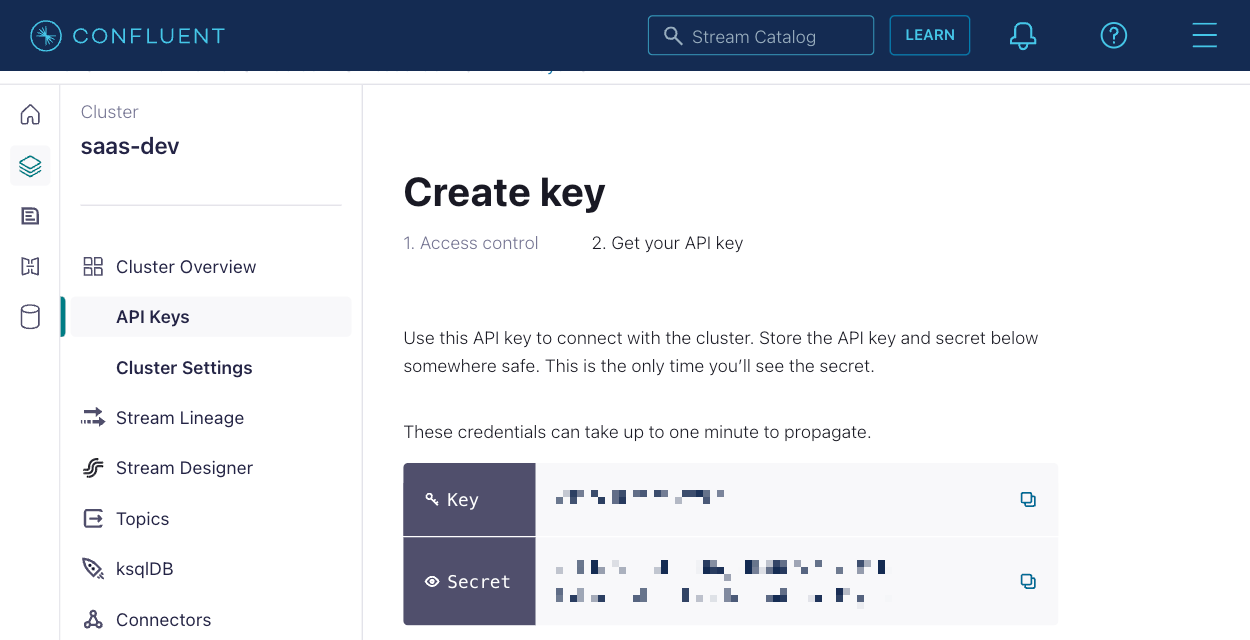
Kafka cluster
In this section, you create an API key that can access the Kafka cluster in Confluent Cloud.
-
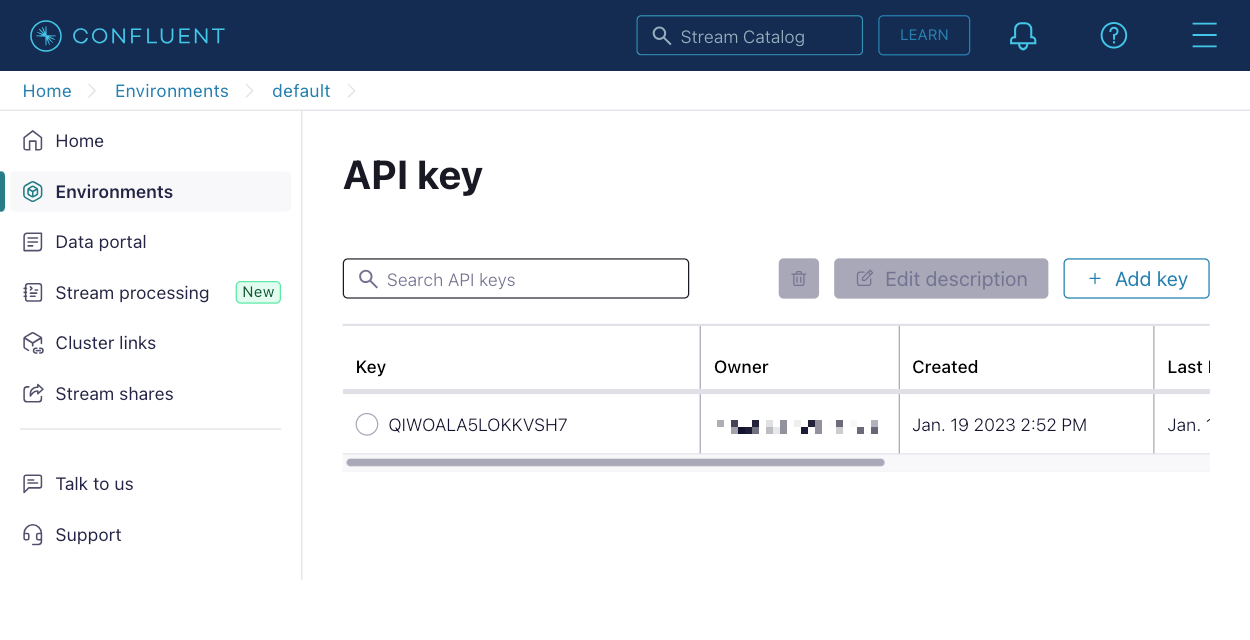
In the Confluent Cloud console, access your cluster and click API Keys in the left pane.
-
Click +Add key and create a key with your chosen scope.
-
Once created, copy and save the Key and Secret.
Schema Registry
In this section, you create an API key that can access Confluent Schema Registry. Note that the API key for Confluent Cloud Schema Registry is distinct from the API key you created for the Kafka cluster in the previous section.
-
Go to your environment in the Confluent Cloud console, and find Stream Governance API in the right pane.
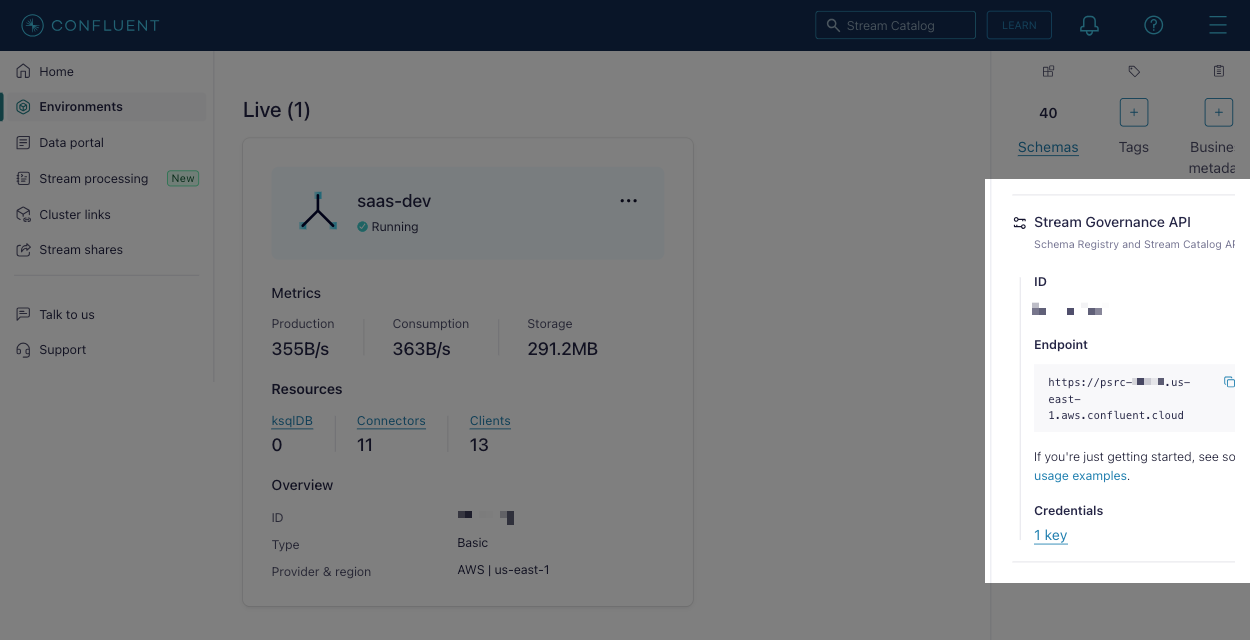
-
Copy and save the Endpoint value.
-
Click the Add key link below Credentials to access the API key page.
-
Click Add key to create a new Schema Registry API key.
-
Enter an optional description, then click Download and continue. The downloaded text file contains the API key and secret.
Add data to your topic
Before you go through the ingestion wizard, add data to your Kafka topic in Confluent Cloud. When you start an ingestion job later, you can preview and ingest the data into Polaris.
Produce events to the topic using your client of choice. For example, you can use the Confluent CLI to produce events as follows:
# syntax
confluent kafka topic produce TOPIC_NAME --value-format DATA_FORMAT --schema SCHEMA_FILE

# example
confluent kafka topic produce docs-demo-protobuf --value-format protobuf --schema kttm.proto
Don't use the Confluent Cloud console to produce messages, since those messages won't conform to the topic schema.
If your data has a time field that you intend to use as the primary timestamp, it must fall within the late message rejection period which is 30 days by default. Otherwise, you can ingest the event timestamp from the Kafka metadata.
Create connections in Polaris
Now you create two connections, one for Polaris to access the data from Confluent Cloud and one for Polaris to access the schema associated with the event values.
Confluent Cloud
In this section, you create a Confluent Cloud connection in Polaris.
-
In Polaris, go to Sources > Create source > Confluent Cloud.
-
In the New connection dialog, enter the following details:
- Connection name: A unique name for your connection.
- Description: An optional description for the connection.
- Topic name: The name of the topic you copied.
- Bootstrap servers: The bootstrap server you copied.
- Confluent API key: The API key you copied.
- Confluent API key secret: The API key secret you copied.
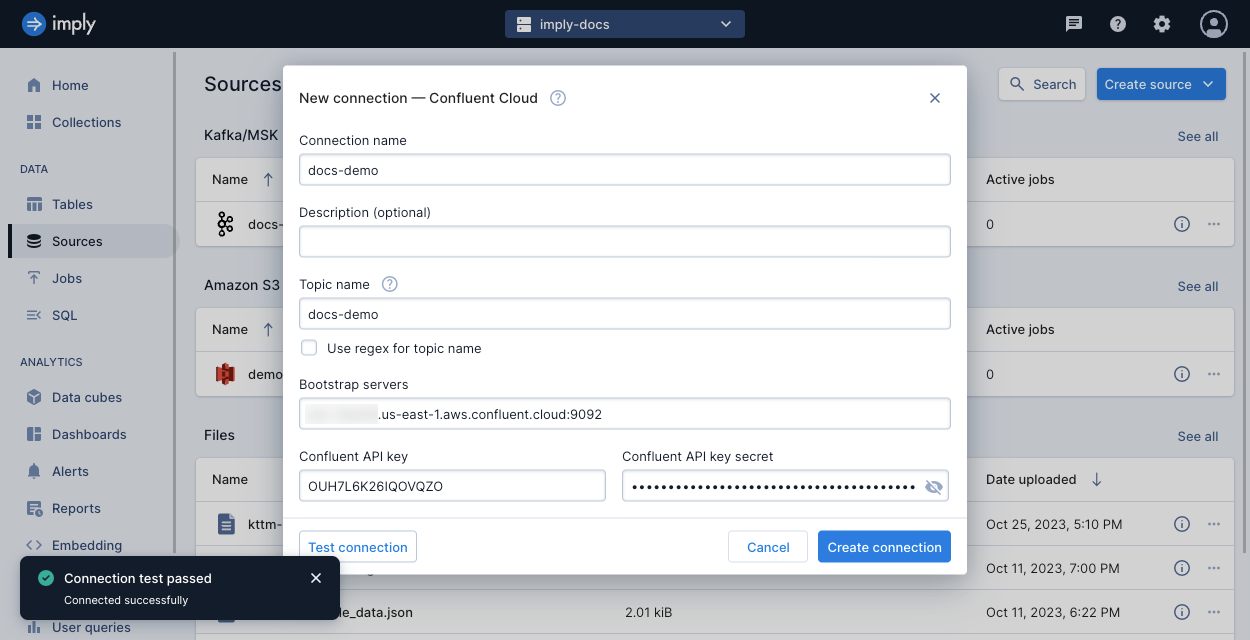
-
Click Test connection to ensure that Polaris can make a connection to Confluent Cloud.
For more details on these fields, see Confluent Cloud connection information.
Confluent Schema Registry
In this section, you create a Confluent Schema Registry connection in Polaris.
-
In Polaris, go to Sources > Create source > Confluent Schema Registry.
-
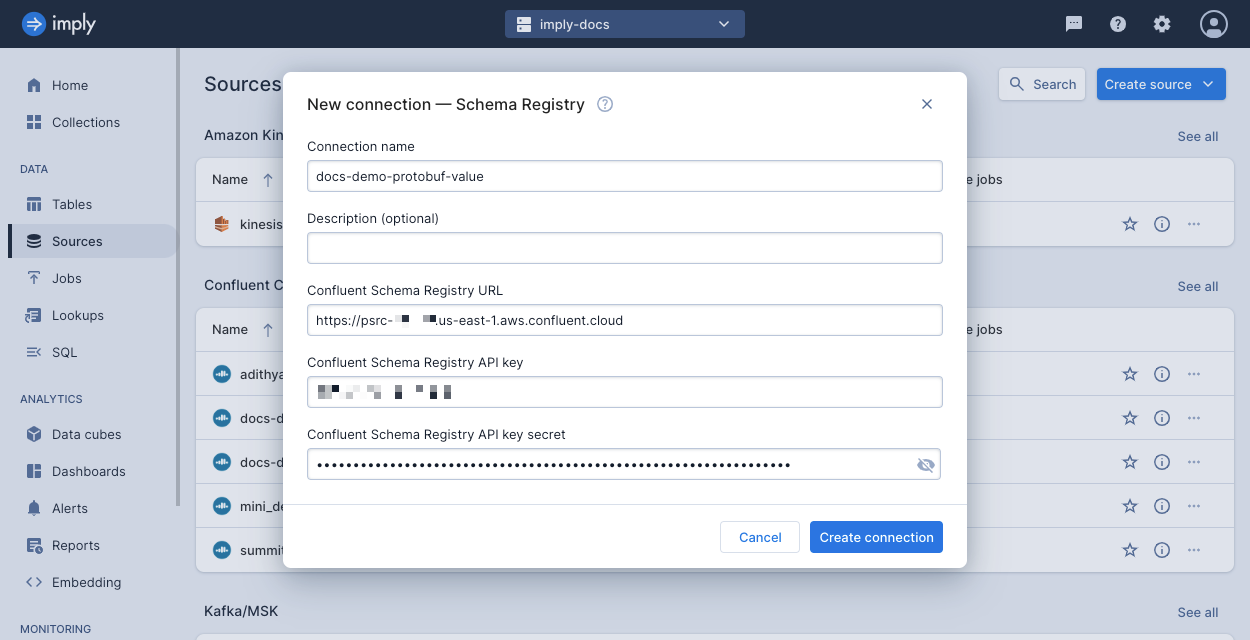
In the New connection dialog, enter the following details:
- Connection name: A unique name for your connection.
- Description: An optional description for the connection.
- Confluent Schema Registry URL: The endpoint you copied.
- Confluent Schema Registry API key: The API key you copied.
- Confluent Schema Registry API key secret: The API key secret you copied.
For more details, see the connection reference for Confluent Schema Registry.
Start an ingestion job
In this section, you create an ingestion job to add data from your Confluent Cloud topic to a table in Polaris.
In this guide, Polaris automatically creates the table based on details in the job definition. For greater control on your table properties such as its partitioning or schema enforcement, create the table manually before starting your first ingestion job. For details, see Introduction to tables.
-
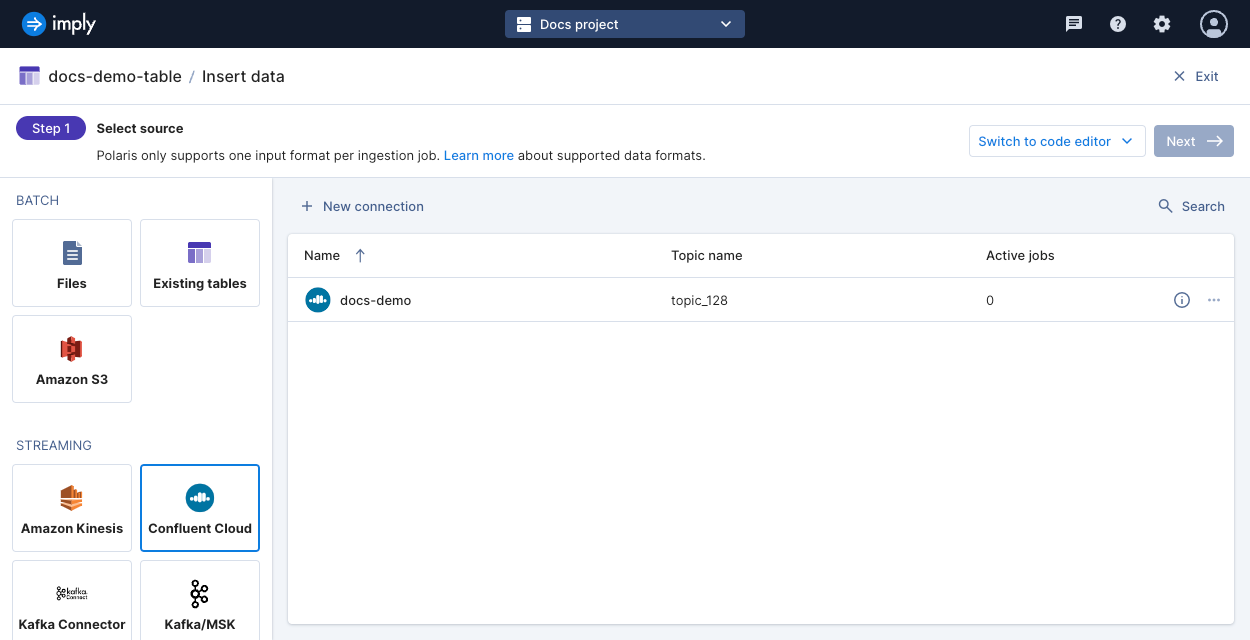
In Polaris, go to Jobs > Create job > Insert data.
-
Click New table.
-
Enter a name for the table, and click Next.
-
Select the Confluent Cloud source, then the connection name, and click Next.
-
Select your input format. When your format is Avro or Protobuf, the Schema options appear in the left pane.
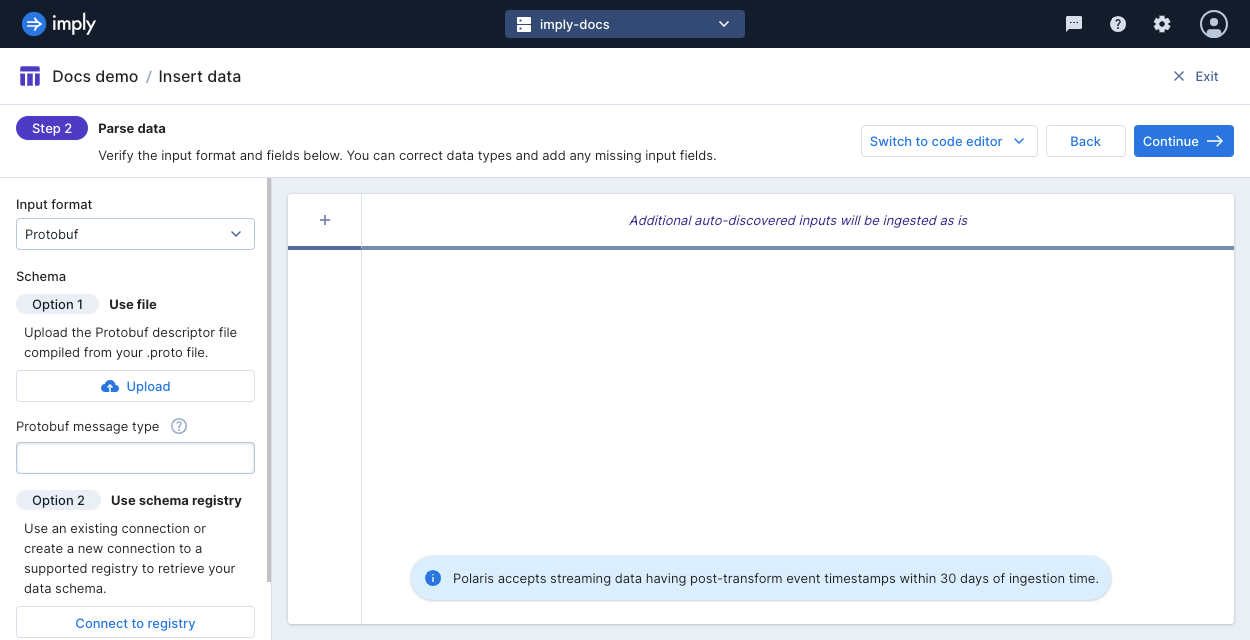
-
Under Option 2, click Connect to registry then select the name of your Confluent Schema Registry connection. Click OK.
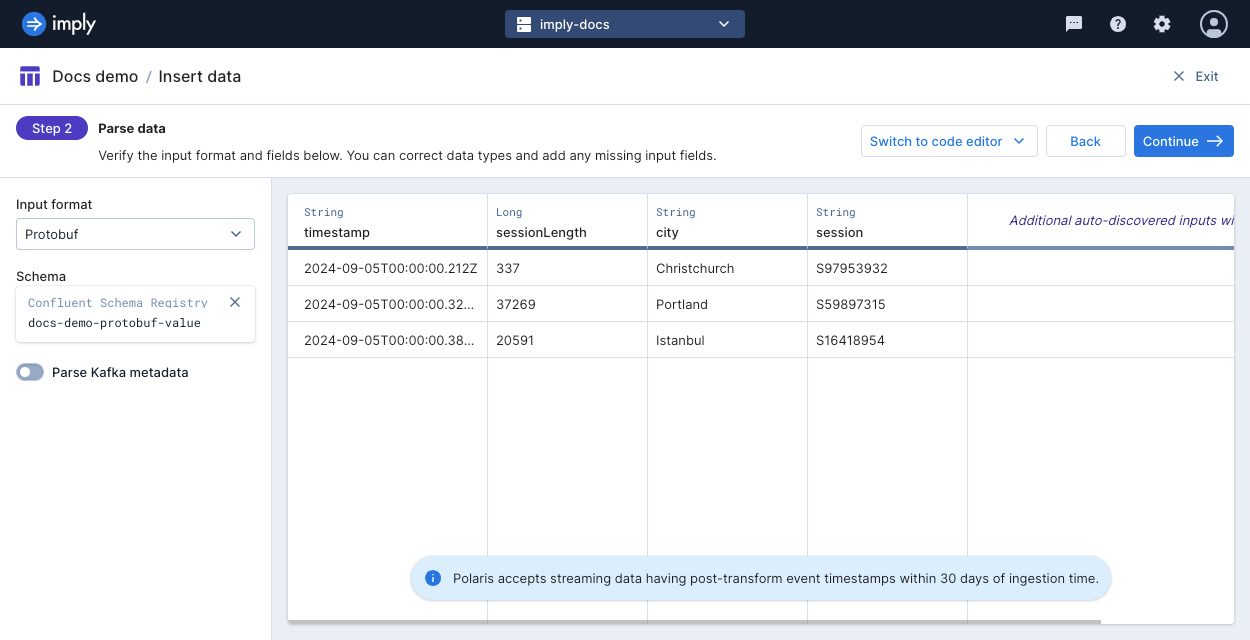
Polaris doesn't ingest data older than the late message rejection period (30 days by default). You can use the Kafka event timestamp as the primary timestamp if your events don't include a timestamp or if your event timestamp is older than the late message rejection period. To do so, select Parse Kafka metadata. Alternatively, you can change the late message rejection period in the next step.
-
Click Continue.
-
Continue through the load data wizard and configure your ingestion job based on your data and use case.
The Starting offset setting determines what you can do with events already sent to the Kafka topic:
- Beginning: Ingest all events as previewed as well as future events sent to the topic.
- End: You can preview the events in the ingestion job but Polaris only ingests events you send to the topic after the ingestion job begins.
-
Click Start ingestion to begin ingestion.
Learn more
See the following topics for more information:
- Connect to Confluent Schema Registry for information on creating a Confluent Schema Registry connection in the Polaris UI.
- Connect to Confluent Cloud for information on creating a Confluent Cloud connection in the Polaris UI.
- Specify data schema by API for using the Polaris API to create an ingestion job that uses a schema for your source data.